Anomalies and complexes in eve online are the main source of faction items, tools for invention and reverse engineering. Often the production capacity of t2 ships and modules depends on the researcher. Plus, exploration is fun! Even in an empire, a researcher can earn up to five hundred to six hundred lawsuits per day. Naturally, certain pumping and equipment will be required. I will tell you about my experience in eve online, I spent a lot of time looking for anomalies.
Start - ship selection
Of course, the fastest scanner is the ops cover. He has bonuses for resolving traffic jams, and he scans extremely fast. Another point is that such a ship has weak weapons and armor, as a result of which it is not able to clear even the weakest anomaly alone. If you decide to clean the anomalies alone, you should not, having found an ops carpet on the market, immediately press the buy button, you will spend a lot of claims, and there will be less benefit. Having decided that I would not meddle outside the empire, I opted for a jaguar model assault frigate. It flies quickly, has enough mid slots to put an analyzer and a code breaker in them, and its firepower makes it easy to deal with NPC frigates and cruisers, which will protect 90% of all anomalies and complexes. Having given my ship a proud name in eve online the anomaly finder, I set off on my first search.
Route selection

Searching for anomalies in eve online highsec is very simple. Immediately after downtime, 5-10 common anomalies appear in each system. In the constellation, at least one complex spawns, a couple of hidden asteroid belts, half a dozen wormholes and up to three hacker or archaeological sites. Choosing a route in eve online to search for anomalies is not very difficult, but requires perseverance. It is necessary to plot the route so that it runs through the maximum number of constellations, systems with a rating of 0.7-0.5, and does not take you too far from the home station.
When using a normal probe, mine in eve online the anomalies finder detects all normal anomalies from the first run. Having fixed their position with bookmarks, I begin to clean them one by one, continuing to scan more complex complexes. When fitting, I was not greedy. It's not so expensive to buy a sister probe launcher and a set of fractional probes in Eve for ISK. Scanning acceleration is guaranteed.
Most monetary anomalies
Ordinary anomalies rarely generate significant income. In one case, out of fifty, a faction pirate module may fall to you. Complexes also sometimes contain deadspace pirate modules, but the chance is just as small. It is easier to buy such a rare item than trying to find it within the empire. Miners need belts, so there is nothing to do there alone. You can get into the wormhole, but there is a great danger of running into the owners of the system or staying in w-space without the ability to get out if the wormhole closes.

There is only one type of anomaly that remains unconsidered. In eve online, special attention should be paid to the search for radar and magnetometric anomalies. It is from these complexes that you can earn so much that you will not want to buy Eve suits for a very long time. I note, however, that the magneto in the highsec is quite poor. The chances of finding t2 salvag or blueprints for t2 rigs in them are extremely small. In lowsek, this is easier, but there they can easily catch mine in eve online the anomaly finder, so I try not to fly into them. Radars can make a lot of money. Decryptors often fall in them. Manufacturers will gladly want to buy these decryptors from you, for each lawsuit they will give you from 5 to 25 million. In one radar, you can sometimes find up to half a dozen decryptors. Datacores can be found as a pleasant bonus in the complex. They cost a little, about 200 thousand, but they drop to a couple of dozen from one "box". So a successful search can bring you up to one hundred million from one complex.
So, in the first article on exploration in EVE, we will talk about what it is and what ships are suitable for exploration. The material is made partly on the basis of translations and Russian-language guides, partly on the personal experience of EVE space exploration, as well as the experience of the guys from The Eastern Cartel corporation. The guide is designed for beginner players and in the first part we will touch on what is generally being explored in New Eden.
The guide was written for the terms of the Vanguard patch, which was released at the end of September 2015.
1.1 EVE Exploration - What to Explore?
Let's start with what the star systems in New Eden are made of. In addition to the local sun, planets, moons, and man-made objects such as stations, customs, and gates, the systems contain anomalies and signatures. You can find out about the presence of signatures and anomalies by opening the scan window (press Alt-P or the icon with spheres to the left of the capacitor image). And if anomalies are visible without special equipment, then in order to find out the exact coordinates of the signatures, you need to use special equipment. The scan will also show you what exactly leaves the signature.
The following space objects leave the signatures in space:
- wormholes (wormholes, wormholes);
- plexes (DED Complexes);
- data sites (Data Sites);
- religions (Relic Sites, archaeological sites);
- gas clouds (Gas Sites).
Note: in this guide we will not consider plexorans and the feasibility of gas production. It's about data sites and religions (both unprotected and those inhabited by NPCs).
Through wormholes, you can get into another system of New Eden, and Anokis, also called W-Space. There will be a separate large material about wormhalls, while you just need to know that these systems have everything the same as in New Eden - dates, religions, ore and gas deposits, combat anomalies or plexes.
Plexes are areas inhabited by NPCs such as guristas pirates. Usually they consist of several zones (so-called "pockets"). Having cleared the "pocket", you move to another with the help of a gate. As a result, you can get quite decent money for loot and salvag. The number of claims directly depends on the complexity of the plex, of which there are 10 in total. They are designated accordingly - 1/10, 2/10, etc. Plexes can be found in highsec, lowsec, and zeros. In general, plexes are a completely separate topic, which we will not deal with in detail in this series of guides.
Dates and religions represent space stations, when inhabited, when abandoned, where you can find containers with valuable items - components for production, blueprints and the like. In New Eden, such places are not protected. There are also protected relic and date sites in the wormhalls - they are guarded by local NPCs, sleepers. Sleepers have armor that is resistant to all types of damage, they themselves pour in well, they are able to trim, throw nets, and neutralize. In short, it will not work to pass such places on light ships.
1.2 EVE Exploration - Where to Explore?
Where is the best place to explore in EVE? Let's go in order as the complexity increases.
1.2.1 Highsek
Empire (systems with security level 0.5 - 1.0). If you are a beginner and fly the simplest ships like the T1 research frigates, then stay here until you master the skills of scanning and hacking containers. In principle, it is unprofitable to exploit in highsec. The time / income ratio is the lowest here. With one signature, an average of 1-3kk claims can be removed here, which cannot be compared with how adventurers in other areas of New Eden make money.
Unless, if you decide to travel through the wormholes, then in highsec you can most often find exits to the C1-C3 class systems. Sometimes access is also opened to systems of a higher level of complexity.
1.2.2 Lowsec
Systems with a security level of 0.1-0.4. Here, as well as in highsek, all religions and data sites are not protected. More loot can be removed from them than in highsec. At the same time, the likelihood of getting rid of and waking up in the cloner is high here, if you do not follow the safety rules. Based on this, it is also not recommended to meddle in a lowseck on T1 frigates or larger ships without PVP practice and fit.
In general, exploration in lowsec can bring in quite decent money and be safe if you look at the locale and respond to suspicious pilots in time.
1.2.3 Zeros
The profitability from research activities is more than acceptable here. From one archaeological site, you can remove loot for 30-70 million claims. That being said, the zeros are not a safe place unless you belong to the alliance that controls the system. Otherwise, it's very easy to run into trouble, because in the locale you can see who is who. If you wish, they will find you very quickly and will not leave you alone until they see your corpse.
1.2.4 W-Space
The level of profitability from exploration here is the same as in zeros when it comes to unguarded sites. However, there is one fundamental difference - there is an empty locale. That is, you do not see who is in this system. This is both good and bad. Good, because nobody can see you. And even if there is someone in the system, then observing security measures, you will leave there with loot. On the other hand, if there is already someone in the system, then the appearance of a stranger is determined by him very quickly, because the scanning "traffic jams" are visible on the podscan. Then there can be anything, from a fun hunt for your ass to a sweet conversation in private in the spirit of "you have two religions and I have two religions, we are at odds with the world."
In addition to the unguarded stations, there are objects here that are guarded by sleepers. In fact, "sleepers" are unmanned drones of the sleeper race, but it so happened historically that players call them sleepers. In systems of complexity class C1-C3, such places are cleaned solo if you have pumped up skills, correctly equipped ships and straight arms. You are guaranteed to get loot from sleepers for ~ 15-20kk, salvag and something from containers. However, their content is not always as expensive as on unguarded sites. In addition, cleaning a site alone requires 10-15 minutes, and the same amount can be spent on skinning sleepers and breaking containers. During this time, funny guys can fly into the system and scan the signature you are on. If you manage to make legs, you will lose some of the loot. If you gape, then, most likely, you yourself will become a loot.
In general, exploration in wormholes is the most intense activity. It is necessary to clearly assess the situation when entering the system and constantly look at the podscan (radar) in order to catch unwanted movements in time. Besides, luck decides a lot here. You can spend the evening visiting a dozen systems and not finding anything in them. On the other hand, you can find an untouched system and get 200-250kk out of there, spending just a couple of hours. Once upon a time it is not necessary. However, there are some exploration tactics that allow you to save time and take away loot. They will be discussed in the next issues.
1.3 EVE Exploration - How to Explore?
In fact, exploration should have been called tumbling, because our work is more like the work of "black" archaeologists and hackers. And yet - how should you do exploration? As it was said in one film - "Without noise and dust." We arrive imperceptibly, quickly break down and also quickly unwind. Based on this, decides in exploration not only the correct fit of the ship, but also the observance of safety measures.
1.3.1 Security Fundamentals
First and foremost, the main danger is from other players. The non-script, which is found on signatures in the same W-Space, does not climb out of the limits of its sites. Therefore, if you do not foolishly warp there, then everything will be fine. But other players are a real problem. Therefore, most of the recommendations will relate to how to behave with their own kind, who are not averse to decorating their statistics with one more keel, and picking up all your acquired with back-breaking labor.
Safety rules relate to the following components of the process:
- Moving between star systems;
- Moving in a star system;
- Hacking containers;
- Andok from the stations.
1.3.1.1 Zeros
Note: The material for this section was prepared by a member of the ComCon Gaming Community, TeddyFear (for which he thanks a lot).
There are two approaches to hunting for religions and dates in zeros.
First simple, but potentially less profitable and more dangerous. It consists in the fact that the pilot enters through WH at random zeros, puts a bookmark on the back exit, and while WH is still flying around the neighborhood, scanning signatures, breaking sites and collecting loot. As soon as there is a suspicion that WH will soon collapse or the ship's cargo is already full enough, the pilot sets off on the return journey. Why is this approach dangerous? You find yourself in a region that you know nothing about. Who lives here? How aggressive are the locals? Are there many competitors here? Potentially low income again stems from the danger of an unknown region - the loss of your favorite asterka is an unplanned expense that we absolutely do not need.
Second the approach is more detailed. First you need to choose a region and a route for yourself. We go to the site http://evemaps.dotlan.net/ and look for a convenient region with parameters: minimal pvp activity, there is a looped route for flights. We put a filter on the ships killed in 24 hours and we see that the ring we want, except for one system, is quite safe.
The next step is to set up overviews and safe spots in the ring systems. To do this, you need to be able to fly around the route without fear of bubbles and camps. The task is to create bookmarks in each route system:
- overview over each gate (250 km from the gate in a random direction);
- safe spot not located on the route of movement of ships. In no case should be done between gates. Ideally - a point between two other spots + outside the scan radius (more than 14.3 au from gates and planets).
After the creation of all the spots is completed, you can finally transfer to the aster (or whatever you scan there) and move to the hunting place.
If the interceptor is on another character, then you can transfer the resulting bookmarks to the scanner through a contract.
It is important to have a mobile depot with you, and a spare set of scanning plugs in the fit. In order to protect yourself as much as possible from the sinking of the ship in the sector with a zero security status (in the presence of the above-described safe spots), you need to perform several simple but extremely important actions.
Login to the system:
- after entering the system, we do not press the buttons and look around;
- if there is a bubble (gate camp). We find the closest point to exit the bubble and see which object is in that direction (planet, asteroid belt, etc.). We turn on the acceleration in that direction, the ship cracked open from this - we press the Ministry of Internal Affairs and immediately shred. How to get out of the bubble - warp to the object, and then go to the spot;
- if there is no bubble, but there are pilots in the locale. We look at the available signatures. Let's compare them with your notes (more on that later). If there is a new / unexplored one, then we press the warp to the spot and while the ship has not yet entered the warp, but has already cracked, release the plug and press the clok.
While we are flying in the warp, we pull the podskan and try to understand what the pilots are sitting on. Regardless of the result on the spot, carry out a preliminary signature scan. It is necessary to weed out combat signatures (combat sites) and wormholes.
Let's say you have the signature THZ-057 and you determine that it is a wormhole. Create a bookmark with the signature name and click ignore the result (so as not to interfere). This way you filter out uninteresting ones. Why is this done? Above it says "compare" - the next time you enter the system, you will immediately see whether a new signature has appeared and whether it is worth staying in this system.
Okay, you found out that there is one relic site in the system and scanned it 100%. Is it worth taking on it? It depends on the neighbors in the system and your impudence. We check the scan, see if there are other people's traffic jams, what kind of ships are visible. Checking the pilots on the killboard. If he was recently killed and was sitting on a buzzard without drones and nets, then there is a chance that he is now on the same ship. If it is clear that the pilot is an active hunter, then certain conclusions can be drawn. Trying to break a relic under a similar light bulb or not - the decision is yours.
If the system is empty, there are no camps, bubbles and pilots. Almost everything is the same. We check the list of signatures. We release plugs, go to the spot, scan and break.
Sign Out:
- if there was a bubble and a camp at the entrance. The chances that they will be waiting for you at the exit is great. Here we need a view of 250 km above the exit gate. We warp in a lock on her, and then on the gate and leave. With a high probability, you will not get into the bubble, since they are usually placed on the warp from another gate - a trap for noobs.
- if the system is empty. It is still better to leave through the overview, since the bubble can still be, albeit abandoned. There is a certain chance that while you are drowning through the bubble to the gate of the system, someone will come from this side and catch you.
1.3.1.2 Lowsec
Several rules work here:
- If it is possible to use Covert Ops Cloaking Device II (and the corresponding T2 exploration frigates, or another suitable vessel) - use. This is the safest way to avoid unwanted attention from other players and avoid ambushes at gates. Walked through the gate and see a bunch of evil campers? Just turn on disguise as soon as you start warping and you won't be caught.
- If you have something very expensive in your hold, do not fly on autopilot between systems, even in highsec. If you are carrying a decent amount of cargo, then for the sake of it you can be knocked down, despite the protection of CONCORD.
- Before you start scanning, find out who is currently in the locale. Pilots can be pushed through sites like zkillboard.com. If a hunter for researchers is grazing in the system, then it is better to move on. Don't waste your time.
- Be extremely careful when undocking in lowsec. Especially if you are traveling with a load. When approaching the station, check the scan for the presence of pilots in the vicinity. If there is a camper grazing near the station, then it is better not to undock with the load.
1.3.1.3 W-Space
Everything is more complicated in W-Space. The main difference from lowsec and zeros is that there is no locale. Therefore, there are more rules here:
- After going through the wormhole and finding yourself on the other side, the first thing to do is to squeeze the podscan, which must be set to the "PvP" preset. If there are ships there, especially warships, then perhaps it is better to return immediately where you came from.
- Be sure to bookmark the wormhole through which you logged in. Only at the entrance, and not at the place where your ship is. If they start to catch you and you warp to the bookmark 10 km from the wormhole, then it can be fatal - they will catch you when you try to leave the system.
- It is necessary to warp off the exit. Open the system map and select the planet that is farthest from you. Jump to a distance of 30, 50 or 70 km - it is more difficult to catch you if someone noticed you and warped to the same planet.
- It is best to make a safe spot - a safe point to which you can escape in case of something. Why do this? Because if you are standing near a planet or on some other object that anyone can dock on. An experienced pilot, especially one with experience in VX, will be able to find and catch you very quickly. If you are at a random point in the middle of open space, you can only be detected with the Combat Scanner Probe I (or the factional variant of the Sisters Combat Scanner Probe). If you also turn on camouflage, it is basically impossible to find you on the safe spot. How to make a safe spot? It's very simple - you need to create a bookmark during the flight from the wormhall to the sun or the planet. The point will spawn in a relatively random location that will be difficult for your pursuer to find.
- They warp off, released the plugs, squeezed the shred (ie "flew to a safe place, released scanners and went into invisibility"). In addition to the main activity, scanning, be sure to check the podscan. This should be done as often as possible, because ships with a shred that pass through the wormhole are visible on the radar for several seconds. Under certain conditions, an experienced pilot will be able to find you without even releasing the scanning plugs.
- The most dangerous stage is cracking containers, because you are 1) visible, 2) busy solving the puzzle. Most often, explorer is caught for this activity. Therefore, try not to lose vigilance and look at the podscan. When something suspicious appears, it is best to immediately warp to a safe spot, even if you have not broken the container. And there it is already to decide what to do next - to accept the battle or to throw out of the system.
- One of the most frustrating moments is when, after passing through the wormhall, you find yourself on the other side of the camp. In this case, there are two ways - either immediately leave the system, or warp to the planet and immediately make a safe logoff (that is, just exit the game and then your ship will disappear from space). Kempyat are usually Aborigines who already know all the exits from the system, so the likelihood that you will be caught trying to leave is also high. Return to the game after a few hours and assess the situation - if it has already become quiet - leave the system.
Also, do not forget that when you re-pass through the wormhole, the CD is hung on the passage, so you won't be able to run back and forth from evil pirates.
These are basic safety rules. Risks can be mitigated by conducting preliminary reconnaissance and evaluating the system. This applies for the most part to the W-Space systems, because in the same zeros it is very easy to understand who controls the system and what to expect from the natives. Therefore, the following recommendations apply to W-Space systems.
- The first thing to know is the class of the system that the wormhole leads to. To do this, right-click on the BX passage and select Show Info from the menu. If it says that “this wormhole seems to lead to unknown parts of space” then this is a C1-C3 class system. It should be added below what size the ships pass there. If it says that “Medium ships can pass” means that this is a C1 class system. If “Larger ships can pass” - C2 or C3 system. All of these systems have signatures that you can farm on a light frigate.
- The inscription “this wormhole seems to lead to dangerous unknown parts of space”, then these are C4-C5 class systems, “this wormhole seems to lead to deadly unknown parts of space”, then these are C6 systems. It makes no sense to go there on frigates, since everything valuable (that is, everything in general) is guarded by sleepers.
- The second important point to which you should pay attention is the VX mass. The inscription “This wormhole has had its stability critically disrupted by the mass of numerous ships passing through and is on the verge of collapse” with a high probability indicates that there is an active farmer life or a cruel cut on the other side. You shouldn't go there either.
- It has already been written about checking the scanned entry at the entrance to the system. A small clarification - the ships that are on the podskan are not always active. Someone could leave the ship under the POS field and logoff.
- See how many anomalies and signatures there are in the system. A small number of signatures - 5-6 - indicates the presence of active natives in the system. And if a few more ships are spinning on the podskan, then it is better not to waste time and leave.
- The average number of signatures - 6-10 - may indicate that the system has recently been farmed for relics and dates. Subsequent scans often reveal wormhole and sleeper-protected signatures that are not being scanned by research frigates. However, you may be lucky and there are one or two signatures for cracking.
- A large number of anomalies and signatures - the system is not populated and no one has flown here for two or three days. Although it often happens that gas clouds are hidden under these signatures.
- If you have a system with an average number of signatures, then before scanning it makes sense to break it through databases such as, for example, http://wh.pasta.gg/ or https://eveeye.com/. Statistics will show you who lives there, how active it is, what time the prime time is expected there. Of course, these data are very indicative, but still. Based on this, make a decision whether to stay here or not. If the system is inhabited by active aborigines, then at best you will find a couple of dates and relics, at worst - you will get a ticket to the cloner when you try to hack them.
That's all for now. The next installment in this series will cover ships and feats for exploration.
Scanning is the art of searching for various signatures (objects and their complexes) in the boundless space of New Eden. After examining the scan, you can find the ships of the players (as well as other objects belonging to them) in this star system, explorer sites (hidden places where you can get various bonuses), and wormholes (wormholes) leading into deep, unexplored space.
Scanning relies on the use of scan probes (in the jargon of "traffic") controlled by the player. The position of the desired objects (hereinafter referred to as the “signatures” guide) is determined by simple trilateration. The success of the scan depends not only on the skills or fit of the character, but also on the player's ability to navigate in space, and the player's experience in preparing and positioning samples.
Equipment to start the process
Technically, scanning requires very few skills and equipment to be able to do this in principle, but in practice, there are a LOT of ships, fit, implants and skills that will allow you to catch targets much more efficiently.
Scan probes
Without scan probes, you simply cannot start. There are three types of samples:
- Core Scanner Probe I it is used only to search for anomalies and signatures, which are the main target of exploration. At the time of translation of the guide, it is easier to find anomalies with an onboard scanner without using samples, and in practice this type of scan samples is only needed to search for explorer sites. Core probes operate over distances from 0.25 to 32 AU.
- Combat Scanner Probe I able to detect anomalies, signatures, player ships, structures and drones. However, these probes can only be launched with a fairly heavy (220 tf) CPU Expanded Probe Launcher I. These probes operate at distances from 0.5 to 64 AU.
- Deep Space Scanner Probe I- an improved version of the combat test, operating at distances from 2 to 256 AU. Note: The trial itself requires Astrometrics 5.
For those who have taken their scanner career seriously, there are the so-called "sister" modifications produced by the Sisters of Eve Corporation:
- Sisters Core Scanner Probe - + 10% to the strength of the scan of the sample.
- Sisters Combat Scanner Probe - + 10% to the strength of the scan of the sample.
- Sisters Deep Space Scanner Probe - + 10% to sample warp speed.
The RSS Core Scanner Probe, available as one of the tier 4 Mathar Epic Arc rewards, grants + 12.5% Probe Scanning Power, but has a very short space life after launch.
Probe launchers
Probe launchers are devices that fit into high slots. "Cannons" for scan-samples. Also vital for scanning
- Core Probe Launcher I shoots out Core probes (and nothing but Core probes), and requires only 20 CPUs to install.
- Expanded Probe Launcher I consumes 220 CPUs but is capable of firing all types of probes.
In addition to the standard options readily available through the marketplace, the Sisters of Eve also offer their own mods, available either through the lp shop (for those who work for them) or through contracts for everyone else.
- Sisters Core Scan Probe Launcher - + 5% to sample scanning power and save 5 CPUs (15 CPUs in total).
- Sisters Expanded Scan Probe Launcher - + 5% to the strength of scanning samples and save 10 CPU. (total 210 CPU).
Skills
Some skills are required for a successful scan:
- Astrometric- allows +1 trial in space per level. It is required at the first level for Core-launchers and trials, at the 2nd level for Combat-trials and Expanded-launchers, at the 5th level for Deep Space-trials.
- Astrometric Acquisition- reduces the scanning time of each sample by 10% per level.
- Astrometric Pinpointing- Improves scanning accuracy. Reduces the maximum deviation from the target by 10% per level.
- Astrometric Rangefinding- increases the scanning power of each sample by 10% per level.
The ships
Technically, the sample launcher can be plugged into any free highslot, if there is enough CPU. But some T1 frigates and their T2 modifications (covert-ops), as well as certain configurations of T3 cruisers, have bonuses on scanning power, which helps the player to catch the target.
Frigates
T1 frigates listed below have + 5% sample scanning power per racial frigate level. They are quite cheap and beginner-friendly.
- Amarr - Magnate
- Caldari - Heron
- Gallente - Imicus
- Minmatar - Probe
Covert-ops ("rugs")
Covert-ops-frigates have a + 10% bonus to sample scanning strength per level of the Covert Ops skill. In addition, they can be equipped with Covert Ops Cloaking Device II, which will seriously help the safety of movement through systems in hazardous areas of space. It is worth noting that if the skill of the rug is less than 3 - this rug has a lower scanning power than the racial frigate, since the prerek (necessary for learning the skill) of the rug (racial frigate, pumped into 5) gives a 25% bonus to the scanning power of the samples to the corresponding racial frigate.
- Amarr - Anathema
- Caldari - Buzzard
- Gallente - Helios
- Minmatar - Cheetah
T3 cruisers
Introduced in the EVE Online: Apocrypha expansion, this special type of cruiser also has a + 10% bonus to traffic jam strength per level of racial Electronic Systems, provided that such a ship is equipped with an Electronics - Emergent Locus Analyzer. There are two things to keep in mind:
a) T3 cruisers are relatively expensive, and their destruction removes one rank of a skill in a randomly taken sub-system skill of the corresponding race,
b) the ability to install Covert Ops Cloaking Device II for T3 cruisers depends on the presence of another sub-system in the kit, namely Offensive - Covert Reconfiguration.
- Amarr - Legion
- Caldari - Tengu
- Gallente - Proteus
- Minmatar - Loki
Riga
There are two rigs that increase the scanning power of the sample launchers.
- Gravity Capacitor Upgrade I - + 10% to scan power per 200 calibration units.
- Gravity Capacitor Upgrade II - + 15% to scan power for 300 calibration units.
Implants
Low-grade virtue implants give a bonus on sample scanning strength; full set gives + 33.83%
- Low-grade Virtue Alpha - 1% on its own and 1.1x set multiplier.
- Low-grade Virtue Beta - 2% by itself and 1.1x set multiplier.
- Low-grade Virtue Gamma - 3% on its own and 1.1x set multiplier.
- Low-grade Virtue Delta - 4% on its own and 1.1x set multiplier.
- Low-grade Virtue Epsilon - 5% on its own and 1.1x set multiplier.
- Low-grade Virtue Omega - 1.25x set multiplier.
The following hardwarewires provide bonuses to various sample attributes.
- 6th slot
- Hardwiring - Poteque Pharmaceuticals "Prospector" PPF-0 - 2% reduction in maximum deviation from target.
- Hardwiring - Poteque Pharmaceuticals "Prospector" PPF-1 - 6% reduction in maximum deviation from target.
- Hardwiring - Poteque Pharmaceuticals "Prospector" PPF-2 - 10% reduction in maximum deviation from target.
- 7th slot
- Hardwiring - Poteque Pharmaceuticals "Prospector" PPG-0 - 2% reduction in scan cycle time.
- Hardwiring - Poteque Pharmaceuticals "Prospector" PPG-1 - 6% reduction in scan cycle time.
- Hardwiring - Poteque Pharmaceuticals "Prospector" PPG-2 - 10% reduction in scan cycle time.
- 8th slot
- Hardwiring - Poteque Pharmaceuticals "Prospector" PPH-0 - + 2% scan power.
- Hardwiring - Poteque Pharmaceuticals "Prospector" PPH-1 - + 6% scan power.
- Hardwiring - Poteque Pharmaceuticals "Prospector" PPH-2 - + 10% scan power.
Video tutorial.
For all beginners, pilots looking to refresh their memory, or even seasoned pilots looking to improve their technique, there is ( English). Not only does it quickly and clearly explain how to scan, but it also allows (from observing another pilot's experience) a couple of ideas, even if you consider yourself experienced.
Scanning system
Here's what you need to know:
- Sample scan fields should overlap. Otherwise, you will not be able to warp to the found point.
- The scan radius of the sample can be changed on the fly. This is necessary to target what you are looking for.
- Samples can be recalled from space. Lost samples can be reconnected, then saved. Then they return from space and are placed in your hold for later use.
- Probes always see what they can see within their radius. The further the target is from the sample and the larger the scanning radius, the weaker the signal.
- You are not required to move while scanning or shooting samples. It is enough to place the samples using the system map. The samples will swap themselves where necessary when you give the command for the scan.
- The scan time itself is very short. Most of the time during the scan process will be occupied by positioning the samples. Therefore, the orientation in space of the scanning player is extremely important, and it is this factor that will determine how long it will take for him to catch the signature.
Scanning procedure
The scanning procedure is based on trilateration, where 3 samples are used to determine a point on a 2d-plane, and a 4th sample is required to find a point in space. 4 samples need to be placed within the site being searched. These samples must be placed on different planes, then a signature to which you can warp is determined.
To begin with, one or more probes determine the approximate position of the signature. Once we know for sure where it is, we can add more probes to calculate the exact position.
- If two tests have reached confident knowledge, you will receive a red ring, the target is somewhere along the length of this ring.
- Three samples give 2 points, the target is approximately at one or another point.
- If a confident signal is reached with four samples, you will get a result that you can warp on, if the strength of the scan of the samples is sufficient to focus on the signature (remember, the strength of the scan of the samples depends on their radius).
An example is below.
First, enter the scan interface either through Ctrl-F11 or through the scan button on the left side of the HUD in space (picture below)
This will open the scanning interface. Open the map in the upper right corner of this window to see a map of the system.

First, we'll determine if there are any signatures at all. Start a trial by clicking on the loaded launcher installed on your ship. Set the scan radius to maximum: either drag the sphere border, or right-click on the sample that appears in the list, and set the scan radius through the drop-down list.
The example uses the Core Scanner Probe I, but experienced scanners can use the Deep Space Scanner Probe I to maximize the radius. To hint at the right moment when dragging with the mouse, the sphere border will be highlighted when the mouse is where the sphere can be dragged from. This can also be seen in the picture below.

Now that the sphere is zoomed in to its maximum size, it will lock in that state when you release the mouse. Make sure the scope covers most of the system (ideally the entire system) and hit the analyze button

The result will appear within 10 seconds (or less, depending on skills). There is some kind of signature here. However, the signal strength is quite small because the sample currently has a fairly large scanning radius. This means that the indicated distance is almost certainly extremely inaccurate ...

To more accurately determine where a given site is located in the system, and to get a stronger signal, change the sample size. In the example, the sample was reduced to 8 AU and this is what happened (do not forget to press the analysis button):

We can conclude that the site is located somewhere near the inner planets of the system. Due to the type of system, there are approximately 3 positions for this signal. It is either near one of the outer planets within the radius of the first sample, or it can be close in a group of planets near the center of the sample we started with. OK, let's place 3 samples to check all 3 cases.
Place the 1st sample with a radius of 4 AU at each of the points:

And we look at the result showing us that we can forget about the outer planets. By clicking on the signature, we can highlight the result, which shows us which sample caught the signal.

We catch the signature, approaching it. We gradually increase the signal strength by decreasing the radius of the samples. To move the sample, simply take and drag it by one of the arrows oriented in the directions around the center of the sample. When you move them all - click on the "analyze" button, they will weld to a new position and start scanning.
In the example, one sample is used to check the volume around the inner group of planets. Look at the signal strength indicator for an indication of how close the sample is to the site. When the probe moves closer to the left neighbor (in the picture below), the signal becomes stronger, but when it moves further, the signal is lost. This means that the site is likely above or below the planets. Throw in the second sample and place it “above”. Here's the result:

A red circle means that the site is caught on both samples, and therefore is somewhere within the red circle. Now we can already narrow the radius of the samples in order to catch a stronger signal, which is done in the example. As soon as the circle is narrowed, we connect the third sample, covering the red circle with it. When all three samples receive a strong signal, 2 dots will appear on the screen.

In fact, the site is located at one of these two points, and we connect the fourth probe, covering one of the two points with it. When the correct point of the two is found, the signature remains the only one:

Although we know the right place in the system, we still need to further reduce the scan radius of our samples in order to pick up a stronger signal. This should be easy enough (use alt, which offsets all probes).
The signature point will go through the red, yellow and finally green phase, and in the green phase (100%) you will be able to warp towards the target. Having received a green point, you can click on it, or on the corresponding line in the scanner, with the right button to swipe to it or forget it. This is what the finished scan looks like:

The signature is now fully scanned and can be bucked or targeted by the warp. The result will remain visible this way until you leave the system, do not gag or disconnect.
If you still cannot catch the signature at 100%, although you are using the smallest possible radius, this may mean that your scan power is not enough. Use a ship with bonuses for scan, upgrade skills or buy the best fit.
Note: this example is only an example. The specific scanning mechanics are at the discretion of each individual scanner and should be owned only by him and his friends. There are more efficient scanning techniques, but this example teaches not so much to _do_ a scan, but rather to understand what is happening mechanically when you take a scan.Scanning interface.
The scanning interface can be subdivided into upper and lower parts, the upper part is used to manage samples and the lower part is used to display the scan results.
Sample management
In addition to the analysis button, there are several more buttons. Here they are:

From left to right:
- Analyze: samples warp to the positions you specified and start the scan
- Collect active samples: recalls active samples to your hold where they can be re-released in the future.
- Reconnect to lost samples: reconnects your ship's sensors to all of your samples present in this system. Used when disconnecting or returning to a system that you left after mistakenly forgetting to collect samples.
- Destroy active samples: the last button permanently destroys active probes. After that, they are lost forever. This can be useful if you need to quickly escape, or hide, hiding your samples from prying eyes.
Individual samples can be selected, disabled, reverted or destroyed by right-clicking on them. The entire selected group of samples as a whole can be moved with a shift. The viola moves the samples relative to the center of their group.
Scan results
The scan results section displays the results obtained from your samples after they have been analyzed:

This sheet displays the group to which the signatures you found belong, the strength of their signals, and the approximate distance. The weaker the signal, the less accurate the distance. The signature ID, which is not shown in the figure below, allows you to separate the signatures from each other. ID is exactly and only what it is - a unique identifier, and does not give any information about the site. The ID also changes in the case of DT.
As the signal gets stronger, the Group section displays additional information based on which frequencies the signal is transmitting. At a certain signal strength, the exact name of the signature will appear in the “type” column, as you can see in the figure below.
The signature ID, which is not shown in the figure below, allows you to separate the signatures from each other. ID is exactly and only what it is - a unique identifier, and does not give any information about the site. The ID also changes in the case of DT.

Filter results
The Result Filter is a powerful tool that you can customize on the fly to filter out unwanted results. After scanning, you can fine-tune the filter as you wish to see the results you want. New scans are not needed, you can even re-clip filters with different settings. The filter will be applied to everything that the samples saw at least out of the corner of the eye at the time of the last scan.
To create a new filter, click on the rippled rectangle (in the outdated screenshot in its place a triangle) on the left side of the field with the heading Scan result filter, and select the "create new filter" option

A window will open that will allow you to select which groups the pilot wants to see on the scan with this filter. Once you have saved the filter, you can select it from the drop-down menu in the same window, and the scan results will be sorted on the fly accordingly:

Hints
- The larger the radius of the samples, the less accurate the samples. Start with large radii, or even a Deep Space Scanner Probe to determine what is in the system, then narrow the radius. Gradually make the scan radius smaller as you get closer to the target. If you've caught a target in the smallest possible radius of your probes and still haven't hit 100%, try using probes that allow a smaller radius.
- It is best to move samples along one axis. Then, in case you are mistaken in the direction, it is easier to return it to its place.
- The lower the signal strength to which the site corresponds, the less the accuracy with which the distance to this site is displayed.
- You don't need to warp the system, you can be completely safe on the safe spot while looking for a signature. Your probes will do all the necessary warps on their own.
- Probes always report all objects within their radius. The larger the radius of the sample and the further the signal is from its center, the lower the strength of this signal.
- When intersecting results from several samples, they are combined into one result.
- When a signature is selected from the list in the scan interface, the corresponding visual cue will be highlighted. Please note that samples have an error and their opinion may differ from reality.
- Filters can be configured on the fly and do not need to be re-scanned.
- Anomalies will always be 100% from one sample, so this 1st sample is enough for them (and in fact - 0, use an onboard scanner)
- When moving samples, you can use the shift for the group, and the alt - for mirror positioning relative to the conditional center.
Signal types
Unknown
This includes:
- Unstable wormhole... A kind of "gate" leading to unknown solar systems not marked on the map. They have restrictions on the permeable mass and life time.
- Unknown - registered... All kinds of combat complexes with a bunch of NPCs and tasty clothes at the end of the expedition.
Expeditions is a chain of combat complexes in different systems, you only need to scan the starting plex, then all information about the next plexes will (or not, as luck would have it) displayed in your journal acc. tab. As a rule, in the first expeditionary complex, you need to blow up some structure to give the coordinates of the trail. complex.
This also includes "numbered" plots of the type 6/10, 8/10, 9/10, in the distant, distant times, these plots were marked with beacons and stood forever in the same places, once almost all of them were removed, leaving only 1/10 , 2/10, 3/10, 4/10 in the empire (can be seen on the galaxy map by selecting Color Stars By -> DED Deadspace Report in the tab) and single highly numbered zeros. Now these plexes are also randomly generated in the systems and they need to be scanned. The number indicates both the complexity and the size of the ship.
- 1/10 Frigates
- 2/10 Frigates, Destroyers
- 3/10 Cruisers, Frigates, Destroyers
- 4/10 Battlecruisers, Cruisers, Frigates, Destroyers
- 5 + / 10 Battleships, Battlecruisers, Cruisers, Frigates, Destroyers
The general meaning of all Unknown plexes (except for wormholes) is to shoot red crosses.
Ladar
There are two types:
- Gas complexes... When you fly in, you find yourself in the middle of several clouds that can be collected with a special "vacuum cleaner" Gas Cloud Harvester I Boosters are made from clouds in the known space. While collecting gas, they can damage the ship, not much, the cruiser can handle it. In Wormhole systems, Ladar Plexes contain the gases needed to build T3 ships. The cloud was never bitten for half an hour of the test.
- Combat complexes with containers for opening which you need Codebreaker I... In bpc contacts for boosters, reactions for boosters, books.
Gravimetric
Asteroid belt, may be NPCs, may arrive later. That's all.
Magnetometric
These are archaeological complexes in which there are special containers that can be opened either by the module Analyzer or module Salvager... There can be npc, in high secs, for example, salvage complexes without npc. And in 0.0 systems, if you please shoot. In containers, salvag, sometimes books (skills), sometimes bpts for t2 rigs, and if memory does not change bpts for fractional structures for pos.
Analyzer efficiency rigs will help you in these plexes:
- Emission Scope Sharpener III.
- Hardwiring - Poteque Pharmaceuticals "Prospector" PPW-1. Implant + 5% to the chance of successful work of the Analyzer.
- Hardwiring - Poteque Pharmaceuticals "Prospector" PPY-1. Implant + 5% to the success rate of Salvager.
Radar
Hacking complexes with openable containers Codebreaker... Usually you have to shoot. In containers Decryptor’s, Datacore’s, bpc for various Data Interface’s, special materials for building date interfaces, as well as in special radars there are bpc for boosters. In known space, the Radars are the source of materials for the Invention. In Wormhole space, Radar is a source of materials for Reverse Engineering, i.e. the production of T3 ships.
Rigi for hacking:
- Memetic Algorithm Bank III.
- Hardwiring - Poteque Pharmaceuticals "Prospector" PPZ-1. Implant for -5% working time Salvager, Codebreaker, Analyzer.
- Hardwiring - Poteque Pharmaceuticals "Prospector" PPX-1. Implant + 5% to the success rate of Codebreaker.
Cosmic anomaly
In the process of scanning, you will surely stumble upon the signals of "cosmic anomaly" - these are unpretentious combat systems scanned with one plug, as well as a built-in scanner. There are no entrance gates in them, and so they can be passed on any ship. There is a small chance of seeing a factional NPC (Dread Guristas, True Sansha ...) or getting an expedition. Combat complexes in faction wars are also cosmic anomaly signals.
With the introduction of the Dominion, the Pirate Detection Array upgrade appeared for systems with a claim, adding 4 anomalies per level. The yield of anomalies also grows with the level. At the 5th level, 20 anomalies are obtained in the system 4–5 of which are top-end in terms of income. Anomalies from upgrades are immediately restored after disappearing.
Translated by © Clancy.
Section "types of signals" © Yolkree.
Ever since the very conception of civilization, people have always been burning with curiosity to find out what is in the mysterious cosmic obscurity. This curiosity has not faded away until now, and the exploration of boundless space continues both by private players and corporations. New Eden is the perfect place to explore, where every player can discover something interesting.
If you started your adventure in the vastness of the legendary space MMO, then the first thing you need to learn is to scan. The game features over 5200 unique star systems, each of which is fraught with many secrets. These secrets will be able to bring you valuable items and a lot.
At a basic level of scanning Eve online use special probes. They are capable of detecting so-called cosmic signatures. There are 4 types of objects (or sites, sites) that can be detected during a signature scan:
- The EVE Online gas fields are where gas collects in interstellar clouds. This gas is very widely used in the EVE industry and is very profitable to collect and sell. Although it is not particularly valuable for the average player, it is a very good find for true miners. But we will not go into details, since we have a number of separate articles on this topic.
- Combat Sites are part of the game's PvE mode, which includes battles against factional enemies and pirates. Clearing such areas of hostile NPCs will reward you with valuable loot, like Deadspace and Faction. But if you are an ordinary explorer and do not have combat capabilities, then it is better to avoid such finds.
- Wormhola, or - these are unstable rifts in space that lead to various star systems. But the problem is that you cannot know what is at the other end of this rift. Wormhole research can be fun and rewarding. We also have a separate article about this, so we will not dwell on the details here either.
- Relics and Valuable Data - These places contain special containers that can be hacked by a data analyzer. There can be five categories: sleeper sites, sleeper caches, ghost sites, drone data sites, and pirate information and relics. For researchers, these areas are of the greatest interest, which is why they will be the focus of this guide.
But before talking about the possible location of the relics and dates of EVE Online, we first need to master the basics of scanning and learn all the skills, modules and ships necessary for this.
Eve online scanning and required skills
Any activity in EVE online requires skill. Without development, you will not be able to experience the many pleasures of the game. Therefore, for a researcher in EVE online, you need your own set of skills.
Some will help you with hacking data and relics, some will increase your survivability in especially dangerous places, and some will allow you to use the best research. All of them are presented in the table below.
|
Skill name |
Description |
|
Racial frigate skills |
This skill allows you to fly Tech 1 research frigates (Caldari -, Amarr -, Minimatar -, Gellente -). It belongs to the initial skill level, and you must definitely learn it in order to start using the basic research ship (all four ships also require the Spaceship Command I skill) Important Note: The Amarr Frigate III and Gallante Frigate III are required for the Astero-class pirate frigate. |
|
This skill will allow you to fly Tech 2 racial research ships (Caldari -, Amarr -, Minimatar -, Gallente -). This is an advanced research skill that requires other skills such as Spaceship Command III and Electronic Upgrades V. |
|
|
This skill is required to use scanning probes that identify cosmic signatures. It is also required as a basic skill that, among other things, requires the study of Science III. Without it, you will not be able to carry out even the simplest research. |
|
|
Astrometric Acquisition |
A skill that will increase your knowledge of how scanners work and reduce scan times for probes. It is an auxiliary skill that will increase your effectiveness; requires Astrometrics III skill to learn. |
|
Astrometric Pinpointing |
This skill will allow you to find scanned targets with increased accuracy. It is an auxiliary skill that improves the accuracy of scanners; requires Astrometrics IV. |
|
Astrometric Rangefinding |
This skill will increase the strength of your scanning probes. This is an auxiliary intelligence skill that will require Science III knowledge. |
|
This skill will allow you to get more accurate information about ancient artifacts, allowing you to analyze and identify them. This is the basic skill required to operate the Relic Analyzer module. Requires Survey III and Science III skills to learn. |
|
|
A skill that allows you to access items at the location of data and relics. To do this, you need to hack security computer systems. This is the basic skill required to operate the Data Analyzer module. Requires Electronics Upgrades III and Science III skills. |
|
|
This is a skill required to use a cloaking device that allows you to remain invisible to hostile players. This is an advanced skill that requires CPU Management IV. |
Modules for
The correct set of modules will greatly increase the efficiency of exploration and survivability. That is why this point cannot be ignored. The customization of your ship will largely depend on the number of high, medium and low power slots available in it, as well as the rig. The tables present and describe modules to help you with your research.
High power modules:
|
Module name |
Description |
|
Core Probe Launcher (required module) |
This module will allow you to launch Core Scanner Probes used to scan space signatures. The basic version of this module will require knowledge of Astrometrics I, and the Tech 2 version requires Astrometrics V. Alternatively, you can install Expanded Probe Launcher, which will also launch scan probes, but it has much higher requirements. |
|
This is a cloaking module that will hide your ship from enemy detection. This is the best form of defense for every research ship. The base version of this module requires Cloaking I, and the Tech 2 version requires Cloaking IV. |
|
|
Salvager Module (optional) |
This specialized scanner will allow you to locate and collect valuable items from shipwrecks. This can serve as an alternative source of income during your research. The basic version of the module requires knowledge of Salvaging I, while the Tech 2 version requires Salvaging V. |
|
Capacitor Neutralizers, Launchers, Turrets etc. (completely optional) |
There are many weapon modules available, and you can choose the ones that suit your PvP or PvE style. These are optional modules, and most likely they will not save your life. You can use them to clear battlefields, but that's not what exploration ships are for. |
EVE Online Medium Power Modules:
|
EVE Online Brick Name |
Description |
|
(required module) |
It is a module used to analyze and find ancient ruins. It is required for looting at relic sites. The basic version of the module will require Archeology I, and Tech 2 will require Archeology V. |
|
It is a hacker module used to break into security computer systems. Required to loot data locations. It will not give you as much profit as Relic Analyzer does, so it is not required. The basic version of this module requires Hacking I and Management II, while the Tech 2 version requires Hacking V and Management II. |
|
|
Micro Jump Drive (required module) |
Also known as Microwarp Drive (MWD). This module allows your ship to jump 100 km forward in a given direction. It will significantly increase research efficiency (containers with data or relics are often far from each other) and survivability (you can combine Micro Jump Drive with your cloaking device, activating one immediately after another) and will provide the ability to perform MWD Cloak Trick, which will simultaneously bounce from danger and hide from it. |
|
Allows you to scan the cargo holds of other ships. It can also be used to scan data and relic locations to determine their value. It's a great productivity tool as it lets you skip space that costs little. The basic version of this module requires CPU Management I, and the Tech 2 version requires CPU Management II. |
|
|
Scan Rangefinding Array (optional) |
This module increases the strength of your scanning of your probes. This will make your scans more reliable. The basic version of the module will require Astrometric Rangefinding II, and the Tech 2 version will require Astrometric Rangefinding V. |
|
Scan Pinpointing Array (optional) |
This module enhances your scanning probes by reducing their deflection from scanning. Like the previous module, this one will make your scans more reliable. The basic version of the module will require Astrometric Pinpointing II, and Tech 2 will require Astrometric Pinpointing V. |
|
Scan Acquisition Array (optional) |
With this module the scanning time of your probes will be reduced. This will make it possible to perform more often scanning... The basic version of this module will require Astrometric Acquisition II, and Tech 2 requires Astrometric Acquisition V. |
EVE Online Low Power Modules:
|
EVE Online Brick Name |
Description |
|
Inertial Stabilizers (completely optional) |
This module will improve the maneuverability and handling of your ship through its signature. But Mounting Inertial Stabilizers will create a lot of problems for you, so it's best to avoid it. The basic version of the module requires Hull Upgrades I, and the Tech 2 version requires Hull Upgrades II. |
|
This module compensates for glitches and fluctuations in the ship's warp. It is a very powerful defensive tool that eliminates warp disturbances caused by attackers; however, it is only useful in high-secs and low-secs. The basic version of the module requires knowledge of Warp Drive Operation I, while the Tech 2 version requires Warp Drive Operation IV. |
|
|
It will make your ship's components lighter, but fragile at the same time. As a result, this will increase the maneuverability and speed of the ship, but by itself it will reduce the strength of the hull. Every researcher's best strategy is to run away before anything bad happens, so this module has essentially no flaws. The basic version of this module requires the Hull Upgrades I skills, and the Tech 2 version requires Hull Upgrades II. |
|
|
Damage Control (optional) |
This module prevents damage to the system using a combination of redundancy and containment field emitters. In simpler terms, this is an increase in the resistance of your hull, armor and shield. This is not to say that it will bring absolute protection, so we classified it as optional. |
Riga EVE Online:
|
EVE Online Brick Name |
Description |
|
Small Gravity Capacitor Upgrade (highly recommended) |
This setting will enhance the scanning of your ship. It will significantly update your probes, which will undoubtedly be beneficial. The basic version will require the Jury Rigging I skill, and the Tech 2 version will require Jury Rigging IV. |
|
Small Memetic Algorithm Bank (optional) |
This setup increases the efficiency of the data modules installed on your boat, which in turn has a beneficial effect on the efficiency of the data analyzer. The basic version of the module requires Jury Rigging I, and the Tech 2 version requires Jury Rigging IV. |
|
Small Emission Scope Sharpener (optional) |
This installation increases the efficiency of the relic modules installed on your ship; this will increase the durability of the Relic Analyzer. The basic version of the module requires Jury Rigging I, and the Tech 2 version requires Jury Rigging IV. |
|
Cargohold Optimization (optional) |
This rig increases the carrying capacity of your ship, but reduces the armor. This will make the research longer and therefore more profitable. Although the only negative is vulnerability to enemies. The basic version of the module requires Astronautics Rigging I, and the Tech 2 version requires Astronautics Rigging IV. |
|
This equipment will increase the maneuverability and speed of your ship, but reduce its armor, that is, you will become faster and more agile, but it will be much easier to shoot you down. The basic version of the module requires Astronautics Rigging I, and the Tech 2 version requires Astronautics Rigging IV. |
|
|
This rig will increase the agility of your ship, but reduce its armor; that is, you will be able to level jumps along the warp, which will increase your survivability, allowing you to quickly escape from danger. The basic version of the module requires Astronautics Rigging I, and the Tech 2 version requires Astronautics Rigging IV. |
|
|
This rig will improve your warp but increase your signature radius; this will greatly increase the speed of your research. The basic version of the module requires Astronautics Rigging I, and the Tech 2 version requires Astronautics Rigging IV. |
|
EVE Online Brick Name |
Description |
|
Salvage Drones (optional) |
They are used to find and rescue wrecked ships. They can also come in handy as an additional source of research income. |
|
Caldari Electronic Warfare Drones; ECM Drones |
These drones specialize in jamming enemy sensors and guidance systems. ECM Drones are a great defense option, as they can bring you a few precious minutes, in which you can warp away from danger. Caldari Electronic Warfare drones are best used as perimeter defense. Both types of drones require the Electronic Warfare III skill. |
|
Combat Drones (optional) |
These specialize in damaging and destroying enemy ships. Research vessels use them primarily for defensive purposes to compensate for their low firepower. They are less effective as a protective tool than ECM Drones. Combat drones come in three flavors: light, medium, and heavy. |
We have provided you with information about and, but which ones to put, it's up to you. In the next part of our guide, we will tell you about the ships that are used for scanning in EVE Online.
Choosing the right exploration ship can be quite difficult for a beginner as it depends a lot on the player's style, experience and level. Therefore, we decided to describe three types of research ships and 9 available models. Of these, you will find the one that best suits your skill and level.
Before going into details, we will provide a brief description of each of the ships. Heron is a great starter exploration ship thanks to its 5 medium slots; Buzzard upgraded it to Tech 2; if you are a complete beginner, then these two should be your starting points. Probe and Cheetah have a more dynamic playstyle and suit more experienced players. Magnate is one of the strongest exploration frigates, but its disadvantage is the small number of medium slots. But you shouldn't worry about this: the "older brother" of this ship, Anathema, compensates for this lack in its characteristics. The Helios may be a fairly versatile exploration ship, but you can only get to it with the mediocre Imicus. And finally, if you decide to conduct research with aggression, then Astero can offer you everything you need for this: a powerful platform for drones and advanced camouflage technology. Its power will also come in handy in wormhole and nullsec EVE Online.
Exploration Frigates for scan
These ships are purposefully created for space exploration. They have good hacking and scanning bonuses, which means it is suitable for any aspiring explorer. However, the combat power of these ships is painfully ridiculous, so don't even think about engaging in open combat with them. Only drones can increase their survivability, but only on condition that they are correctly selected.
This type:
- Heron
- Magnate
It is the heaviest of all Tech 1 research frigates, but it only has 3 medium module slots and this reduces its research potential. It has one more slots for low-power modules, namely 4. To control it requires the Amarr Frigate I skill, and gives the following bonuses:
1. 7.5% bonus to the power of combat and main scanners (a percentage is awarded for each level of the Amarr Frigate skill);
2. Reducing the duration of salvaging by 5% (a percentage is calculated for each level of the Amarr Frigate skill);
3.5% bonus to data analyzer and relics (role bonus).It is the fastest and most agile of all Tech 1 research frigates. Probe is very adept at avoiding trouble, and its 4 medium module slots make it a competitive explorer. The three low slots are best used for modules that give the ability to avoid pursuers. Requires Minmatar Frigate I skill and provides a way to:
1. 7.5% bonus to the power of combat and main scanners (a percentage is awarded for each level of the Minmatar Frigate skill);
2. Reducing the duration of salvaging by 5% (a percentage is calculated for each level of the Minmatar Frigate skill);
3.5% bonus to data analyzer and relics (role bonus). - Imicus
Slowest of all Tech 1 exploration frigates, but also the best in drone control (20Mbit / sec Drone Bandwitch). Therefore, the correct selection of combat drones is essential in order to compensate for Imicuse's poor survivability. Its four middle slots are enough to operate like a solid exploration ship. Requires Gallente Frigate I skill and provides bonuses:
1. 7.5% bonus to the power of combat and main scanners (a percentage is awarded for each level of Gallente Frigate skill);
2. Reducing the duration of salvaging by 5% (a percentage is calculated for each level of the Gallente Frigate skill);
3.5% bonus to data analyzer and relics (role bonus).
A feature of this ship is as many as five medium slots. This makes it very easy to research. If you're a beginner, choosing this as your first exploration ship will save you the hassle of deciding which mid-power module to install and which to skip. To control Heron requires Caldari Frigate I and provides the following bonuses:
1. 7.5% bonus to the power of combat and main scanners (a percentage is awarded for each level of the Caldari Frigate skill);
2. Reducing the duration of salvaging by 5% (a percentage is charged for each level of the Caldari Frigate skill);
Covert Ops Frigates and Scanning
Essentially, these are Tech 2 upgraded versions of regular research. Their most notable feature is the warp with an active cloaking device. This feature makes them one of the trickiest ships in the game. The ability to stay under enemy radar is often used in PvP wars, where frigates for special operations will be able to get a lot of valuable data to corporations. In addition, they have good bonuses for research and use scanning extremely good, which, combined with advanced masking technology, makes them a very good choice for scanning in zero-sec and wormhole.
Ships of this type:
- Buzzard
Like Heron, it has its own strengths and weaknesses. Like the Heron, it has 5 medium slots to help set up your ship to navigate dangerous areas in space. Buzzard does not have a Drone Bay. This ship can deploy Covert Ops Cloaking Devices and Covert Cynosural Field Generators, and its cloak reactivation delay has been reduced to 5 seconds. Requires Caldari Frigate V and Covert Ops I to control, and provides the following bonuses:
1. Bonus 5% to rocket and kinetically light rocket damage (percentage is calculated for each level of Caldari Frigate skill);
2. Bonus 5% to the rate of fire from rocket launchers and light rocket launchers (a percentage is awarded for each level of the Caldari Frigate skill); - Anathema
An advanced version of the Magnate, this ship has a good tank for a special operations frigate. Unlike its predecessor, it has 4 medium slots, which gives it much more opportunities to explore. Anathema does not have Drone Bay. This ship can deploy Covert Ops Cloaking Devices and Covert Cynosural Field Generators, and its cloak reactivation delay has been reduced to 5 seconds. Requires Amarr Frigate V and Covert Ops I skills and provides the following bonuses:
1.5% bonus to rocket damage (a percentage is awarded for each level of the Amarr Frigate skill);
2. Reducing the recharge time of the capacitor by 5% (the percentage is calculated for each level of the Amarr Frigate skill);
3. Reducing the requirements for Cloaking Devices by 20% (a percentage is calculated for each level of the Covert Ops skill);
4. Bonus of 10% to the probes of the combat and main scanner (a percentage is awarded for each level of the Covert Ops skill);
5. Reduction of Survey Probes flight time by 10% (a percentage is calculated for each level of the Covert Ops skill);
6. Bonus +10 to the analyzer of data and relics (role bonus). - Cheetah
This is the fastest and most agile special operations frigate, but low CPU power and not the best capacitor characteristics reduce its versatility. But nevertheless, as with the Probe, it helps to avoid certain troubles. Due to its speed and agility, the Cheetah plays the role of a scout and spy. It also doesn't have a Drone Bay. This ship can also deploy Covert Ops Cloaking Devices and Covert Cynosural Field Generators, and its cloak reactivation delay has been reduced to 5 seconds. The skills to control it are Minmatar Frigate V and Covert Ops I. It also provides the following bonuses:
1.5% bonus to damage from a small projectile (a percentage is awarded for each level of the Minmatar Frigate skill);
2. 10% to the optimal range of Small Projectile Turrets (a percentage is awarded for each level of the Minmatar Frigate skill);
3. Reducing the requirements for Cloaking Devices by 20% (a percentage is calculated for each level of the Covert Ops skill);
4. Bonus of 10% to the probes of the combat and main scanner (a percentage is awarded for each level of the Covert Ops skill);
5. Reduction of Survey Probes flight time by 10% (a percentage is calculated for each level of the Covert Ops skill);
6. Bonus +10 to the analyzer of data and relics (role bonus). - Helios
This is the only Special Ops frigate to have a Drone Bay, but the low drone capacity and the dreaded Drone Bandwitch make this advantage almost useless. It only has two slots for high power modules. This is sufficient for research purposes, but not ideal at all; this is somewhat offset by the 5 medium slots. It can also be equipped with Covert Ops Cloaking Devices and Covert Cynosural Field Generators, and its cloak reactivation delay has been reduced to 5 seconds. To control it, you will need the skills of Gallente Frigate V and Covert Ops I, and it, in turn, will provide the following bonuses:
1.5% bonus to damage from Small Hybrid Turret (percentage is calculated for each level of Gallente Frigate skill);
2. Bonus 10% to thermal damage from Scout Drones (a percentage is calculated for each level of Gallente Frigate skill);
3. Reducing the requirements for Cloaking Devices by 20% (a percentage is calculated for each level of the Covert Ops skill);
4. Bonus of 10% to the probes of the combat and main scanner (a percentage is awarded for each level of the Covert Ops skill);
5. Reduction of Survey Probes flight time by 10% (a percentage is calculated for each level of the Covert Ops skill);
6. Bonus +10 to the analyzer of data and relics (role bonus).
Pirate Frigates - Aggressive Scanning
Unlike other research ships, pirate frigates can not only defend themselves, but also be aggressors. These vessels are designed for long missions and are not required to visit the stations too often.
Ships of this type:
- Astero
This is a one-of-a-kind exploration pirate ship. It outperforms other models in cunning exploration and attack power. It has the largest drone capacity of any research frigate (75m³ and 25 Mbit / s). Even though it is Tech 1, it can be fitted with Covert Ops Cloaking Devices and has a cloak reactivation delay reduced to 15 seconds.
All this has made the Astero one of the most popular spacecraft for space exploration, despite its high price. To control it, you need the skills Gallente Frigate III and Amarr Frigate III, and it gives the following bonuses:
1.20% bonus to hit points of drones (a percentage is calculated for each level of Gallente Frigate skill);
2. Bonus of 4% to all armor resists (a percentage is awarded for each level of the Amarr Frigate skill);
3. Reducing the requirements for Cloaking Devices by 100% (role bonus);
4. Bonus 37.5% to the power of combat and basic scanners (role bonus);
5. Bonus +10 to the analyzer of data and relics (role bonus).
This was the list of EVE Online space exploration ships. Now that you have all the proper information about the modules, skills and ships that will be needed for scanning, you can move on to describing the scanning process itself and the places where it is most profitable to do it.
So, after we told you about the skills, modules and ships required for space exploration EVE Online, it's time to start directly with the scanning process itself. In this part, we will tell the reader about the places where scanning can take place, as well as about the relics and data you can come across during your travels.
Scanning systems
There are 4 types of systems that are separated by the security level of the area: high security space (high sec), low security space (low sec), zero security space (zero sec), and wormhole space. It is easy to guess that the higher the complexity of the system, the more profitable the scanning will be. We propose to consider each of these systems in more detail.
- High security systems. These systems are popular not only among beginners, but also among those who are afraid to take risks in dangerous parts of space. This means that the already limited resources located in this territory are diminishing even more due to the huge number of competitors in it. If your plans include making more claims, then leaving this system as soon as you have the necessary experience is the right decision.
- Low security systems. Here you can find much more valuable objects with relics and data; the more so as there will be an order of magnitude less competitors for these objects. However, the danger here will be much greater.
- Zero safety systems. There are very valuable places for mining data and relics here, and due to their large number, the risk of being attacked here is not so high. Combined with the fact that many researchers are too afraid to visit null-seki, there is plenty of room to turn around. But on the other hand, a lot of dangers have gathered here in the face of aggressive factions of NPCs and gankers, who have extensive experience in killing researchers.
- Wormhole spaces. The value of finds in these systems is comparable to the value in zero-sec. There are even fewer visitors here than zero, so research here will be very lucrative. The risk of being attacked here is very low, but this danger cannot be ruled out, and you need to be well prepared before going to the wormhole. The difficulty is further increased by the fact that you do not know how many people are in the same space with you, and even more so you do not know who they are (unless, of course, the players type something in the local chat). Although, in general, these systems are safe and there can be plenty of lawsuits.
Data and Relic Sites
The sites or (i.e. location) of data and relics that you will have to deal with will vary greatly in both complexity and potential profit. In total, there are five types of these date sites:
- Sleeper Sites. They are in Wormhole space. These places are well protected, and it is impossible to hack them without first defeating the defenders. The hostile NPCs that defend this site are valuable on their own, as they lose good loot when defeated. Therefore, even those ships that are not able to hack sites will find work here.
- Sleeper Caches. This is a very complex data site full of dangers and triggers (an unsuccessful hack could explode the container, and the sentry guns present could launch an attack on you). These sites do not appear in wormholes and can be found on normal systems. Sleeper Caches are of three different types: Advanced (Scanning Difficulty - Level 5), Standard (Scanning Difficulty - Level 4), and Limited (Scanning Difficulty - Level 4); and may contain blueprints for polarized weapons, skill tutorials, and crafting materials.
- Ghost Sites. These are data objects that are controlled by pirates, and pirates do not like unwanted guests on their territory. After these sites are hacked, a timer starts, during which pirates can overtake you if you are not fast enough. Unsuccessful hacking attempts will cause the container to explode and damage every ship within 10 km. These locations can contain various blueprints of Ascendency Blueprints, "Yurt" and "Wetu" Mobile Depot Blueprints, and "Magpie" Mobile Tractor Unit Blueprints.
- Drone Data Sites. They are available in just a few regions: The Spire, Ethernium Reach, Outer Passage, Kalevala Expanse, Oasa, Malpais, Perrigen Falls, and Cobalt Edge. And these sites contain three containers: one at Research and Development Laboratories and two at the High-Security Containment Facility. A second unsuccessful hacking attempt here will result in enemy frigates spawning and no further hacking attempts will be possible until the emerging enemies are destroyed. These sites also contain Racial Drone Components and Blueprints (specific to the race that owns the site).
- Pirate Relic and Data Sites. They can be found in class 2 and 3 wormhole, as well as in all common space systems. At the moment, these are the safest places to hack data and relics, since there is not a single hostile NPC or any other defense. Each of these sites contains multiple jailbreak containers, emergency stations, abandoned cars, etc. Pirate relic sites contain skill books, blueprints, T1 and T2 salvaging materials; and pirated data sites include skill books, Decryptors, Data Cores, blueprints, and production materials.
Hacking process
Hacking is an integral part of EVE Online research. The main goal of the hack is to disable the kernel of the container system. A successful hack is made only by passing the mini-game. This game is about maneuvering a computer virus through the container board. At its core, the hacking process resembles a typical Minesweeper, so if you have mastered the classics from Windows, then you should have no problems with hacking in EVE.
Secrets and tips
Now that the basics have been covered, we can leave some helpful hints on how to scan and use for novice (and non-beginner) researchers. scanning.
- Use hotkeys, as they speed up your actions (this is a trivial advice, but it's still worth pointing out, since many players rarely use them).
- Take full advantage of your cloaking device. This is your best defense, and you should invest in it as much as possible.
- Try to avoid densely populated systems. Configure the map to display ships that have been destroyed in the last hour; it will help you estimate how many players are in the system with you; if your map shows a lot of destroyed ships, then it would be better to leave here as soon as possible.
- Learn how to use Secure Safe Spot Bookmarks.
- Never try to fight attacking ships, because most likely you will not survive (ships that attack research ships are often well prepared for battle). You should use superior (if, of course, you equipped your ship correctly) speed, agility and ECM Drones.
- Use directional scanning as often as possible when your disguise is inactive and run away at the slightest enemy activity.
And in conclusion of all this, I would like to say that scanning is not only a profitable business, but also just an interesting activity. You may face many difficulties, but if you are calm and attentive, you will be able to avoid danger.
If you need help, you can always find it on the website. We are an online store that sells game, ships and other items for EVE Online. We also sell accounts, services and consultations.
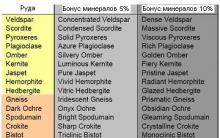


Summary: Calendar of significant and memorable dates
Tattoo playing cards lettering in different languages
Topographic map of the ussr 5 km
OSM contours and vector maps in Garmin navigators
Any magic crystal black desert