Before reading this walkthrough, please note that it does not describe the game's many side quests that are not necessary for the story's story progression.PrologueWaking up...
Before reading this walkthrough, please note that it does not cover the game's many side quests that are not essential to the story.
Prologue
Having woken up on the throne in a delirious state, you, on behalf of King Robar III, need to overcome a small dungeon. A little later you will have to face some resistance from the local undead. However, communicating with them using your sword should not cause any difficulties, so immediately after this short introductory part you will get acquainted with the main character of the game and begin to play through it.
Feshir
First, go to the village and see Ivy's father there, sitting in the center of the village. Gromar will tell you that in order to have his marriage with Ivy blessed, the hero will have to complete three tests. First you need to find an ancient dagger in the caves that are located across the bridge north of the village and bring it to Gromar. On the bridge you will meet farmer Knut, who offers you to rid his fields of the invasion of mole rats. You can agree, then Knut will give the hero his club. With its help, it will be easier for you to complete not only this side task, but also to deal with opponents inside the cave, the entrance to which is located immediately beyond the field. Having obtained the desired dagger in the dungeon, do not forget to search the chest before leaving and return with the trophy to Gromar. From him we receive the second order - to drive away the smuggler who settled near the mountain lake. We take the key from the old man and go through the gate to the lake. There we meet our friend Diego, who offers you some semblance of a training battle. Having lost to you, he will agree to give up his old machete as proof of your victory, but only after you have dealt with a couple of goblins that are hanging around his boat on the beach. Go down to the water and give your opponents a good beating. Having brought the machete to Gromar, you will receive a third order from him - to bring him three pairs of deer antlers. Upon entering the deer thicket, you will meet Ivy again and she will tell you that you can get a bow from the hunting tower, which is just outside the gate. We quickly shoot deer with it and take their antlers. With this wealth we go to her father and receive the last order from him - to make an engagement bracelet for your bride. To do this, talk to Halven, who is standing at the exit from the hut. He will say that he will gladly make a bracelet for you if you get the amber. The local orc Oruk has this substance. Oruk will ask you to serve him in exchange for stones - to bring blue toadstools from the cave, which is more common with deer. We find five mushrooms there and get amber in return. Take it to Halven and present the finished bracelet to Ivy.
Farewell, Feshir!
Steward
After entering through the main gate of the castle, go up the stairs until you reach the main tower, which is guarded by the Gorn. He will tell you that Diego is now in prison, accused of murdering the baron's assistant. Going down to the entrance to the casemates and talking with the guard there, you will meet with the arrested Diego. From him you learn that the only way to justify him to the baron is to find Mermund's missing assistant. First you need to talk to the guard Winstan, who hangs out on the western outskirts of the city. In a conversation with this subject, it turns out that he is acting in concert with the rebels who hid Mermund in one of the caves outside the castle. To make it easier to resolve the issue, we hit him in the face and find out the location of the rebel camp. Leave the castle and find the entrance to the catacombs, located in the north-east of the barony. After passing by Ogtara's farm, you will reach the entrance to a cave, where inhospitable rebels will already be waiting for you. Get ready to swing your weapon quite actively, since as you move through the catacombs, opponents will constantly attack you. After passing a room with a row of beds, you will open the lattice door and face a rather serious opponent in the person of the chief interrogator of this lovely institution. Try not to fall under his mace and then you will cope with him without problems. After collecting the trophies and unlocking the locked chamber, you will release Mermund. The released prisoner will tell you about lost secret documents that are very valuable to the baron. Having found them, you will easily win his favor and receive a pass to the Valley of Blood. To do this, you need to return to Ogtara's farm and find a cave nearby. Inside it, in addition to other rebels, you will find their leader, who has these very documents. All that remains is to take them to the castle to Baron Renwick and get permission from him for further travel. By the way, in addition to this paper, you can choose armor to your liking from the three models presented. In your new vestments, leave the castle and go to the east of the barony until you reach a gate guarded by a guard, to whom you must show the permission you have received.
Valley of Blood
After passing the gorge and the forest path, you will meet Castellan Giltor at the estate in the hope of finding out from him information about the archives of Silverlake Castle. He will agree to help you only after you return one of his people - standard bearer Doran. Leave the estate and go north, where the subject you are looking for is walking around the battlefield. Having learned from him that he has lost the banner of Lord Gavaan, promise to help the poor fellow and go to the goblin caves to the east of the battlefield. Having climbed the forest ridge and encountered a small detachment of goblins there, you will reach the desired cave. Find the banner of Havaan inside them and take it to Doran. Now head back south through the manor until you reach the castle. Going up to its second floor, you will find Castellan Giltor in the hall by the fireplace. He will tell you that access to the archives can only be given by Lord Gavaan, who was captured by the orcs during the battle. Naturally, you need to return the honorary prisoner. To do this, leave the castle and go forward along Silverlake Lake. Soon you will come across a bridge with guards who will let you pass further as soon as you say the password. By the way, further on the shore of the lake you will see some semblance of a low observatory, whose surroundings are teeming with orcs. I advise you to destroy them right now, and only after that go to the entrance to the cave nearby and talk to the orc Ogbosh, who is guarding the gate to the camp. He will let you through after you bring him a drink called skahan. This thermonuclear drink can be obtained from the shaman Melog, who lives in a forest hut south of here. Walking along the road across the river, you will find yourself in the forest, where you will soon come across a shaman’s dwelling, in which his owner plays music on the drums. In exchange for the skahan, he will ask you to find for him the son of the previous tribe leader named Irrai. To do this, follow the path from Melaga's house to the west and soon you will come across Irraya sitting by the side of the road. He will tell you that the orc Shalog took his personal amulet from him, and without it he is just a body without a soul. Go to the south of the forest, where you will run into a stone blockage blocking the path forward. Moving along this rubble, you will find Shalog and after a short course of beating he will tell you that he hid Irrai’s amulet in the cave. The entrance to it is located in the east of the forest and to get to it you will again need to walk along the stone ridge. In it you will find a chest with Irrai's amulet, which you can take to the owner in the shaman's hut. From him we learn that no one can defeat the current leader of the orcs, Erhag. But if you put Irrai’s amulet on yourself, you will be able to challenge him yourself, and at the same time free Lord Gavaan. Receive the ill-fated skahan from Melog, and from Irrai his amulet, return to the entrance to the camp and give the swill to Ogbosh. He will let you inside, where you will have to fight in some kind of throne room with Erhag and a couple of his bodyguards. The liberated Gavaan will ask you to deal with Erhag's minions and free the people of Gavaan, whom the orcs are forcing to work at the sawmill. You may have already managed to deal with Erhag's minions when you cut down all the orcs near the observatory on the shore of the lake. You can find the prisoners by going up the path to the east, which is on the way back to the castle, if you go from the orc camp. After completing all the tasks, talk to Lord Gavaan, who is walking along the path along the lake, and report on your successes. All that remains is to return to the castle and study its archives (they are in the basement of the southern wing of the castle). After receiving the ancient map, go upstairs and talk to Lord Gavaan again. From him you will learn that before you, two more magicians were interested in the ancient temple, who can be found in Tuushu. He will also give you a scroll of spell that destroys the stone blockage on the road blocking your path forward. Go to this rubble (not far from the place where you met the orc Shalog) and cast the spell. As a side effect of its action, you will have to face a stone golem, a clumsy creature, but quite resistant to your attacks. Having dealt with it, follow the road forward until you reach a forest settlement built around the sacred Tuushu tree.
Tuushu
At the entrance to the village you will be met by the local commandant Leboras, who wants to check your good intentions regarding the town. To prove your usefulness you need to destroy 6 nests of toad lizards that have bred in the swamps southeast of Tuushu. Having dealt with the clutches of eggs and their indignant parents, return back to the village and give the delicacy to Leboras. Now chat with the locals, or rather with the sorceress Gelana. It can be found by climbing one of the stairs into the tree itself through a huge passage at its base. She will not immediately allow you to communicate with Master Merdarion, but will refer you to the magician Vultus so that you can influence him and stop the explosive experiments. Go down the tunnel to the roots of the tree, which is located right next to the exit to the street and chat with the required character. He will promise not to play the role of a young chemist anymore, but also recommends that you not get involved with Gelana - they say, she still won’t let you through to the master, unlike himself. In principle, you are free to choose whose tasks to complete in order to get an appointment with Merdarion, but we will consider options for Vultus’ tasks. First, he will ask you to bring him a lost straw hat, which he supposedly dropped in the ruins located southwest of Tuushu. The entrance to them will be illuminated by torches, and nearby you will have to fight a swamp-eater worm, so you won’t pass by. After defeating orcs and claw-grabbers in the dungeon, you will find a straw hat and be able to take the trophy to Vultus. The sorcerer's second task will be to change the weather so that the bright sun will dry out his laboratory. To do this you need to find an ancient statue. Go strictly south from the town and a little later you will find ruins with a statue, and at the same time your old friend Zira. From her you will learn that parts of the statue are somewhere nearby, so you will have to look for them again. Feel free to jump down into the dungeon and move forward, dealing with all the, without exaggeration, numerous opponents along the way. In one of the dungeon rooms you will come across a locked door to which you need to find the key. Proceed through the hall with two stone golems and take the desired item in one of the chests. At the end of this journey, you will find the missing piece of the statue and climb back to the pedestal. In a conversation with Zira, you need to insist on sunny weather, which she absolutely will not like. After convincing her with the help of a weapon, approach the statue and repeat your request. After this, return to Vultus and tell him about your successes. He will tell you that Gelana is already hypnotized by him, not without the help of that same straw hat, and you can easily ask her for an audience with the master. Having received a special seal and improved your wardrobe again, go up the stairs that are located in the hall with Gelana and find Calamus in the library. He will let you go upstairs to the sanctuary to see Master Merdarion. From him we learn that the magician you are interested in is called Ikarius, whose location we know is Calamus. He will give you the key to Icarius's hut, located on the area between the library and the sanctuary. After examining the dead magician, we come to the conclusion that it is urgently necessary to find his partner, Lester. This can be done by sneaking into his hut in the swamps, which is in the southeast side of Tuushu. We go there, dealing with claw grabbers and swamp eaters, but we find in the hut not Lester at all, but his friend Milten. The owner of the home was clearly kidnapped, and we have to find him with the help of a new acquaintance. Just follow the steps of the glowing swampman forward until you find yourself in another cave, passing by the monastery gate and going down to the sea. Inside it you will free poor Lester, having fought quite a bit with the orcs and their comrades. From him we learn that the monastery can be accessed by moving the statue in the southern part of the cave. In fact, she is located in the same room very close. Then cross the long bridge and go up to the entrance to the monastery.
Road to the Temple
From the monk Rundor you will learn that you can get an audience with the abbots only after passing two tests. The first of these is to defeat two golems hanging around the monastery courtyard. Return to Rundor and threaten to clean his face. As soon as your character says in a conversation with him: “There is no justice. There is only power,” you will gain access to the abbots waiting for you in the largest building of the monastery. They will tell you that the desired temple is located far north of the monastery and the path to it lies through the jungle. With this knowledge, we leave the monastery and go down from it, but not along the same path along which the ships came, but along the path leading to the north.
First you will pass the black gorge, and then continue your journey through the jungle, fighting off its inhabitants, until you reach the ruins, where you will have to fight with a man who has lost his mind. Go down into the dungeons to reach a stone pass through the jungle on the other side. Continue your way north and you will reach the sea coast. In principle, you can easily ignore the magicians standing on the platform before going down to the beach - their quest is a side quest. In any case, walking along the beach, you will have to brush off the warriors emerging from the sea (Chernomor’s father was not seen in their ranks). After passing the coast, following the forest path again, you will soon meet a man named Thor. He will tell you that there is a troll wandering around somewhere and you need to be on your guard. If you go further, you will run into the castle gates, where you will not be allowed in anyway. Therefore, you need to move along the rocks to the southwest of it, where you will meet the aforementioned troll (by the way, there is a corresponding road sign on the way to him). If you are not confident in your abilities, then I do not recommend contacting him, but rather run without looking back forward to the entrance to the cave. Inside you will meet a one-eyed spy ahead of you, with whom you will enter into a temporary alliance. You need to choose one of two corridors, where you will go to activate the switch that raises the bridge leading to the temple. Having chosen the fire tunnel, you need to run through the corridor, dodging the burning balls and activate the switch. Now run back to the altar and fight Dantero. The situation is complicated by the fact that your one-eyed opponent has called golems to his aid. Try to deal with the main enemy as quickly as possible, after which the passage to the temple will open and you will be quite able to escape from the golems without engaging in battle with them.
Move forward through the dungeon to the temple, fighting with overgrown arthropods. Do not let yourself be surrounded, but rather retreat into narrow tunnels, providing yourself with cover from the flanks. As a result, you still have to fight with their parent, after which you will be able to go out into the fresh air. After walking a little along the mountain path, you will again come to the entrance to a cave guarded by two golems. Inside, you have to overcome the corridor, dodging fireballs flying along it and at the same time brushing aside the attacking enemies. Faced with a locked door, take a walk into one of the branches of the dungeon, at the end of which you will find a chest with useful things and a key. Finally, you reached the ice dome located in the center of the temple, and at the same time you became acquainted with the demonic winged creatures of An'bael. Having defeated them, jump onto the ledge of the hall from the back side and exit through the grate. There you will take the sacred hammer and can leave the cave. Descend down the gorge from the snow-capped mountains to the level of green vegetation, where you again dive into the passage in the rock. After running through it without fighting anyone, you will finally run out of the dungeons. You can safely ignore the request of the peasant you met at the exit from the dungeons for a punitive operation against the living dead.
Torniara
Go to the reddish glow of a high city tower, visible in the north of this area near the sea coast. Having reached the fortress, you will meet your old friend Horn at its gates. He will advise you to talk with Diego about the best way to get into the castle. Diego himself is now somewhere in the port. Ningal will show you the way there, hanging out in the western part of the market square right next to the stairs leading to the slums. He will ask you to open a passage closed with a magical seal. This can be done with the help of special scrolls located in the possession of two dead comrades of the magician. Go down the stairs into the slums and look for the corpses of Ningal's assistants in two opposite parts of this quarter. Take the scrolls from them and defeat them on the obelisks in the same area. The barrier will deactivate and you will be able to brag about it to Ningaloo. We receive from him the key to the gate on the market square and go through it to the port. After talking with Diego there, you will learn that now you need to get to his estate, located further down the street and ask Lester about possible ways to enter the castle. It turns out that three local scientific minds have come up with different ways to penetrate the fortress, and how you get there depends on your choice. I suggest you choose the option of Daranis, who offers to move to the castle using the teleportation circle located right in the courtyard of Diego’s estate. To do this, you need to bring the magician the rune of obedience, which his tame golem should have delivered long ago. Go outside through the door of the house next to Daranis and go north from Diego's estate to the officials' quarter. Alas, the golem has completely gone crazy, so we will have to eliminate it and bring Daranis the rune from his cold corpse. After this, you can use the teleport for its intended purpose and be transported directly to the fortress of Robar III. Having met Zira there, you will learn from her that Lord Hagen went to storm the bastion of the traitor Drurkhang and has not yet returned. I hope the hint is clear? Leave the castle and follow the road to the right, that is, to the east. This way you will reach the round Colosseum and not far from it you will see the entrance to the prison casemates. Having freed the prisoner there and taken Ivy’s bracelet out of the chest along with the key to the cell, you understand that it was Drurhang who was responsible for the destruction of your home village. Having freed the captive Muldoon, you receive the key to the dungeon under the Colosseum, where Diego and Hagen are waiting for you. Get out of these casemates on the other side and go into the ditch under the arena and meet your friends there. It turns out that they were poisoned to make it easier for Drurhang to win in the arena. But if you try on the armor, you will probably be able to defeat the traitor. Do this when you enter the arena. In it, you will have to briefly pretend to be Russell Crowe, fighting not only Drurhang, but also 14 of his officers. After a difficult victory, a ghost named Xardas will speak to you. He will tell you that with the help of an ancient relic hidden in the grave of Lord Dominic, you can clear the mind of Robar III. This grave is located to the west of the arena, if you move straight along the rocks. Once inside, dodge the fireballs and pull the lever that opens the passage to the crypt. There are several sarcophagi with knights in it, and again fireballs are flying. Having dealt with the first and avoiding the second, take the relic from the central coffin and take it to the throne room of King Robar's castle. There you will receive a new assignment - to deal with the cultists of Beliar who captured the temple of Innos. Teleport to Diego's estate, and from there go down into the sewers, where you will talk with Daranis. Run forward and you will reach a barrier that other magicians will open for you. All that's left to do is to destroy 16 cultists along the way. The last 6 people will have to be destroyed in the main hall of the temple. Once you complete the task, the external barriers will fall and your friends will be able to come inside. They will also offer you several ways to remove the internal barrier that prevents you from taking the amulet. I suggest you choose the method of the magician Ningal, which consists of killing the five winged An’bael demons hanging around the city. You should look for them in the port, city slums, in the temple quarter and in the rich area of the city. After dealing with them, take the hearts to Ningal and you can pick up the amulet from the pedestal. The ghost of Xardas will appear again and tell us that for the amulet you found to work successfully, it needs an appropriate setting. He has already found it and can’t wait for us to visit his tower. Head north from the temple and make your way through the cemetery, fighting off its rampaging residents until you meet the Gorn. Go down into the dungeon and exit at the lighthouse itself. Having dealt with the demon at its foot, go to the top of the lighthouse and teleport from there to the tower to Xardas.
Final fight
After talking with him, examine the contents of numerous chests in the old man’s tower and go down into the next cave. After going through a very long dungeon and defeating numerous opponents, you will emerge into the light of day. Climb along familiar paths to the monastery, destroying everything on your way that shows signs of movement. Before entering the monastery, one of the three Kseshi demons will be waiting for you, with whom you must deal with without fail. In the courtyard of the monastery itself, we deal with two more demons and talk with the abbots of the temple. Climb onto the wall where one of the demons was, and from there jump down into the gap in the floor. After running through the last tunnel, you will meet the main villain of this game.
The fight with Xesha does not look like an impossible task, but it requires a certain technique. When she descends to the center of the hall, systematically chop her down with your sword (or whatever you have in your hands). Once she teleports behind the magical barriers, dodge the fireballs and fight off the servants she summons. Also, do not stay in one position for a long time, because from time to time stone spikes will jump out of the floor, causing very serious harm to the hero’s health (a couple of seconds before they appear, a glow will be visible on the floor). By following these simple recommendations, you will cope with it without any problems and complete the game.
Prologue
You find yourself on the throne in the body of King Robar III. You have to overcome a small dungeon filled with restless undead. Use the sword for its intended purpose, and after the dungeon, meet the main character of the fourth part. By the way, completing the fourth “Gothic” will take you at most twenty hours - you won’t have to fall out of reality for a long time.
Feshir
After Feshir
Steward
Enter through the main gate and stomp towards the large tower guarded by the Horn. He will say that your friend Diego is now in prison - he is accused of murdering the baron's assistant. Go down to the prison and talk to the guard, who will arrange a meeting with Diego. Diego will tell you that the only way to acquit him is to find a man named Mermund, the very same assistant of the baron who has disappeared somewhere. First, talk to Winstan, who is wandering around the western part of the city. He will tell you that he is acting in concert with the rebels, who hid the baron's assistant in one of the caves behind the castle. To find out the location of the camp, beat Winstan and, having found out the coordinates, go to the catacombs, which are located in the northeast of the barony territory. The rebels will be waiting for you near Ogtara's farm, where the entrance to their cave is located. Beat them, and in the catacombs themselves, get ready for fierce resistance. After passing the hall filled with beds, you will come across a local torture master who needs to be knocked to the floor. After you deal with him, free Mermund. He will immediately tell you about the lost secret documents, for the disappearance of which the baron will make him what the rebels wanted to do. Finding the papers is not difficult - go to the cave next to the farm. Take the documents from the rebel leader, and then take them to the castle to Baron Renwick. He will give you a pass to the Valley of Blood and one of three armor to choose from. Go to the gate to the valley. Show the guards the order, after which you can calmly go through the gate.
Valley of Blood
Tuushu
At the entrance to the settlement you will be greeted by Commandant Leboras. He wants to understand if you are as useful as you were described and what you can do for his town. To prove your loyalty, you will have to destroy several nests of toad lizards that have bred in the swamps south of the city. Having dealt with the clutches of eggs and the lizards themselves, go back and talk to the commandant. Leboras will consider you a useful person and will allow you to stay in the city. Now you can chat with the locals - first of all, with the sorceress Gelana. It can be found inside the tree by going up some small slopes. She will not allow you to talk with Merdarion, the local master of magic, but will send you to the magician Vultus so that you stop his extremely loud experiments. Go down the tunnel to the roots of the tree and chat with the pyrotechnic magician. He, besides promising not to blow up anything else, will half-whisper you to not deal with Gelana - they say, she will not lead you to any master. We will look at the Vultus version. To begin with, the idiot magician will ask you to find his straw hat, which he lost in the ruins southwest of the city. The entrance to them is visible from afar - you won’t miss the crowd of monsters and torches. Inside the ruins, orcs and other vile creatures await you and must be killed. Take the hat and take it to the magician. The delighted wizard will ask you to change the weather to dry out his laboratory. To do this, you will have to find an ancient statue in the ruins south of the city. Feel free to run into the dungeon, in one of the halls of which you will find a sealed door. The key to it is in a chest in the room with two stone golems. Unlock the door, take the piece of the statue and go back to the pedestal. Talk to Zira, and then stand up for your rights to turn on the sunny weather. After this, inform the statue of your request, and it will do everything. Talk to Vultus, then to Gelana and, having received a special seal, go up the stairs. Find Clamus in the library - he will let you through to Merdarion. From him you will learn that the magician you need is called Ikarius. You can find out where he lives from Clamus, who will give you the key to Ikarius’s home. It is located in a small area between the library and the sanctuary. In the house you will come across a corpse. You urgently need to find a magician’s partner named Lester. Look for his swamp hut. True, in it you will not meet Lester, but his friend Milten. As it turns out, Lester was kidnapped, and you and Milten will have to find him. Go to the next cave, which is located on the seashore. Inside it you will free the captive magician, simultaneously cuffing the orcs and their minions. Lester will tell you that the statue in this room will open the way further. After activating it, walk along the long bridge and go up to the entrance to the monastery.
Road to the ancient temple
From the monk Rundor you will learn that getting an audience with the fathers of the monastery is not an easy matter. You need to pass two tests. The first is to defeat two golems that are wandering around the monastery courtyard like restless ones. After beating them, return to Rundor and threaten him with serious injuries. After this, he will admit you to the council of the monastery, which is located in the largest building. They will tell you that the required temple is located far to the north of the monastery. To get to it, you will have to go through the jungle. Well, follow the road north. First you pass a black gorge, and then you have a long trek through the jungle to the ruins where the madman stands next to. Go down into the dungeons under the ruins to reach a stone pass on the other side of the caves. Make your way through the pass to the temple.
Soon you will reach the sea coast. Walk along the beach, fending off attacks from sea warriors along the way. After passing the coast, you will meet a man named Thor, who will tell you that a dangerous troll is wandering around the area. Please note that while the troll is alive, the gates of the desired castle are tightly closed, do not even think about trying to open them. Instead, follow the rocks to the southwest. There you will meet the green-skinned one. After killing the troll, immediately run to the cave where you notice the spy. Agree with him and then choose the tunnel. In the fire one (which we chose), you will have to dodge fireballs. After activating the switch, run back and fight with your former ally. The situation is complicated by the fact that the spy has called golems to help him. If you can quickly deal with the treacherous spy, you can simply run to the temple - the golems will not catch up with you. Now you will have to go to the temple through a dungeon inhabited by all sorts of creatures. After you kill the queen of local overgrown worms, go into the fresh air. Walk along the trail. You will see a cave with golems, inside of which a corridor with fireballs and a crowd of enemies acting as if at the same time awaits you. Don't be afraid to branch out. One of them contains a chest with a key to the door at the end of the corridor. Through the door, you will find yourself next to the ice dome in the center of the temple and will become closely acquainted with the an'baels - winged demon-like creatures. Having defeated them, jump onto the ledge of the hall and exit through the grate. Take the sacred hammer and leave the cave. Descend down the gorge from the snow-capped mountains. Another, albeit completely empty, cave awaits you. After running out of the dungeon, move towards Torniara.
Torniara and the end of the game
Follow the glow coming from the high city tower, which can be seen in the north near the sea coast. Having reached the fortress, you will meet with Gorn, who will recommend that you talk with Diego about getting into the castle. Diego himself is somewhere in the port. Ningal can tell you the way there. You will meet him near the transition to the slums, at the market. He will ask you to open a passage closed by a magical seal. To do this, you need to find special magic scrolls that lie on the corpses of Ningal's assistants. Go down the stairs into the slums and find the bodies you are looking for in two dead ends of this dirty quarter. Pick up the scrolls from them and use them on the obelisk that sticks out right there, nearby. The barrier is removed. Go and report this to the magician, who will give you the key to the gate on the market square that leads to the port area. After talking with Diego, you will learn that you now need to get to his estate. There you will understand how to get into the castle. At the estate, find and talk to Daranis, who suggests using the teleportation circle in the courtyard to penetrate. You need to bring the magician the rune of obedience, which his golem was supposed to deliver. Go outside and run north to the officials' quarter. The enraged golem will have to be destroyed. Take the rune from his remains and take it to Daranis. After this, you can be transported straight to the citadel to Robar III. Having met Zira in the fortress, talk to her to find out that Lord Hagen went to storm the fortress of a rebel named Drurkhang and - what a pity - has not yet returned. Leave the castle and head east. Go to the Colosseum and find the entrance to the prison. After freeing the prisoner there, take the bracelet from the chest that you gave to Ivy. As it turns out, it was Drurhang who was responsible for the destruction of your home village. After rescuing Muldoon, you will find yourself in a dungeon under the Colosseum, where Diego and Hagen are waiting for you. They were poisoned to make it easier for Drurhang to win in the arena. Enter the arena and get ready for hot Hollywood action. You will have to fight Drurkhang and his fifteen officers. After winning, the ghost of Xardas will suddenly speak to you. He will tell you that with the help of an ancient relic from an equally ancient crypt, you can make Robar III sane again. The crypt is located west of the arena. But first, a traditional corridor with fireballs awaits you, and at the end there is a lever that will open the path directly to the tomb, where again... fireballs fly. Take the relic from the central coffin and drag it to Robar. You will be tasked with destroying members of the Beliar cult who occupied the Temple of Innos. Teleport to Diego's estate, and from there go down into the sewers. Run forward until you reach a barrier that other magicians will open. There are sixteen cultists in the temple (six of them are in the central hall). After dealing with them, the external barriers will fall, and your comrades will be able to enter the temple. They will help you remove the barrier that prevents you from picking up the amulet. You will have to destroy five an'bael class demons that are wandering around the city. The locations of the creatures are as follows: in the port, in the city slums, in the temple quarter and in the rich area of the city. Having dealt with the problem, take the demon hearts and take them to the magicians, then take the amulet and talk to the newly appeared ghost of Xardas. He will tell you that the amulet needs a frame that matches its strength. He has already found her and now calls you to his tower. Go north from the Temple, go through the cemetery. At the end you will meet Gorn. Go down with him into the dungeon at the very foot of the lighthouse. There will be demons waiting for you near the entrance - deal with them. After this, climb to the top of the lighthouse and go to Xardas through the portal. After talking with Xardas, we advise you to thoroughly loot his tower. Then go down into another, this time a very, very long dungeon with crowds of enemies. Come out into the light and drag yourself to a familiar monastery, subjecting to genocide everything that shows aggression towards you. Before entering the monastery, one of the three powerful Xeshi demons will be waiting for you. You need to take him down quickly and decisively before he takes you down. There will be a couple more creatures in the courtyard - kill them, and then talk to the abbot of the monastery. After the conversation, climb onto the wall where one of the demons was and jump into the gap. After passing through a short tunnel, you will meet the final boss of the game. The fight with Ksesha is still a pleasure. When she lands on the floor of the hall, hit her in close combat. When she flies behind the magical barrier, get out of the fireball line of fire as quickly as possible, and at the same time crumble everything she summons during timeouts into the salad. By fighting this way, you will easily defeat the demon and will be rewarded with the final cutscene.
So, Arkania, a game that the developers of Joe Wood promised not to name, but still could not resist the temptation and added Gothic 4 to the title - PASSED (now by me)!
For some time I sat quietly and looked at the credits endlessly floating upward between the two faces of the two-headed goddess, listening to the music, which, by the way, turned out to be at a completely acceptable level. Then, parallel to the credits, thoughts and impressions began to float in my head...
At the beginning, it took me some time to get used to controlling the hero, however, for this purpose there were all those small tasks that had to be completed on Fesher (the first island) in order to talk dad Ivy, the GG girl (as it turned out, had already gotten knocked up by the Shepherd), to wedding with her.
What I didn’t like was the impossibility, as in Dragon Age, for example, of using the mouse roller to zoom in and out of the picture during a battle. As soon as you pull out the sword, it’s on you, the camera hovers over the stage, and you can’t see the terrible face of the one you’re beating (or you...).
Some of the things I liked were somersaults to avoid being hit, good blocks (let us still remember, Joe, Forsaken Gods with their bugs!). But the yellow illumination of the sword for performing combo attacks disappears so quickly that you simply don’t have time to react, which is why stupid calling begins instead of a beautiful fight (in The Witcher this move is presented much better). But, in general, I liked the melee system.
As for ranged weapons. When shooting with a bow (probably until you have leveled it up enough), the sight constantly floats, and from a distance it is difficult to shoot an arrow into a target (especially into a head with a match head, as the developers advise us). In addition, the sight itself is gray, in most cases, it simply blends into the background, so you have to strain your eyesight quite a lot (remember Oblivion, where the crosshair of the sight was yellow, visible, especially in the darkness of caves). I didn't upgrade my shooting because... I played as a heavily armed knight with a two-handed weapon, which I made my GG during the game, and he needed talents other than an archer. When shooting from a crossbow, the sight does not wobble, it loads faster than the bowstring of an incompetent person is pulled, and therefore it was preferred (only bolts were found in chests much less often than arrows). The choice of weapons in the game is rich, and it is also possible to create your own by studying scrolls with recipes - and this without tedious
washing
Blacksmithing!
Yes, in fact, what is proudly called an RPG suffers greatly. This mode can be completely disabled (there is such a function in the settings). And what for is it necessary to lie in bed if there is no restoration of strength, etc., as was the case in previous parts, stirring the brew in the cauldron - if all kinds of stews are not created, sitting on a stool and other unnecessary actions for unknown reasons. On your way, comrades! So, there is more of an action here, of course (the character is in many ways similar in features to the Prince of Persia), mixed with an RPG.
There are strange goodies in the form of artifacts that you need to look for wherever you can. These are forgotten graves (a super-powerful ice rune that is assembled from 30 (!) pieces). This is a Beliar artifact for creating the Reaper of Hatred (some kind of knife of wondrous power) - also 30 pieces. And the joke of Lord Dominic, who, being in a good mood, scattered 30 statues of Innos throughout the cities and towns (again) - whoever collects the first will receive a blessing on his head from the mentioned god. By the end of the game, I had the most statues of this very Innos. As many as 25. To be honest, I broke my eyesight while searching. But I never found the blessing. He's not 25, yeah...
A little about weapons:
First there were pitchforks... And the pitchforks were two-handed. And that was good.
Afterwards, on the way to the witch through the Dark Forest (a task from Diego, which, in fact, saves the GG from certain death on his native island), in one cave I found the club of the orc Orruk (Shame of Orruk - two-handed)
HOW I PASSED ARCANY (short review)
 HOW I PASSED ARCANY (short review)
This was even better. Having replaced a couple of insignificant knives, he took away the fire club of the Master from the invader who came from Myrtana (on the islands the orcs are kind, they hardly eat the local population and live peacefully in the caves).
HOW I PASSED ARCANY (short review)
 HOW I PASSED ARCANY (short review)
And then until the very end of the game, from about halfway through, I went with the Bloody Reaper - a two-handed weapon that gives 20% of the life taken from enemies to the wearer, thereby restoring the red stripe. Its damage is 40 (I don’t remember where I found it..).
HOW I PASSED ARCANY (short review)
 HOW I PASSED ARCANY (short review)
HOW I PASSED ARCANY (short review)
 HOW I PASSED ARCANY (short review)
However, it was not possible to come to an agreement with Ksesha with the help of him - she also plays with lightning,
HOW I PASSED ARCANY (short review)
 HOW I PASSED ARCANY (short review)
And he brings out his assistant golems-skeleton-magicians, and stone roots grow from under the ground, which the Shepherdess tickles under the armpits, and she herself causes an earthquake (probably it’s best to jump and hover, because in any case my GG fell to the ground and lost a lot of life). I had to take a more powerful saber - the Reforged Ancient Sword (it gives +15 to health and increases magic, but the latter is of no use to us, we are proud knights who don’t do magic tricks). He shot 60 points at a time, two-handed, and things started to get more fun.
HOW I PASSED ARCANY (short review)
 HOW I PASSED ARCANY (short review)
By the way, I advise everyone to stock up on vials of iodine (i.e., jars with red health +350) - it will be useful.
Armor: All sorts of different beautiful jackets - starting from the vest that Diega gave from the master's shoulder, and ending with the Myrtani rune cuirass, which gives 280 protection + enhancements
HOW I PASSED ARCANY (short review)
 HOW I PASSED ARCANY (short review)
HOW I PASSED ARCANY (short review)
 HOW I PASSED ARCANY (short review)
Magic. It is divided into three main types: fire, lightning and ice.
HOW I PASSED ARCANY (short review)
 HOW I PASSED ARCANY (short review)
You can pump up one of them or all of them at once (some creatures may be immune to one or another type of spell). By the way, on the box with the game disc, in the annotation, it is written: “spells have appeared that allow you to turn day into night and vice versa.” I've never seen anything like this in a game. Here is Gothic 3 - yes, it was... Yes, it is not needed here - and without that, day and night they flash like cards in a hand. Only a magician needs magic. Those who play as an archer (medium armor) or a knight (heavy armor) do not need magic in principle - scrolls are enough, of which there are many in chests and for sale.
In addition, in the same annotation it is said: “it has become possible to ride animals” - along the way, the annotators confused the toy Arcania with Oblivion (except that Diego the Shepherdess was dragging from Feshir to Steward on his hump!)
The graphics are quite decent, but at times the picture does not keep up with the events - it seems to think, and after a second - again! And in its place (for example, when you put on new armor, or finish a conversation with a character - how many times did terrible visions of a leather-covered skull flash, on which eyes, a nose, wrinkles, a helmet, etc. a moment later grew). But, in general, it is tolerable. In my opinion, the times of day pass too quickly - I ran through the gorge - and now it’s night outside. The sun has just begun to shine, and here comes the rain, which may stop immediately. (By the way, about the rain - for some reason it overtook me even in the cave of Xardas, which will be discussed below!!!)
Regarding everything else: several times, nevertheless, during the passage of the game, it was thrown into the system. A couple of times it even tore out of the game so rudely that my poor computer had to strain to reboot. Once the game froze tightly - in the end: seven troubles, one reset!By the way, there were several glitches in the already mentioned cave of Grandfather Xardas.
A couple of times there, the GG even fell into “some kind of nowhere” (AK), covered with a pink veil, through which, like through a placenta bubble, the sun broke through.
HOW I PASSED ARCANY (short review)
 HOW I PASSED ARCANY (short review)
About Xardas. I was tormented by vague doubts about the need for this character in the 4th part of the um... “trilogy”. After all, despite the clumsy translation of some personalities on some sites, still GG at the very beginning of Forsaken Gods (our dear Nameless One, who later became, as we know, Robar III) stabbed a black sorcerer in the Unknown Lands (and it was not Xardas who defeated him and threw him out, as the clumsy translators wrote...), where they fled at the end of Gothic 3 with the symbols of the power of Innos and Beliar (with the symbols of Adanos, we remember, the Nameless One melted Nordmar's stove). And now the necromancer suddenly comes to life...
HOW I PASSED ARCANY (short review)
 HOW I PASSED ARCANY (short review)
Moreover, not without irony, in a conversation with Shepherd (for simplicity, we’ll call it GG Gothic 4) he mentions that, yes, he was familiar with the current Robar Sh. They say that he somehow stabbed him in the stomach when some disagreements arose . Xardas modestly keeps silent about how he escaped. The appearance of a necromancer in the game is the Ghost.
HOW I PASSED ARCANY (short review)
 HOW I PASSED ARCANY (short review)
As the necromancer called this outrage - astral projection (a 3D hologram with built-in stereo sound, in our opinion!). At first it is impossible to even get close to him in the gorge - he evaporates after blinking a little. Then we meet him at the lighthouse, then on the way to the Arena, and soon he begins to rinse the brains of the young widower shepherd in the Arena (who by this time had already killed as many evil spirits and bad people as the veteran paladin Innos could not even dream of. And I bought a bunch of pretty good armor complete with a brain pot (helmet).
The history of Gothic is interesting in itself. Starting as the debut project of a small studio, it took off, acquired a publisher and fans... and then fell victim to marketing and ambition. The third part was the swan song of the series as we knew it. And in the fourth, a lot has changed, starting with the developer...
Heroes of new times
The sky is smoking, the stars are exploding,
He sees the fallen Rome, his spirit rejoices,
Both Rurik and Attila drink with him for brotherhood -
He is at the center of all eras, the frantic shepherd!
Timur Shaov, “The Dreamy Shepherd”
The nameless hero from past games became King Robar the Third. He united most of the lands, but at some point he lost his mind and went to war in the southern lands, which is difficult to explain. Robar's paladins, contrary to their duty, sow not light and faith, but fire and death. City-states fall one after another under the onslaught of the army of the former Nameless...
Meanwhile, on the small island of Feshir, a local shepherd is tormented by nightmares. Or rather, it’s not that they’re torturing him, he’s just dreaming that he himself is a king, in his hands is a flaming sword, his eyes are clouded, and someone’s voice is speaking in his head.. In the role of a king, the shepherd does not bask in the chambers, surrounded servants, dishes and odalisques, which would be much more logical, but destroys skeletons and demons. The guy is torn from his heroic dreams by a girl of an overly peasant appearance, who turns out to be... his bride and daughter of the village head.
After looking at her, I just want to convict the shepherd-dreamer of self-interest and the desire to make his way to power in a roundabout way through the altar. But it soon turns out that our hero really loves his Ivy, he just has a little strange tastes...
By the way, why are we all “hero” and “shepherd”? Everything is very simple - the character, as usual, has no name. And throughout the game he will be called nothing more than “Hey, adventurer!” Well, we are no strangers to this. And the story itself is not new. Except that today the world is threatened not by Beliar, but by a follower of the mysterious Goddess.
Puppet show
Faces are erased, colors are dull -
Either people or dolls,
A look is like a look, and a shadow is like a shadow.
And I'm tired and, resting,
I invite you to the booth,
Where dolls look so much like people.
group “Time Machine”, “Puppets”
The world of the game remained the same and at the same time changed beyond recognition. The publishers did not hide their orientation towards the North American market and their desire to follow the traditions accepted there. The main idea was to simplify everything that can be simplified.
The living world fell first victim. After all, looking around the city for a blacksmith, who is such a bastard! - I went after work to take a sip of mead, it was very expensive. From now on, all merchants and story characters stand only where they are required by duty. Has it become more convenient? Perhaps. But the atmosphere has already sagged.
The dialogues boast a cinematic quality. That is, the camera selects good angles and, with a couple of exceptions, copes with its role. But the actors in this movie are good for nothing. The men stand in a column. Women defiantly shake their hips (one would like to exclaim after the secretary Verochka from “Office Romance”: “Where did you get this vulgarity?!”) and only occasionally demonstrate, and often inappropriately, some gesture, of which there are hardly any ten. The dialogues are voiced, but that doesn't make it any easier. Facial expressions and articulation do not correspond at all to what is being said.
But the main problem is that the characters the same. There are only three or four male models and a couple of female models in the game. False mustaches and beards, like tattoos and hats, will not save you from this - a feeling of déjà vu will follow you everywhere. Only the main character, several key characters and old acquaintances from previous parts can boast of a unique appearance.
Alas, the inhabitants of Arkania are completely impersonal. And the main character himself is unconvincing. He tries to be funny (in some places even successfully), but everything else in his performance - from righteous anger to declarations of love - looks terribly forced. Most of all, our shepherd resembles an ordinary ram, which doomedly wanders wherever it is shown, only occasionally kicking and trying to butt.
And the battle begins again
Plan? Why do I need a plan? I have an axe!
The new developers definitely did better in combat than the previous ones. First of all, you will no longer be able to “click” your opponents with the mouse. They have a lot of health, they usually attack in a group and bite painfully. In addition, most of them are trained in ranged attacks.
At our disposal are bladed weapons, bows and crossbows, and a meager set of spells. In close combat, we can not only block blows as before (blocks are no longer as effective, opponents easily break through them and do not hesitate to come from behind), but also somersault in all four directions. Constant somersaults are the best salvation from claws, fangs, swords, fireballs, stingers, arrows... whatever. Life is in motion. But, on the other hand, this means that other methods of movement are practically not in demand. If in Morrowind everyone always moved by jumping, then here you will find continuous somersaults.
There have also been more attacking techniques. You can hit weakly or hold down the hit button and hit harder. Initially, the hero can perform simple combinations of four hits in a row, but gradually this number will increase and it will even be possible to carry out entire series - if you click the mouse in time at the moment when the weapon lights up yellow. There are quite a lot of combinations of different techniques, and there are also quite a few types of enemies, so the battles are quite varied and don’t get boring quickly.
|
I run home, and dinner is running after me and at the same time frying. |
Bows and crossbows are a little more difficult to handle. The first ones have to be pulled for some time - the longer you hold the button, the more damage you will cause. The second ones are reloaded after each shot, and while this is happening, the hero cannot tumble. There are usually plenty of arrows for a bow, but crossbow bolts are a real shortage. Even less common are special projectiles with special properties - for example, special vampiric arrows that pump the enemy's health into the arrow. Keep in mind that a headshot does much more damage, so accuracy is encouraged here.
Unfortunately, small arms significantly disrupt the game balance. And although the “woodpecker” technique, proven over the years, does not work here - if you climb a tree, the enemy will trample below for a while and then move away, ignoring shots in the back - a new method has appeared. Enemies are completely incapable of running attacks; They need to stop and swing before they can strike, and almost any of them can be hit with arrows while backing away. The only exceptions were some animals with a ramming attack (for example, wild boars), which you have to dodge by somersaulting. And the method is not applicable against enemy shooters - opponents are amazingly accurate, they even rely on anticipation, and you may simply not have enough health for a long firefight.
But the easiest way to win without making much effort is magic. The hero has only three spells available, but each of them can be improved and modified.
Fire deals the greatest damage, although spread over time. Over time, the hero can learn to accumulate energy and hit areas. Most often, fire is used against a large crowd of weak enemies who are desperately too lazy to beat one by one, becoming a formidable force only with maximum development. Just constantly somersault and shower your adversaries with flames.
If the enemies are too fast, or too fat, or there are too many shooters or sorcerers among them, magic will come to the rescue ice. It deals a lot of damage at once and slows down target. And with an enemy who has lost mobility, you can do whatever you want - run away and restore mana, shoot in the head, or carry out a series of blows. Any attack removes the slowdown, but the spell can be repeated immediately. In addition, frostbitten enemies miss more often.
As you delve deeper into the jungle of ice magic, enemies can be frozen for a longer period - up to the point of removing one of them from the battle by turning into an ice statue.
And finally, the greatest headache for your enemies is lightning. It consumes the least mana, deals decent damage and completely disables hit enemy for a few seconds. What can you do in these moments? Say, hit with an ax or shoot an arrow in the forehead, and at the same time have time to restore the expended mana and immediately hit again. And further. And further. And further. Until the enemy dies without ever moving.
The spell doesn’t care at all whether your target is a giant wasp, an orc or a troll; at least the main villain is immune to the stun effect. At the end of the game, when the mana bar fills up like a pot of porridge, you will be able to hit two people at once with this technique. As the spell develops, the lightning will begin to strike several enemies at once (although this requires too much mana, it will not have time to recover) and even instantly kill those who have less than a third of their health left.
This is where the magic ends. Transformations into different creatures, levitation, and even more so the once declared weather changes, alas and ah, are not with us.
Between two chairs
If you chase two hares, you will run far.
Unfortunately, by the end of the game even the fights become boring. The hero becomes too strong, the environment ceases to be diverse, and the depth in the game never increases. But at least consistency and logic are beginning to appear in the events taking place.
Most dungeons do not need to be run in both directions; as a rule, the exit is not far from the entrance. The developers tried their best to please two audiences at once. And to the loyal fans of the series, and to the “new blood” that should join it. It turned out, as usual, mediocre.
Arcania is the first role-playing game that requires role-playing to be done independently. For example, initially we can produce potions, food and weapons anywhere - even in an open field, even in a dense forest. But at the same time, the game has quite an entourage forges - with a smelter, an anvil, a bucket of water and a grindstone. But initially you can’t use all this - first you need to enable the required option in the menu!
And even after this, the sequential process of smelting and forging will remain purely decorative. Why heat the workpiece, give it the shape of a sword, cool it and sharpen it, if exactly the same thing is done with one button anywhere in space.
If you want to fry food over a fire, please! Making potions with alchemists is easy. But the meaninglessness of these actions quickly reduces the pleasure to nothing. If the menu included not only opportunity use beds, cauldrons and anvils, but also necessity- the world would sparkle with completely different colors. But when a frail magician with a cart of coal and iron in his pocket suddenly creates a huge two-handed weapon right out of thin air and rushes to attack the surprised monsters, the atmosphere completely evaporates. Yes, it has become much more convenient to play, but at what cost?
And this despite the fact that outwardly the game is simply magnificent - at least something is valued equally in both camps! Excellent light, clear shadows, streams of water flowing over all surfaces during the rain, trees swaying in the wind, cute houses, authentic cities and simply enchanting landscapes! There are not many shortcomings - unimportant textures where you can’t reach, faded skies and not the best optimization. The sounds of the world are not far behind. If you can afford multi-channel acoustics, Arcania will take full advantage of it. The clanging of teeth from the bushes will warn you of danger, and the roar behind will add to the sensation. The roar of a waterfall, the sound of the wind, the splash of waves, the grunt of a boar - all this allows you to get used to the world... until you meet the next settlement of clones.
As sad as it may be, “Arcania” is a logical continuation of the long-suffering series. It contains successful discoveries, but many more ruined old ideas. Having for once bypassed the rake of bugs and almost avoided the imbalance, the developers stepped on new ones - the need to make one game for different people. It is clear from everything that they tried very hard, and something even worked out. And they definitely have potential. All that remains is to decide what they want - to go out to the masses with another action role-playing game or to make a role-playing game for a much smaller but devoted group of fans and sympathizers. Will “Gothic” itself survive until then?..
Role system
Our hero has nine main parameters: health, mana, stamina, their recovery speed, as well as melee combat, shooting and magic.
On a note: health and mana recovery speed numbers show how many units they will be replenished in thirty seconds.
With each level gained, we receive a small increase in these parameters, as well as three points that can be distributed among skill branches. There are only eight of them. Each has several passive (permanent) and active (requires the use of stamina or mana) skills. In addition, each point invested in a skill raises two basic parameters, specific for each of the branches (indicated in parentheses).
Durability(melee combat and stamina recovery). A branch for warriors, and it is aimed at increasing damage from melee weapons. If you are not going to constantly swing some kind of piece of iron, you don’t need it. Only those who constantly spend stamina should develop it to the end.
At the first level, passive becomes available fast attack, which allows you to quickly jump up to the enemy in order to hit him properly.
On the fifth - a strong beat . By holding down the attack button, you can, after spending a little stamina, accumulate the strength of the brave, inflict additional damage and break through the enemy’s block. True, all this time you will be bitten, beaten and offended, so it is better to either prepare powerful blows in advance while the enemies are still running, or use them in one-on-one battles.
Discipline(health and melee). This branch is also focused on warriors or multiclasses. Allows you to quickly deplete your stamina bar, causing great damage.
The first level brings series . Now after each hit your weapon will glow yellow for a while. If you press the attack key at the same time, the hero will deal several additional blows, which will cost stamina.
At the fourth level there will be hail of blows , allowing you to hit six times in a row.
On the seventh you get improved series , which allows you to carry out two series in a row.
Whirlwind of blows at ten, it allows you to hit as many times in a row as you like and brings back the tactic of “snapping” enemies into the game. But beware of groups of opponents and powerful retaliatory attacks, which are accompanied by a characteristic green glow.
Finally, at the thirteenth level, it becomes available to us expert series , which increases the number of series to three in a row, which, combined with the previous skill, allows you to mince any enemies.
Power(health and stamina). It is unique in that it contains only one skill, and even then at the first level. There is essentially no point in raising it further. But the skill itself will be very useful for warriors - knockback blow does not cause damage to the enemy, but takes him out of the battle for a while, allowing him to take care of his comrades. Executed from a block.
Accuracy(shooting and mana). It also does not have a final skill and ends with a useless “tail”. Unlocks a small group of shooting skills and is useful to everyone, especially at first. Arrows deal good damage and make it much safer to kill your opponents. But you should learn to hit your enemies in the head, otherwise each kill will take too many arrows and time.
On a note: arrows fly in a parabola, gradually descending - take this into account. When the enemy is already close, the sight shamelessly suggests the result of the shot: if it turns white, it means you will hit the target, and if it turns red, a headshot is expected.
At the first level you get Eagle Eye and you can use the zoom button (by default Z) to zoom in on the image while aiming.
The fourth level will bring a firm hand , which will cause the crosshair to stop floating back and forth.
On the eighth level awaits you deadly accuracy , increasing headshot damage by an additional 30%. If a bow is your main weapon, it is definitely worth getting to it.
It is important: An inconspicuous number under the right side of the stamina bar shows the supply of small arms shells.
|
Today there will be fresh wild boar for dinner. |
Surveillance - the first skill in the branch becomes available only at level four and allows you to crouch and sneak. There is little meaning in this, but you can study it in memory of bygone orders and clean out chests not in front of the mindless owners, but quietly sneaking around. In a word, create the atmosphere yourself.
At the end of the branch, at the thirteenth level, awaits you ambush . It increases the damage of a shot against an enemy who cannot see you by 30%. The problem is that immediately after the shot he (and at the same time all his brothers) will still see you, so the benefit of the skill is zero. Spending an insane amount of points on a small damage increase for a single shot is absolutely pointless.
Zeal(magic and mana recovery). The first of the three magical skills allows you to hit enemies with the flames of Innos. Not very useful at first, but in the end it will incinerate enemies in small units.
Fire Strike - the first skill, which requires the fourth level, gives us the opportunity to throw a ball of fire at the enemy, which deals 60% damage immediately and another 10% for the next four seconds. But do not forget that burning enemies are still fast and dangerous, and the magic mantle is thin and the magician himself is very fragile. Therefore, you should set fire to enemies from afar, and move on to something else close up. Or run a lot, jump and somersault, trying not to get hit.
On the seventh level is all-consuming flame . With it, enemies burn half as much, but the damage from the spell increases by as much as 50%. That is, we do not deal 100% damage in four seconds, but 120% in two. Very, very useful.
Fire ball at level ten, it allows you to accumulate a charge by holding down the attack key. When fully charged, the spell deals double damage, but consumes three times as much mana. In this case, the damage is distributed over the area, but does not set enemies on fire. As a result, we deal 150% damage to all targets in the area for triple the cost. This makes very little sense.
Here's a passive skill fire from the thirteenth level, it just returns the fireball’s ability to ignite and sharply increases its effectiveness.
The final skill becomes available only at level sixteen. But inferno worth the points spent. Not only does it hit nearly three times as hard as a normal spell - albeit at a cost of three times as much mana - it hits a huge area and sets it on fire for a full ten seconds. All enemies caught in it will catch fire and take their 12.5% normal damage every second while they are on fire, and for another two seconds after they exit. As a result, usually stationary shooters will receive 365% (!) of normal damage in twelve seconds. Most of them won't survive this. This spell allows you to quickly and painlessly burn out enemies of average vitality. And for the healthier ones there is the following branch.
Clarity(mana and mana recovery). The branch with the most useful advantages for a magician, because it allows you to cast spells for a very, very long time, albeit not very strongly. In addition, Adanos' ice spells will be useful for all other classes.
On a note: The level restrictions for the skills of all three magic branches are the same (4, 7, 10, 13, 16), so we will not indicate them anymore.
Ice arrow hits a quarter weaker than a fire strike (without the all-consuming flame), costs the same, but deals damage immediately, rather than over time. Moreover, the spell three times slows down the target for a full ten seconds. Slowing down opens up endless tactical possibilities, reducing not only the speed of movement, but also the speed of attack. The first will save you from melee fighters, the second will make shooters and magicians shamelessly miss. At the same time, the magician can calmly run around the target, restoring mana, the fighter can quickly pump huge damage into a barely crawling target, and the archer can run away and fill it with arrows. And if necessary, you can simply run away.
It is important: any impact on a frozen enemy will remove this useful effect from him.
Penetrating cold Increases the freeze duration by half. Very useful, helps fight several opponents at once.
Frostbite Reduces the damage dealt to the target by half. Also very helpful in fighting a group of enemies.
Crystal Cage deals a third more damage for twice the mana cost and completely immobilizes the target for twelve seconds or until it is first hit. There is little point in this, since slowed down opponents are already practically harmless.
Final stasis hits two-thirds harder than a regular ice arrow (for double the mana cost) and completely removes the target from combat for twenty-three seconds, turning it into an invulnerable statue. It may be useful for multiclasses, but for pure magicians such joy is unnecessary - freezing the enemy with ordinary arrows is much more effective.
Domination(magic and mana). The followers of Beliar are stronger than all others in battle with small opponents, no matter how strong they are. But lightning in the later stages is very demanding on the mana reserve, so it is recommended to invest in the Adanos branch at the same time.
Lightning the cost is equal to two-thirds of an ice arrow and the damage is proportionate and reduced. But at the same time it stuns the target for four seconds. A stunned enemy can do nothing but stand and shake. During this time, you can have time to run away, shoot, hit, or cast the spell again. Moreover, the latter can be repeated endlessly, because the mana spent on lightning will have time to be restored in these seconds.
Torment Increases the damage a stunned enemy takes from your attacks by 30%. More useful for a warrior and archer than for a pure magician.
Chain lightning at maximum charge, it requires four times as much mana, deals only 80% damage, but can hit five enemies at once, stunning each one for four seconds. A wonderful escape tool.
Death blow Instantly kills enemies with less than a third of health (unless they are in the ranks of mini-bosses or bosses). In combination with inferno, it destroys everything and everyone.
Storm of torment hits with the force of a regular ice arrow, stands like chain lightning and hits everyone in a large area, simultaneously stunning. There is no particular point in it: it is better to destroy the crowd with the help of inferno, and for mass stunning, chain lightning is enough.
| Runes |
|
Runes in Arcania are small spells that require only the pebble itself to cast. After use, it does not disappear like a scroll, but “cools down” for some time. A recharged rune can be used again. In total, the game has four types of regular runes and one unique one. The first ones are found and bought from traders and have enhanced varieties. The latter is collected from the graves of magicians scattered throughout the world.
|
Fauna
There are two types of enemies in the game: humanoids and beasts. The first, like you, can be warriors, archers or magicians.
From the former you can expect blows in the forehead, from the latter - arrows in the side, and the latter rarely hit, but ignore armor. The tactics of dealing with them are quite obvious, which cannot be said about monsters - many of them require a special approach.
On a note: many animals are replaced over time by their improved varieties. For example, bloodflies become lake wasps, then dung wasps, and finally bone hornets. Their habits do not change, only their parameters grow.
Boars. Compared to what was in the last part, they have weakened considerably. They usually attack in threes and bite painfully. A special attack is a ram: the boar begins to push forward and, if it hits the hero, it will knock it to the ground. This is where his friends will feast on you. To avoid a ramming attack, just jump away in time.
It is important: all opponents, before a special, or simply powerful, attack, prepare for it for some time, do not move and glow green. Everyone except the wolves - for some reason they glow red. If you see such illumination, it’s better to somersault to the side. Away from fangs.
Field workers. Huge beetles. They attack with their paws and jaws, and, like wild boars, they can ram and knock down the hero. Most often they attack individually, but they still pose a danger due to their thick shell, which is very difficult to penetrate. Destroy them with magic or headshots.
Lizards. Most resemble monitor lizards. They run fast, bite painfully, and are very thick-skinned. They have a very unpleasant special attack - they open their mouths and pour acid on the hero for some time, causing colossal damage per second. Avoid this attack with all your might (running in circles works well) and keep hitting.
Claw grippers. Fast, strong and numerous. It is advisable to lure them out one at a time, hit them from afar and weaken them. If there are a lot of them and they have already caught up with you, do not hesitate to poke them in the nose with an ice arrow and give them a run for their money.
Fire lizard. It is similar to its swamp comrade, but instead of acid it spits fireballs, which cause enormous damage and set the hero on fire. Not so dangerous up close, so close the distance, dodging the spits, and hit him with whatever you can. A magician and an archer can fight remotely, you just need to dodge the fire in time.
Piedmont Creepers. Both workers and soldiers are in many ways similar to field soldiers: just as armored and strong in close combat. Their special attack also knocks you down. They prefer to attack in small groups, which are highly recommended to be separated. A very unpleasant opponent for a warrior; melee fighters should stock up on magic scrolls.
Golems. There are different types, but the essence is the same. Those nearby may pound their fists or shake the ground, knocking you off your feet. From afar, boulders are targeted and thrown, which also knock you down. Conclusion: dodge and hit from afar, after dealing with your retinue.
On a note: According to the description, fire golems are afraid of the cold and are difficult to penetrate with flame, while ice golems are the opposite. In fact, both of them are equally afraid of everything; they do not have any increases or penalties for elemental damage.
Troll. One of a kind. Powerful, smelly and hairy, a real man. He has a huge supply of health, a powerful blow and incomparable slowness. For archers and magicians - the best target and easy prey, for warriors - a source of headaches and an excellent acrobatics trainer.
For all its shortcomings, the fourth Gothic remained a game with a huge open world that is very interesting to explore. In the next issue we will return to it to reveal the location of the most interesting caches, find all the figurines of Innos, ancient relics, artifacts of Beliar and forgotten graves, as well as select the best equipment for warriors, archers and magicians.
1 2 All
A dynamic role-playing game - the third part of the epic Fable saga. Incredible spells and battles!
The Armored Princess is an exciting adventure of Princess Amelie.
Colossal space strategy. The star sword is waiting in the wings!
The second part of the classic strategy games. The balance of power is broken - the stars are waiting!
The expected real-time strategy game about the times of the Crusades.
Great Action with RPG elements. We recommend the unique world of the Zone to all Fallout fans!
The adventures of the Assassin in Renaissance Italy are a continuation of the cult Action.
An exciting first-person shooter. Who wants to shoot in the ruins of New York?
Post-apocalyptic shooter in the Moscow subway - meet Metro 2033! A new look at Moscow.
Helicopter simulator for controlling a modern Russian helicopter "Black Shark"
An exciting football simulator that allows you to plunge into the world of professional football.
Simulator of everyday life - meet people, chat, build a house and make a career in The Sims 3!
An exciting car simulator for lovers of speed and the roar of powerful engines. Put on your helmet and go!
Walkthrough of Gothic 4: Arcania
Prologue
At the beginning of the history of Arkania, civil wars break out again in Myrtana, and the king again has to unite the country, he brings peace to Nordmar and Varant. It occurs to the king to capture the southern islands. But during the journey, the king’s mind becomes increasingly clouded, and his generals have to take command.
Our adventures begin on the southern island of Feshir. The hero is a young shepherd who wants to marry the girl Ive. However, everything turns out to be not so simple...
Feshir.
First of all you will receive a quest Difficult conversation. Ive will give it to him. Just go with her to the village and talk to her father, he will tell you that in order for him to give you his blessing for the wedding, you must complete three of his instructions.
Gromar will give a task Melgan's grave. Farmer Knut stands on the bridge, blocking the passage to Melgan's tomb. Take from him an additional task - to destroy the mole rats that are too rampant in his fields. Go to the cave, killing mole rats along the way. Collect fat from them. Now go into the cave, go left to the end, there you will find Melgan’s grave, take the dagger from it, which you need to take to Gromar. Go back, do not forget to inform Knut that his request has been fulfilled.
The next task will be Smuggler in the forest. Gromar will give you the key to the gate that leads to the forest lake. Open the gate and follow the path up. A surprise awaits you at the crossroads - an old acquaintance of Diego. He is a smuggler and your mentor, albeit secretly. Talk to him, tell him about the test that Gromar gave you. Then you have a test fight with Diego. He will also ask you to go down to the beach and destroy the goblins near his boat. After completing the task, you will receive a machete from Diego. It must be taken to Gromar as evidence. He will give you one more task - to bring him three deer antlers. Quince will tell you that her bow is in the hunting lodge and will open the gate for you. Go inside, take a bow from the guardhouse and shoot the deer with it. Collect meat and horns from the bodies. Take the latter to Gromar.
You have passed the test. Gromar gives you his blessing and you receive the quest For Ivy. Gromar speaks about the bracelet, go to the blacksmith Halven. From him you will learn that Orruk has amber, which would make a wonderful bracelet for Ivy. Go to Orruk and talk to him. To your request to give you the amber, he will answer you with a counter request: bring him six blue toadstools from the cave in the deer clearing. He will give you the key, go to the clearing. Go through the cave, collect the required amount of mushrooms and go straight to the clearing. Give the toadstools to Orruk, he will give you amber. Take it to the blacksmith and take the bracelet.
Wanderlust. Return to your beloved, give her a bracelet and propose. She will talk about her pregnancy and express a desire to visit Argan. Diego will help you fulfill this request; his cave can be found behind the waterfall, above the forest lake. Run to him. An unpleasant surprise awaits you along the way - Knut set up an ambush. We'll have to let him know that he's going into the wrong place. Inform Diego of your bride's wishes.
Diego gives a quest called Forest witch. You need to take a bunch of herbs to the forest witch. You receive the key to the door to the dark forest. Leave the cave, go through the forest, getting rid of the wolves along the way. Walking along the right side, you will find a cave, and in it a good two-handed weapon - Orruk's old club. Go to the end of the forest and you will see a witch's booth, go in and talk to her.
Aive is dead, the village is on fire. The hero is going to take revenge on Robar for the death of his beloved and friends. Diego advises finding a blessed anvil and forging weapons there. This must be done quickly, since the paladins of Robar are also looking for her.
Gothic 4 - Arcania.
Coast.
On the hill east of the coast there is the Shattered Maiden tavern, where you need to talk to the magician Daranis to get information about the location of the anvil. Climb the hill, talk to the guard and go inside, the magician is on the second floor. After talking with him, you will receive further direction - the archives of Silverlake Castle.
Talk to the innkeeper Murdra, she will tell you who Darkan is and why he captured the bridge. South of the inn on the coast there is a watchtower, talk to Rauter there. He's a mercenary, stuck here because of Darkan. He will share his thoughts on how to get across the bridge. Go to the top of the tower and talk to the fisherman Lorne there.
The innkeeper Murdra will give the task Two barrels of mead. She will say that the lumberjack Garn has mead and will ask you to go to him. Exit the inn and go straight along the path. When you reach the lumberjack's hut, try to persuade him to give you mead. He will ask for 200 gold, you can pay, or you can take it by force. In this case, you will have to beat him and two lumberjacks. Take the drink to Murdra.
Fisherman Lorne will give a task Wooden leg. He lost his leg on Boar Rock. It is located east of the tower. From the inn, go up the path until you come to a circular road. Explore it, you will find chests and goblins, experience is never superfluous. In the chest guarded by the shaman and goblins, you will find that very leg. Give it to Lorne at the fishing village.
While following the leg, you will meet Ulrich, the herbal merchant. He will ask you to clear his lawn of the goblins that have occupied it. Go up and to the left, there you will see the desired lawn, and on it two goblins and a shaman. Deal with them and report this to Ulrich.
Lorne can help you get to the other side of the bridge. He will ask you to find a box of money in an abandoned mine. You will find the mine just above Garm's hut. In the mine you will meet a miner who will also ask you to bring him a still from the old mine, now captured by the same goblins. Exit the mine and go left. When you reach the old mine, get rid of the goblins and search the mine. The cube should be on the table. Go through the cave, come out just in time to the miner, give him the cube. he will make a mixture, use it to blow up the wall. Examine the mine, in one of the branches you will find the damned Gulthard. Behind it is a chest with the desired box. Go to the end of the cave, you will go straight to the inn. Give the box to Lorne, he will send you to Murdra to exchange the wooden leg for the key to the box. After completing the exchange, return to Lorne, receive the password and money.
strong>Price of a wooden leg. Talk to Hewland at the gate. Tell him the password and go through the opened gate. Here you will have to fight Dartan and his company. After the battle is over, collect the trophies and open the gate to the bridge.
Walkthrough of Gothic 4 - Steward
On the bridge you will meet a merchant named Elgan. He will inform you that in order to go to Silverlake, you need to obtain the personal permission of the baron. You need to get to the baron's citadel and talk to him. Go to the citadel, along the way activate the teleportation stone on the farm. Talk to the guard Dak at the gate, ask him about the location of the necessary people in the city and about the news. Come into the city.
At the entrance to the citadel you will meet Gorn, also familiar from previous parts. You will receive a quest from him Diego is in trouble. I would like to note that in this quest there are different options for plot development. Gorn will report that Diego is in prison. He won't let you see the baron. We need to go visit Diego in prison. To get inside, talk to the guard Aldrich and threaten him with the Bugle. Go inside and talk to Diego. He will tell you why he was here and how you can free him. Talk to the guard Winston, he was one of the last to see Mermund.
Now let's look at the options for completing this quest.
The first option: beat out Winston's confession about the location of the rebel hideout and the password to enter. Mermund is being held there. The cave is located behind Ogtara's farm, exit the castle and go straight. Having reached the cave, get rid of the guards and go inside. Go to the end of the cave, which houses many rebels. Having reached the cells, you will have a battle with a rather strong enemy - the main interrogator. Block his blows with a shield, roll away from them, and attack yourself. Pick up the keys from his body and open the cage with Mermund. He will say that the brother of the baron's brother, Gertan, has important documents. Base under the Ogtara farm. Go there, intimidate Winston, take the key to the entrance from him, go inside and deal with the inhabitants, including Gertan himself. Take the documents from him, take them to the baron and receive a pass to the Bloody Valley.
Second option: in the conversation, Winston proves to you that Renwick is a traitor, he wants to surrender the fortress to Robar, and his brother Gertan and sister Luwen found out about this and were going to tell the people of Stuart. For this they were persecuted. We need to find Luwen. Talk to Gorn about her. He will tell you about a chest that may contain information about her whereabouts. Together with Gorn, check the chest, you will open it with the help of the master keys that Diego gave you. Inside you will find a key. Talk to the merchants; you will learn from the bow merchant that he saw a light in an abandoned house. Go there and go inside. You will find Luwen there, talk to her and go to the coast for Renwick’s correspondence with Robar, from which it turns out that Renwick really is the traitor. In the chest you will also find the key to the new rebel hideout. It is located to the right of Ogtara's farm, next to the watchtower. Find Gertan and give him the papers. After this, go in search of Riklen, who has left to explore the cave. You will find his body. Take the key to the tomb, examine it and leave the dungeon. Now go to Renwick. Inform Jilvie of her lover's death at the entrance to the citadel. Talk to Gertan and get a pass.
Regardless of the route, you will receive a costume at the end. Now you can leave the castle in your new outfit. Go east until you reach a gate guarded by a guard. Show him the pass.
Gothic 4 - Valley of Blood.
Coming out through the gorge and following the forest path, you will find yourself in the estate. Talk to Gilthor. You can get information about the archives of Silverlake Castle from him, but he agrees to help on the condition that you help him return his standard-bearer Doran. You can find it if you leave the estate and go north. There he will wander around the battlefield, talk to him. He will say that he has lost the banner of Havaan. Agree to help him, go east to the goblin caves. Go up the forest ridge and you will come across a squad of goblins. Next will be the cave you need. Search her, take the banner and take it to Doran.
Go south through the estate and you will come to the castle. Go to the second floor, there in the hall by the fireplace you will find Giltor. He will say that access to the archives can only be obtained from Lord Gavaan, and he is captured by the orcs. Let's go save him. After leaving the castle, go forward along the lake. Soon you will reach a bridge on which there is a guard. Tell them your password and they will let you through.
On the shore of the lake you will see a building resembling an observatory with an orca around it. Before moving on, clear the area here. Now go to the cave not far away, there is the orc Ogbosh, who is guarding the gate to the camp. Talk to him. He doesn’t let you through just like that, he asks you to bring him skahan swill in exchange for the pass. To get it, you need to go to the shaman Melog, who lives in a hut south of here. Follow the road across the river, then walk through the forest until you come across the hut of a shaman playing drums. He is also not going to give you the drink just like that, he asks you to find for him the son of the previous leader - Irraya. Follow the path west until you find him sitting by the side of the road. He will complain to you that his personal amulet was taken away from him. The culprit is the orc Shalog. Go south through the forest, you will come to a rubble that blocks the further path. Go along the rubble, sooner or later you will run into Shalog. You need to get him into a good conversation, naturally by force, so that he will tell you that he hid the amulet in the cave. The cave is in the east of the forest, go along the rubble again. There is a chest in the cave containing an amulet, take it to the shaman's hut and give it to the owner. Talk to the shaman, he will say that no one can defeat the orc leader Erhag. The Irraya amulet will help you with this; by wearing it on yourself, you will be able to defeat the orc and free Lord Gavaan. Take the skahan from the shaman and the amulet from Irraya and return to the entrance to the camp.
Give the skahan to Ogbash, he will let you inside, where a battle with Erhag and his guards awaits you. Gavaan will ask you to deal with the orcs and free his people, who are forced to work at the sawmill under the supervision of Erhag's minions. If you have cleared the area of orcs near the lake, then one thing has already been done. To find the prisoners, follow the road to the castle until you see a path, go up it to the east.
After finishing all your business, talk to Lord Gavaan, who is walking along the path by the lake. Now you can go to the castle. There, in the basement of the southern wing, study the archives. Get the ancient map, now talk to Gavaan again. He will say that two more magicians asked about the temple, you can now find them in Tuushu. He will give you a spell that will help destroy the very rubble that was blocking the path. Go there, after casting the spell the blockage will collapse, but you will have to fight a stone golem, it is not very susceptible to attacks. After you get rid of him, follow the path forward. You will come to a forest settlement that is built around the sacred Tuushu tree.
Walkthrough of Tuushu - Gothic 4.
At the entrance you will meet Leboras, who will want to check your intentions regarding the town. He will ask you to destroy six nests of toad lizards that have settled in the swamps southeast of Tuushu. Go there, destroy the eggs and those who laid them. Return to the town and give the trophy to Leboras.
Talk to the sorceress Gelana, go up the stairs inside the tree, you will find her there. She will send you to the magician Vultus so that you talk to him and stop the experiments. Near the exit to the street there is a descent into a tunnel, go there and talk to Vultus there. He will promise to stop, but will advise you not to contact Gelana. She will say that in any case she will not let you see the master, unlike him.
Decide for yourself whose tasks you will carry out. Let's talk about Vultus's tasks. The first task will be to find his hat, he lost it in the ruins southwest of Tuushu. The ruins are not difficult to find; the swamp-eater worm lives next to them, and the entrance is illuminated by torches. Go into the dungeon, get rid of the orcs and claw grabbers, find the hat and give it to Vultus.
In the next task, Valtus will want to change the weather; he needs the sun to dry out his laboratory. Exit the city to the south and go straight until you find ruins with an ancient statue. There you will meet Zira. She will say that parts of the statue still need to be assembled. Jump into the dungeon, there are many opponents waiting for you there, go forward, clearing the way for yourself. You will find a locked door, you need to find the key. The key is in the chest, in the hall with two stone golems. Go to the end, there you will find a statue element, now go upstairs. Talk to Zira and focus on the sunny weather. She won’t like this, she will have to use force and weapons. Ask again by approaching the statue. Return to Valtus and make him happy. In response, Valtus will say that Gelana is hypnotized with the help of that hat, and you can talk to her yourself about a pass to the master. Get the seal and new clothes, go to the hall where Gelana is standing and go up the stairs. Find Calamus in the library. He will let you through to Merdarion.
After talking with him, you will learn that the magician you are looking for is called Ikarius, and Calamus can tell you where to find him. You will receive the key to his hut. It is located between the library and the sanctuary. Arriving there, you will find the corpse of a magician, examine it. Now we need to find his partner Lester. His home is located in the swamps southeast of Tuushu. Go there, along the way you will meet claw grabbers and swamp eaters. You won't find Lester in the hut, you'll only find Milten. With his help, you must find the kidnapped Lester. Follow the footsteps of the glowing swamp, pass the monastery gates, go down to the sea, there you will find a cave in which Lester sits. Clear the cave from the orcs and free him. After talking with him, you will learn that in order to get to the monastery, you need to move the statue nearby, in the same room. Now go across the bridge and go up to the monastery.
Gothic 4 - Road to the temple.
Talk to the monk Rundor, he will tell you that you need to pass two tests to get an audience with the Father Superiors. In the first test you need to destroy two golems in the monastery courtyard. Go to Rundor and start threatening him. In a conversation you will say the phrase “There is no justice, there is only power.” After this, you will have access to the abbots. They are in the largest building. From them you will learn that the temple you need is located north of the monastery and you will have to go there through the jungle. Now exit the monastery along the northern path.
Hit the road. Along the way you will have to go through black gorges, then you will find yourself in the jungle. There you will have to make your way, destroying enemies along the way. Sooner or later you will reach the ruins, where you will have to fight with a crazy person. Now go down into the dungeon and go through them. You will come out to a pass through the jungle. Head further north until you reach the sea coast. There you will meet the magicians on the platform before the descent. They will give you a side quest. While you walk along the beach, you will have to fight off the warriors who will come out of the water. After passing the coast, you will come out onto a forest path. Walking along it, you will meet a man named Thor. He will tell you about a troll nearby and advise you not to relax.
There's no point in going straight, there's a castle there that you can't get into. Walk along the rocks to the southwest. Along the way you will see a sign and stumble upon that same troll. Calculate your strengths objectively; if they are not enough, then do not mess with the troll. Just quickly run forward to the cave. In the cave, meet the one-eyed spy and form an alliance with him. Now you need to activate the switch that raises the bridge to the temple. In the fiery tunnel you need to run, dodging the burning balls. Activate the switch and run back to the altar. Now you have to fight with Dantero, who summoned golems to help him. I advise you to quickly deal with him, after his death the passage to the temple will open and you can quickly escape without messing with the golems.
Go forward through the dungeon towards the temple. When meeting the inhabitants of the dungeon, cover your back and sides with narrow tunnels, do not let yourself be surrounded. You will have a fight with their leader, after defeating which you will go outside. After walking a little along the mountain path, you will reach another cave, the entrance to which is guarded by two golems. Inside, you will have to walk along the corridor, managing to fight off enemies and dodge flying fireballs. You will reach a locked door. Turn into one of the branches of the dungeon and there you will find a chest with a key and something else. You will come to the center of the temple, to the ice dome, and here you will meet the winged demons of Anbael. After getting rid of them, jump onto the ledge on the back side of the hall and exit through the grate. Take the sacred hammer and leave the cave. Continue down the gorge until you reach the vegetation level. Here again you have to go into the passage in the rock. No one will be waiting for you here, run right through and exit the dungeons. At the exit you will meet a peasant with a side quest.
Walkthrough of Gothic 4 - Torniara.
Head north towards the city tower near the sea coast. At the gates of the fortress you will meet your old friend Gorn, who will advise you to talk to Diego about getting into the castle. Diego can be found at the port. To find out the way, talk to Ningal, who can be found in the western part of the market square near the stairs leading to the slums. The passage is sealed with a magic seal and he will ask you to open it. The scrolls that are in the possession of the magician’s dead comrades will help with this. Go along the stairs into the slums, there you will find the corpses of Ningal's assistants on opposite sides. Take the scrolls from the bodies and use them on the obelisks right there. Tell Ningal that the barrier is no longer there. He will give you the key to the gate on the market square, go through it to the port.
Talk to Diego. He will tell you that you should go to his estate and talk to Lester about ways to enter the castle. Diego's place is further down the street. It turns out that there are three ways to get into the castle. I think the most convenient way would be Daranis's version, in which you move directly to the castle through the teleportation circle located in the courtyard of Diego's estate. It will be necessary to bring the magician the rune of obedience, which for some reason is not carried by his tame golem, which should have already appeared. Go outside through the door of the house next to Daranis and head to the officials' quarter north of Diego's home. You will find the golem out of his mind, and you will have to kill him to take the rune from him. Give it to the magician, after which you can immediately use the teleport to get to the castle of Robar the third.
In the fortress you will meet Zira, who will report that Lord Hagen has not yet returned after going to storm the bastion of the traitor Drurkhang. We need to find him. After leaving the castle, follow the road east until you come to the circular Colosseum. Not far from it you will see the entrance to the prison. Go there and free the prisoner. Open the chest, in it you will find the key to the camera and Ivy's bracelet. Still, it is Drurkhang who turns out to be guilty of the destruction of your native village.
Free Muldoon, get the key to the dungeon under the Colosseum. Exit from here on the other side and you will find yourself in a moat under the arena. There you will meet Hagen and Diego. You learn that they were poisoned so that Drurkhang could win in the arena. Put on your armor, you have a chance to defeat the traitor. Enter the arena. And here you have to fight with Drurkhang himself and his many associates. After the battle is completed through difficult efforts, the ghost of Xardas will appear and speak to you. From him you will learn that Robar's mind can be cleansed. To do this, you need an ancient relic, which is hidden in the grave of Lord Dominic. To find this grave, follow the rocks to the west of the arena.
Once inside, you need to pull the lever to open the passage to the crypt. Beware of the fireballs, which will again fly everywhere. Inside you will also find fireballs and sarcophagi with knights inside. Deal with the knights one by one and dodge the balls. You will find a relic in the central coffin; it must be taken to the throne room of Robar's castle. Here you receive another task - to get rid of the Beliar cultists who captured the temple of Innos. Use the teleporter to get to Diego's yard, go down to the sewers and talk to Daranis there. Go forward to the barrier, the magicians will open it for you. Now we have to get rid of sixteen cultists. The last six will have to be beaten in the main hall.
After destroying all the cultists, the barriers will fall and the passage will be open to your friends. You will have several options for removing the barrier that prevents you from picking up the amulet. It is better to choose the Ningala method. You need to destroy the five winged demons that you have already met before. You can find them in the port, in the city slums, in the temple district and in the rich area. Take their hearts and give them to the magician Ningal. After this you can pick up the amulet. The ghost of Xardas will appear again and say that the amulet needs a frame, which is in his tower. From the temple, go north, through the cemetery, clearing your way, destroying the restless inhabitants thereof. You will see Gorn. Now go into the dungeon, after passing through it, you will come out to the lighthouse. You will be met by a demon, destroy him. Climb to the top of the lighthouse, from there you will go through the teleport to Xardas' tower.
Last fight.
Talk to Xardas, search all the chests and go down into the cave. A long dungeon with a considerable number of enemies. Having emerged into the light, follow the familiar path to the monastery, as always clearing your way with the help of weapons. In front of the monastery you will be met by the demon Xeshi, be sure to get rid of him. Entering the monastery courtyard, you will see two more demons, destroy them too. After this, talk to the abbots of the temple. Now climb onto the wall where one of the demons stood and jump from there into the gap in the floor. Run through the tunnel, which will lead you to the main enemy.
There are certain tactics in the battle with Xesha. When she is in the hall, hit her with the weapon you have. When she teleports behind the barriers, her summoned assistants will appear, kill them while dodging the fireballs. Do not stand in one place for a long time, move, this will save you from the stone spikes that appear from time to time directly from the floor. Their appearance will be warned by highlighting the area. If you follow the tactics, the battle will not seem very difficult to you. That's all the walkthrough of Gothic 4: Arcania.
Interesting Facts


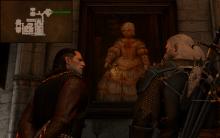

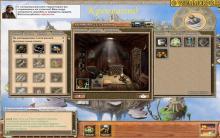


Maps of the Yaroslavl province Maps of the Yaroslavl province
Where to dig the computer collection in the "zombie farm"
Game Time for a Hero: how to complete the task Lucky Foot?
The Long Dark: game review
Find the differences games Find the differences 2 new adventures level 625