Having abandoned the session and downloaded the repack of the game that has not yet been officially released Dungeon Siege III, I decided to write her passage and participate in the competition with the support and CBR.
So, we have a medium-sized computer, there is a Dungeon Siege III game, which means we can start ...
The beginning does not particularly burden the brain of even the laziest gamer - I chose a character who has bigger boobs, which I like more, chose the difficulty that corresponds to the desire to kill your mosk, keyboard and mouse to your abilities in this genre of games and ... go ahead!
Walkthrough Dungeon Siege III (supported by website and CBR) + Screenshots and wallpapers
 Walkthrough Dungeon Siege III (with the support of the site and CBR) + Screenshots and wallpapers
By the way, regardless of the chosen character in the game, only the drop will change, partly the dialogues and, of course, the satellites - the main storyline and locations will remain the same. According to the game itself: some chests and hiding places are hidden behind various obstacles - do not be lazy to search every corner. Also, when choosing certain answer options when talking with characters, you can increase your influence on companions (and these are "Feats", and "Feats" are pluses to characteristics).
From the very beginning, the game tells us what to press and what happens at the same time, gives the task "Gathering in the north", and we follow the path to Montbarron estate. The estate is on fire, around the corpses of the descendants of the legion.
Walkthrough Dungeon Siege III (with the support of the site and CBR) + Screenshots and wallpapers
 Walkthrough Dungeon Siege III (with the support of the site and CBR) + Screenshots and wallpapers
We examine the building (we read notes and letters on the floor, examine the corpses). As an example for training, you will be asked to examine the first object containing things - a shelf with weapons. We equip better weapons, run down the stairs, eliminate the barricade, search the chest on the left, go down to the floor below, "split" the barrels and another obstacle, and enter into our first battle with the enemy - it will not be difficult to neutralize two Leskantsi mercenaries. We search the chest on the right, down the stairs, deal with the bandits, break / shoot the barrels, search everything and run with one of the survivors, Martin Guiscard, the son of the Legion, to eat as far as possible from such an unsafe estate.
Walkthrough Dungeon Siege III (with the support of the site and CBR) + Screenshots and wallpapers
 Walkthrough Dungeon Siege III (with the support of the site and CBR) + Screenshots and wallpapers
Along the way, we break and rummage everything that can be, run across the bridge, activating (setting fire to fuses) three barrels of gunpowder.
Walkthrough Dungeon Siege III (with the support of the site and CBR) + Screenshots and wallpapers
 Walkthrough Dungeon Siege III (with the support of the site and CBR) + Screenshots and wallpapers
Boo-boo!!! Four more scoundrels departed to another world and a wooden bridge with them. Well, we are heading to the Legion's fort - there is hope to find Odo and his surviving friends and associates.
We are in new location. Here is our first save point. If you run south to the fallen tree, then in a pile of garbage you can find something useful.
Walkthrough Dungeon Siege III (with the support of the site and CBR) + Screenshots and wallpapers
 Walkthrough Dungeon Siege III (with the support of the site and CBR) + Screenshots and wallpapers
In the camp itself, we read a note (hunted for you - 500 gold per head each), which is attached in front of the nearest cart and search the chest and racks with weapons. Behind the camp we destroy two stumps, we find a chest behind them. Next is the save point and the Bridge to the fort. You can look into another camp to the left of the bridge - beat the bandits and profit from their little things.
Having crossed the bridge, we are faced with the first boss - the mercenary Bogdan, who decided that he would be able to make good money on us - we will upset him and go inside the building.
Walkthrough Dungeon Siege III (with the support of the site and CBR) + Screenshots and wallpapers
 Walkthrough Dungeon Siege III (with the support of the site and CBR) + Screenshots and wallpapers
After talking with Odo, we get the task - Go to Vranov Yar and talk to the locals. We are also leveling up.
If we go deep into the fort and go down the stairs to a small room, we will stumble upon spiders - it is better to kill away from cocoons so as not to spawn a bunch of small biting minions. After the massacre, you can collect several useful trophies.
Walkthrough Dungeon Siege III (with the support of the site and CBR) + Screenshots and wallpapers
 Walkthrough Dungeon Siege III (with the support of the site and CBR) + Screenshots and wallpapers
We go to Vranov Yar. In front of the gate we speak with Ladislas and find ourselves in Lower Raven Yar. We look around. We take the task from Lyudmila - to take revenge on the murderer of her husband. On the way we meet a messenger / messenger - you are asked to meet with the Leskantsi woman Leona in the cave. Another resident, Anton, will say that he wants to return the family value - of course, we agree to help the unfortunate. We find a merchant nearby. Having crossed the bridge, we take a task from Jacob - you need to "fish out" and kill the devil fish that interferes with his fishing.
Let's go to Western Forest. Keeping to the left, we kill Ottokar and take away the family figurine. We go along the right path, we find ourselves in Singing Storm Cave.
Walkthrough Dungeon Siege III (with the support of the site and CBR) + Screenshots and wallpapers
 Walkthrough Dungeon Siege III (with the support of the site and CBR) + Screenshots and wallpapers
We talk with Leona, methodically kill the thugs, fight with Vera and her assistants (I left Vera for a snack, and using dodge, I brought down the skeletons and assassins with an area attack), and free two captives.
Walkthrough Dungeon Siege III (with the support of the site and CBR) + Screenshots and wallpapers
 Walkthrough Dungeon Siege III (with the support of the site and CBR) + Screenshots and wallpapers
If you are not playing as Anjali, then she will join us. Leona asks to clean up Gunderik estate from thugs. No problem!
The room on the left on the second floor of the estate - the ghost of Alice Gunderik complains about her imprisonment. We promise to help her.
Walkthrough Dungeon Siege III (with the support of the site and CBR) + Screenshots and wallpapers
 Walkthrough Dungeon Siege III (with the support of the site and CBR) + Screenshots and wallpapers
If you carefully read all the notes along the way, then when talking to the enchanted door, you can say the password and get the "Decipherer" feat - +2 Dexterity.
Walkthrough Dungeon Siege III (with the support of the site and CBR) + Screenshots and wallpapers
 Walkthrough Dungeon Siege III (with the support of the site and CBR) + Screenshots and wallpapers
Walkthrough Dungeon Siege III (with the support of the site and CBR) + Screenshots and wallpapers
 Walkthrough Dungeon Siege III (with the support of the site and CBR) + Screenshots and wallpapers
Read books, try to pull the lever. So we got it - we wet the evil spirits. We go through the "open" door. We destroy the 4th liches and the Swamp Horror, which they called, and take the part we need from the skeleton in the corner. We insert the coal stone into the lever and open the door.
Walkthrough Dungeon Siege III (with the support of the site and CBR) + Screenshots and wallpapers
 Walkthrough Dungeon Siege III (with the support of the site and CBR) + Screenshots and wallpapers
In Inner Sanctuary we will have a choice - to destroy the Nagog's Heart or leave it alone.
1) We do not touch the heart (the quest to save the ghost of Alice is not completed, apparently, a bug) and kills Lord Gunderik. Leona is happy.
2) Destroy the Heart (the quest to save the ghost of Alice ends) and kill Lord Gunderik (he becomes stronger due to the broken Nagog Heart). Leona is not very happy.
Walkthrough Dungeon Siege III (with the support of the site and CBR) + Screenshots and wallpapers
 Walkthrough Dungeon Siege III (with the support of the site and CBR) + Screenshots and wallpapers
Walkthrough Dungeon Siege III (with the support of the site and CBR) + Screenshots and wallpapers
 Walkthrough Dungeon Siege III (with the support of the site and CBR) + Screenshots and wallpapers
If you handed over the estate to Leone, you will receive the feat "Leskanzi Ally" - +3 Will, otherwise "Legion Overseer" - +3 Endurance.
By the way, if you collected various records about Ebe (at least 30 pieces), you will get the "Keeper of Knowledge" feat - +3 Will.
Before the exit, you can walk on foot - collect gold and spheres of life from spawning vases and benches.
In the Lower Raven Yar, we give the figurine to Antokha (we don’t take money if we want the feat "The Embodiment of Virtue", otherwise they gave me about 800 coins). We speak with Gregory - we go through the city. On the way we meet Tatyana, we get a new task - to bring a package to Nick in the Eastern Cave. Along the way, we kill the vile spirit of water - Nishemma.
Walkthrough Dungeon Siege III (with the support of the site and CBR) + Screenshots and wallpapers
 Walkthrough Dungeon Siege III (with the support of the site and CBR) + Screenshots and wallpapers
We pass by the estate. We meet a merchant who asks for help. We go further, collecting along the way the chests set by someone very generous and evenly destroying the local gopota. Further, on a small area with barrels and boxes, we make a cluster of robbers and trade with happy Florin. Having gone deep into the path and to the left, we kill Boris on the instructions of the widow.
Walkthrough Dungeon Siege III (with the support of the site and CBR) + Screenshots and wallpapers
 Walkthrough Dungeon Siege III (with the support of the site and CBR) + Screenshots and wallpapers
Near the destroyed bridge and "explanatory" note to it. Let's go to Nizhny Vranov Yar and turn in two tasks. We inform Lyudmila about revenge (we don’t take money if we want the feat "The Embodiment of Virtue", otherwise they gave me a thing for 1870 coins). We hand over the task to Yakov (we do not take money if we want the feat "The Embodiment of Virtue", otherwise they gave me 712 gold). If all three tasks were passed without requiring a reward, we get the feat "The Embodiment of Virtue" - +5 Will.
We go to the estate - we talk with Odo, he directs us to Burning Forest. On the way to East Forest we take the task from the corpse about the treasury. Going to the left, we kill Old Dakkenvir, we take one of the books of the genealogy of the great families of the Legion (1/3).
Walkthrough Dungeon Siege III (with the support of the site and CBR) + Screenshots and wallpapers
 Walkthrough Dungeon Siege III (with the support of the site and CBR) + Screenshots and wallpapers
The next Dakkenvir will be more modest. We search the nearby skeleton for the presence of another book (2/3). Going down and walking along the right branch of the forest, we find ourselves in a cave Shadow Rift. We find the last book (3/3), go deeper, kill the giant White Fang spider, unravel Nick and give him the package. The quest is considered completed - we get experience and an item.
Walkthrough Dungeon Siege III (with the support of the site and CBR) + Screenshots and wallpapers
 Walkthrough Dungeon Siege III (with the support of the site and CBR) + Screenshots and wallpapers
Walkthrough Dungeon Siege III (with the support of the site and CBR) + Screenshots and wallpapers
 Walkthrough Dungeon Siege III (with the support of the site and CBR) + Screenshots and wallpapers
V Gorelesye quite a lot of "amphibians". We go, we kill everything that moves, we rummage through the bushes. Arriving at the place where the soldiers of the Legion fell, we pick up Hugh Montbarron's ring. Behind the tree there is a special cache - the Ancient Shield of the Legionnaire drops out (4200 gold). On the way back, the Radiant Youth warns us of the dangers ahead.
Walkthrough Dungeon Siege III (with the support of the site and CBR) + Screenshots and wallpapers
 Walkthrough Dungeon Siege III (with the support of the site and CBR) + Screenshots and wallpapers
Walkthrough Dungeon Siege III (with the support of the site and CBR) + Screenshots and wallpapers
 Walkthrough Dungeon Siege III (with the support of the site and CBR) + Screenshots and wallpapers
He teleports us to the entrance to Burntwood. Companion / companion in a little confusion, we reassure him / her.
By the way, if you have completed at least 10 additional tasks, you will receive the "Real Hero" feat - +2 Stamina.
We return the genealogy books to their place, search the chest (I have a bunch of gold and the Raven Ring). We speak with Odo, open the Legion Crossing. Enter - we are in Crossing Rukkenwal. We clean the chest. In the next transition and we are in the Gunderik Mausoleum.
Walkthrough Dungeon Siege III (with the support of the site and CBR) + Screenshots and wallpapers
 Walkthrough Dungeon Siege III (with the support of the site and CBR) + Screenshots and wallpapers
We desecrate in the most brazen way all the burials in the prey areas. There is a hidden room here (the Corset of the Consort drops out of the sarcophagus - 6000 gold), which is not displayed on the map (see screenshot).
Walkthrough Dungeon Siege III (with the support of the site and CBR) + Screenshots and wallpapers
 Walkthrough Dungeon Siege III (with the support of the site and CBR) + Screenshots and wallpapers
Walkthrough Dungeon Siege III (with the support of the site and CBR) + Screenshots and wallpapers
 Walkthrough Dungeon Siege III (with the support of the site and CBR) + Screenshots and wallpapers
At the gate Upper Yar We are waiting for Vogomil with "servants" - we deal with him and attack the Town Hall. Ilias, Marek... - everyone should lie down near the save point!
Walkthrough Dungeon Siege III (with the support of the site and CBR) + Screenshots and wallpapers
 Walkthrough Dungeon Siege III (with the support of the site and CBR) + Screenshots and wallpapers
1) Let go - feat "Generosity of the winner" - +2 Will.
2) We kill - the feat "Iron Fist" - +2 Attack. You also get a powerful staff - Heavenly Judgment (10080 gold).
Walkthrough Dungeon Siege III (with the support of the site and CBR) + Screenshots and wallpapers
 Walkthrough Dungeon Siege III (with the support of the site and CBR) + Screenshots and wallpapers
In the Fortress we talk with Odo. You have to cross the restored bridge. Opening along the way Crypt of Legion Heroes(Lazar's request) - in two statues in front of the entrance we insert the Legion's ring each. Maximilian will ask you to find three artifacts - we will kindly agree to help him. At the first turn to the right there will be a closed door - do not be sad - we will go out through it. Take the Cryptkeeper's Key from the skeleton in the second room on the left in the square hallway. We open the door of the second room on the right of the same square corridor and take the Skull of Norik. After descending the large spiral staircase, we find ourselves in Hall of Heroes.
Walkthrough Dungeon Siege III (with the support of the site and CBR) + Screenshots and wallpapers
 Walkthrough Dungeon Siege III (with the support of the site and CBR) + Screenshots and wallpapers
Walkthrough Dungeon Siege III (with the support of the site and CBR) + Screenshots and wallpapers
 Walkthrough Dungeon Siege III (with the support of the site and CBR) + Screenshots and wallpapers
On the left side of the wall of sarcophagi we find the Staff of Meyrik. We kill Dracomir.
Walkthrough Dungeon Siege III (with the support of the site and CBR) + Screenshots and wallpapers
 Walkthrough Dungeon Siege III (with the support of the site and CBR) + Screenshots and wallpapers
We go further, we take the Sword of Bolingar, we head to the exit from the crypt. We hand over quests to Maximilian and Lazarus. We cross the bridge, Katarina joins us (if we do not play her) - now we can choose one of the satellites. Next, we will be in Cliffs of the Eastern Swamp.
Walkthrough Dungeon Siege III (with the support of the site and CBR) + Screenshots and wallpapers
 Walkthrough Dungeon Siege III (with the support of the site and CBR) + Screenshots and wallpapers
Walkthrough Dungeon Siege III (with the support of the site and CBR) + Screenshots and wallpapers
 Walkthrough Dungeon Siege III (with the support of the site and CBR) + Screenshots and wallpapers
Walkthrough Dungeon Siege III (with the support of the site and CBR) + Screenshots and wallpapers
 Walkthrough Dungeon Siege III (with the support of the site and CBR) + Screenshots and wallpapers
We destroy its "internal bio-content". At the bottom of the cave, we take Lucas into the group (if you are with one companion). We overcome the barricade and find ourselves on Battlefield in the Swamps. We promise to help Lord Devonsey, arrange a meeting with him and part of his army near the village of the First People. Near the two cannons of Jane Cassinder on a hill there is a hidden passage to the cache: there are two chests and a barrel. We promise to help Roderick in the search for the missing soldiers, we follow the path behind him in Swamp of the Duskwood. Rescue the first squad of scouts. Exploring with the General First People Settlement for the prisoners. With the help of the "valve" we put forward the bridge. We will have a dialogue with the leader of the Maru-Yatum tribe, after which we will have to lay down a bunch of his "people".
Walkthrough Dungeon Siege III (with the support of the site and CBR) + Screenshots and wallpapers
 Walkthrough Dungeon Siege III (with the support of the site and CBR) + Screenshots and wallpapers
Walkthrough Dungeon Siege III (with the support of the site and CBR) + Screenshots and wallpapers
 Walkthrough Dungeon Siege III (with the support of the site and CBR) + Screenshots and wallpapers
We run to rescue the prisoners. Climbing the giant roots, we find ourselves in the arena where we have to fight with the leader (it is better to open the cages with prisoners so that they also participate in this crazy battle). After the battle, we are presented with a gift in the form of four chests and the leader teaches a spell to "remove" the roots.
Walkthrough Dungeon Siege III (with the support of the site and CBR) + Screenshots and wallpapers
 Walkthrough Dungeon Siege III (with the support of the site and CBR) + Screenshots and wallpapers
Walkthrough Dungeon Siege III (with the support of the site and CBR) + Screenshots and wallpapers
 Walkthrough Dungeon Siege III (with the support of the site and CBR) + Screenshots and wallpapers
Chatting with Phineas. On the way back, we take a task from Ara to collect slugs eggs. We pass further along the path freed from the roots and free the second detachment of scouts. Further, another such cleared path - there we kill the Ancient Worm and take away its eggs (0_o). We hand over the task to Are, we head to the camp. We hand over the task to Roderick. We speak with Devonsi, then we follow Phineas. We pass through the roots - we are on Road to Stone Bridge.
Walkthrough Dungeon Siege III (with the support of the site and CBR) + Screenshots and wallpapers
 Walkthrough Dungeon Siege III (with the support of the site and CBR) + Screenshots and wallpapers
Ahead we destroy a gang of robbers led by Svarbog. At the gates to the Kamennomost we speak with the Automatic Commandant (I remember Oscar from "Siberia"). Here we are in the city.
Walkthrough Dungeon Siege III (with the support of the site and CBR) + Screenshots and wallpapers
 Walkthrough Dungeon Siege III (with the support of the site and CBR) + Screenshots and wallpapers
Ursula asks for help with delaying her goods - she believes that the silk she is expecting could attract thieves. We agree to sort it out. Go ahead, turn left - Great Fortecia. In its right part, we are attacked, as I understand it, by revived armor. We need to collect four books. To do this, we run around the map, wet the warriors, dodge fireballs flying out of the jaws of stone lions and collect ancient volumes. Access to some rooms is limited by bars - you need to press the levers (advice - it's better to examine everything well as you find books, because then access to these rooms will be closed). After all this disgrace, we put all four books on the shelves of a large rack on the second floor and open a secret passage to the portal. Our partner / partner brings Odo with Marten, we speak with them. We need to: enlist the support of the Masters and save the 17-year-old Queen Roslyn (you can start with any task).
We get a feat for 20 completed additional tasks"Eb's Savior" - +3 Endurance.
We go to the Hall of Masters. Gisella with a crowd of protesters demand the release of the krug. Sigismund Wolf will tell you interesting story and agree to help in obtaining the support of the masters. I'm going to the council.
Walkthrough Dungeon Siege III (with the support of the site and CBR) + Screenshots and wallpapers
 Walkthrough Dungeon Siege III (with the support of the site and CBR) + Screenshots and wallpapers
We need to get at least three votes out of five. Sigismund Wolf promises to vote for you anyway. Mayor Grimmelhaus says he will support the majority. Rorik Kassel will ask you to deal with the task "Strike!". Grezebelly will say that you need to eradicate a gang of thieves in the Crypt. Squeaky itch will entrust us with the case of the thief.
Walkthrough Dungeon Siege III (with the support of the site and CBR) + Screenshots and wallpapers
 Walkthrough Dungeon Siege III (with the support of the site and CBR) + Screenshots and wallpapers
What do we do with the "Krag" (talk to him and make a decision)?: let go; leave behind bars; we escort him to the borders of the city, accompanied by machine guns, thereby ensuring his safety.
Here we meet Reinhart (unless we play for him) - the last member of the legion team.
We hand over the task to Skripozud. Leaving the council hall (by the way, there is a chest on the street immediately to the left, which is constantly updated), turn left and reach the closed gate. Let's talk to the Automaton and say that we were sent on an errand - he will open the gate. V Lower City go to Bolshaya Foundry. Dether Snell asks you to smash the leader of the Cyclopes and restore the operation of the mechanisms - go ahead, meet the feats!
Yes, the cyclops are not to be trifled with... To the right there will be the first lever that needs to be pressed... Well, and then - the 2nd, 3rd, and so on up to the 5th, as you move along the mine (although in general there are levers there will be much more; PS: the role of "objects for destruction" in order to profit here is played by "U"-shaped pipes).
Walkthrough Dungeon Siege III (with the support of the site and CBR) + Screenshots and wallpapers
 Walkthrough Dungeon Siege III (with the support of the site and CBR) + Screenshots and wallpapers
On the way, we free the hostages (Albert Lutz, the blacksmith and the shift supervisor). The leader of the Cyclopes Ergometheus, after a thrashing, enters into a dialogue with you and offers negotiations.
Walkthrough Dungeon Siege III (with the support of the site and CBR) + Screenshots and wallpapers
 Walkthrough Dungeon Siege III (with the support of the site and CBR) + Screenshots and wallpapers
We must choose what to do with the Cyclopes:
1) Grant them rights, get the feat "Hero of the working class" - +3 Attack.
2) We refuse their demands, we get the feat "Suppressor of Riots" - +3 Will.
When leaving the Bolshaya Foundry, I had the feat "Sage" (60 entries about Ebe) - +4 Will.
From Foundry to the left and down. We meet Hardtooth, who asks to destroy the out-of-control machine gun. Essno, we agree. Nearby, Herman Holtzman talks about Legion artifacts hidden in the crypt. Well, what else to do? - Let's go look for them in Crypts of the Sacred Blood.
Walkthrough Dungeon Siege III (with the support of the site and CBR) + Screenshots and wallpapers
 Walkthrough Dungeon Siege III (with the support of the site and CBR) + Screenshots and wallpapers
Already at the entrance we begin to clean the sarcophagi (Gee-gee-gee ...). Going a little further, we see pieces of disassembled machine guns - Mudbelly was right. Let's go look for the leader of this gang. The lever activates the retractable mechanisms of the bridge. In the room to the right and above we find a bag of silk. Having descended the stairs, the first battle with reprogrammable automata awaits us (for the first time, my inventory turned out to be filled to overflowing).
Walkthrough Dungeon Siege III (with the support of the site and CBR) + Screenshots and wallpapers
 Walkthrough Dungeon Siege III (with the support of the site and CBR) + Screenshots and wallpapers
Walkthrough Dungeon Siege III (with the support of the site and CBR) + Screenshots and wallpapers
 Walkthrough Dungeon Siege III (with the support of the site and CBR) + Screenshots and wallpapers
Another lever - another retractable mechanized bridge. Ahead - 3 huge pendulum axes (each removes 153 health). A lever is a bridge, another lever is a door. Another door and more axes-pendulums. Again, the lever (on the left), the door, and behind it, in the room, a load of wool and the Legion's Diary. We go further lever-> bridge-> ax-pendulum and find ourselves at a crossroads. I started from the left room: lever->bridge->pendulum-axe->lever (Katarina joins us, unless we play as her, and we get the feat "We are the Legion" - +4 Stamina), take the Burial Urn Legion, we turn back and bring down the Converted Automaton. We go to the right room: lever-> bridge-> lever, we take away the cargo with parchment. We return, we pull the central lever, we pass along the bridge. Down the stairs - we let the thieves' trash and the Street Boss derailed. We are waiting for a meeting with the godfather Eragott - we fight with him and ask about the Old Frant.
We take the Medallion of the Legion, pull the levers - we head for the exit. In Kamennomost, an emergency - machine guns are destroying the city.
Walkthrough Dungeon Siege III (with the support of the site and CBR) + Screenshots and wallpapers
 Walkthrough Dungeon Siege III (with the support of the site and CBR) + Screenshots and wallpapers
After an exciting battle with pieces of iron on the streets, we go to the Hall of Masters. They will tell us about the Old Frant - we run after him. It will not be easy to defeat him - first we destroy the machine guns and the capsules from which they come out, then the car with hoses (similar to an old vacuum cleaner), and remove the lives from the platform on which Frant stands.
Walkthrough Dungeon Siege III (with the support of the site and CBR) + Screenshots and wallpapers
 Walkthrough Dungeon Siege III (with the support of the site and CBR) + Screenshots and wallpapers
Walkthrough Dungeon Siege III (with the support of the site and CBR) + Screenshots and wallpapers
 Walkthrough Dungeon Siege III (with the support of the site and CBR) + Screenshots and wallpapers
After the destruction of the platform, we decide the fate of Archambault du Poyen:
1) Return to your ranks - the feat "Savior of the Legion" - +3 Will.
2) To prosecute - the feat "Patron Lord of the Stone Bridge" - +3 Endurance.
We hand over the task to Mudbelly and get a new one (find the perpetrators of crimes against the Legion). The first defendant is the merchant Rudolf Maxwell (we make a decision that you prefer). Entering the Lower City, we disassemble the enraged machine gun into cogs.
We return the goods to the merchant Werner Schnaus, that is, we hand over the quest. Nearby, practically insane, is the former guard Wenzel (the decision is yours). At the Crypts, we hand over the task to Hardtooth and help him in one more thing - for this we go into the crypt and, guided by the marker, we find the part. We return to him, give the gear. Frederik Pratz trades in a small area below the Ketzler bridge - we pass a "sentence" on him. Not far from the entrance to the Stone Bridge, we “remove” a gang of robbers and turn in the quest to Ursula (her assortment of goods is updated - there are much more things for sale and much more best quality). In the Hall of Masters, we tell Mudbelly about how we dealt with the "debtors" of the Legion. Cases in Kamennomost are completed.
We go along the transition to Bleskoy. We are on Frosttop. We move forward, trying not to run into fire projectiles (be guided by the sound and do not forget to search the chest behind one of the walls that can be destroyed). We find a cannon with which you can break through the gate. Need gunpowder. Going further, we will meet a sapper of the royal army - you need to help the queen's soldiers retreat and fill up the approaches to the castle. Let's go back - we take cannon gunpowder and break through the very first gate we met with a cannon. We go inside and clear the camp. There is a cannon even lower, but it is without a cannonball. We take the core in a corner nearby. We shoot from a cannon. We cut through the passage, overgrown with ice crystals, we pass through the waterfall and talk with Ibsen.
We go along the right arm of the Kaari pass. We block the third magic channel. In one of the corners we save the lost soldiers and take them to Ibsen (just go further - you will come to a fork near the "house" of the hermit, and along the left sleeve), not forgetting to block the second magic channel along the way.
Walkthrough Dungeon Siege III (with the support of the site and CBR) + Screenshots and wallpapers
 Walkthrough Dungeon Siege III (with the support of the site and CBR) + Screenshots and wallpapers
Walkthrough Dungeon Siege III (with the support of the site and CBR) + Screenshots and wallpapers
 Walkthrough Dungeon Siege III (with the support of the site and CBR) + Screenshots and wallpapers
Now we go along the central path, kill Old Ice Dakkenvir and block the first channel of Stonestock. Ibsen will give us a waystone and ask us to clean one cave from the local fauna.
We go along the right sleeve to the cave, we kill all the creatures, led by Prince Enjekki. Ibsen gives us two rings as a reward. We go on the left sleeve. We go into the cave, cut off the population of endemics and speak with Phineas - he will ask you to see the queen (two chests are hidden behind the crystals to his left). On the right side we go up (the first platform will take you to a room with chests), on the second platform we cross the abyss.
Walkthrough Dungeon Siege III (with the support of the site and CBR) + Screenshots and wallpapers
 Walkthrough Dungeon Siege III (with the support of the site and CBR) + Screenshots and wallpapers
Rise in Ruined Yard. We talk with the queen and Devonsi - you need to fill up the passages to the cave. Phineas is right there and asks you to collect Painite. Bartholomew talks about the need to find the automatic rifle he abandoned. So, having received the tasks, we go to solve them.
V deep well we rise above, we meet Roderick. Need to find gunpowder in Southern Mines. The first charge lies not far from the savepoint. We take the second one in the right dead-end tunnel, where we also do not forget to press the crystal-lever. Walking along the left tunnel, we take the third charge of gunpowder. Using the floating platform, we cross to the other side of the tunnel, take the fourth charge of gunpowder, collect painite (4 pieces). In one of the caves, we break the crystals and look for the Bartholomew rifle, simultaneously dodging cannon shells and killing spiders. We explore the tunnel further until we come across Lieutenant-Azunit.
Walkthrough Dungeon Siege III (with the support of the site and CBR) + Screenshots and wallpapers
 Walkthrough Dungeon Siege III (with the support of the site and CBR) + Screenshots and wallpapers
After his defeat, we lay a charge on the trolley. We go back, we press the lever, we pass into the opened metal door-lattice. We go down the Deep Well and, guided by the markers, collect the painite.
Front Western mines we meet Roderick, again we agree to help him. Again we collect gunpowder. We raise the first one not far from the savepoint. Then I turned to the right side - in it we alternately activate three lever crystals and save the soldiers from the trap. At the dead end, which became their dungeon, there are three chests and a second charge of gunpowder. Going along the left wing of the Western Mines, we find the other two charges of gunpowder. We move along the platforms, collect the remaining painite. Ahead is another Lieutenant-Azunit. We kill him, lay the explosives in the trolley and tick. You can return to the base to the queen and turn in assignments.
Feat "Strong Fighter" (withstand 100,000 damage throughout the game) - +2 Endurance.
Feat "Merchant from Eba" (sell goods worth 100,000 gold) - +2 Dexterity.
We give Bartholomew the rifle, give Anton the painite, chat with the queen and run to help Phineas stop Kamnestok (he will lower the platform for you).
Walkthrough Dungeon Siege III (with the support of the site and CBR) + Screenshots and wallpapers
 Walkthrough Dungeon Siege III (with the support of the site and CBR) + Screenshots and wallpapers
Roderick tells us not very good news - we will have to hold back the onslaught of Jane's army. At the bottom of the well, we will meet her face to face - believe her or not - you decide.
The negotiations will end in a fight with the Fighting Creature - a powerful animal with tusks, a kind of cross between a rhinoceros and a mammoth.
Walkthrough Dungeon Siege III (with the support of the site and CBR) + Screenshots and wallpapers
 Walkthrough Dungeon Siege III (with the support of the site and CBR) + Screenshots and wallpapers
After the battle, in negotiations with the queen and Devonsi, we learn the truth about the murder of the king. The young queen asks to leave Jane alive if she is defeated - we agree or oppose.
The feat "Ally of the crown" (you provided decisive support to the crown) - +5 Stamina.
Roderick will lead us to the crossing. We head to the Stone Bridge Fortress, speak with Odo. We're going to breed masters for an army of machine guns. There are reinforcements, we find ourselves in Castle Courtyard Spire. If you left Rajani alive, then she and Saraya will meet you near the entrance to the castle, and tell you how best to proceed. If you killed Rajani, then you will have a dialogue full of hatred with her sisters. In the end, we learn that we need to kill two distraught archon sisters in order to get to Jane. We go forward, we press the lever, we pass further, another lever and we get the task about the hiding place (we poke into the closed door of the dungeon). We go back to the side doors-lattices, which were closed. To the right of the left side entrance, we stand on the golden tile - the secret door is open. Walkthrough Dungeon Siege III (supported by the site and CBR) + Screenshots and wallpapers
We release the Ferret (and it is better to leave behind bars). We search the chests and go to the right sleeve of the dungeon. We release political prisoners. We go into the immured chamber through the passages in the next one. In the chest we take the Hand of Azunai (15756 gold) - quite useful armlets. Now you can also Fresh air.
Examine the entire left side Castle Court Spire.
Walkthrough Dungeon Siege III (with the support of the site and CBR) + Screenshots and wallpapers
 Walkthrough Dungeon Siege III (with the support of the site and CBR) + Screenshots and wallpapers
Near the savepoint, don't miss the secret room with chests. We reach the elevator platform, press the lever, climb up and kill the Archon of War. We turn back and examine the right arm of the yard. In one of the nooks and crannies, you can dress up nicely at one of the "local merchants" (next to it is a hidden room with five chests).
Walkthrough Dungeon Siege III (with the support of the site and CBR) + Screenshots and wallpapers
After the battle, we listen to a short conversation and ... yes, yes, yes ... we run after the main enemy in pursuit - Burnt Forest should see its heroes again.
On the way to the transition, we search the chest with very good things (if the Ferret was released from the dungeon, then the chest will be empty), we trade with the Ferret, we go into the transition.
Feat "Savior" (free all prisoners from the Spire Dungeon (Ferret does not count)) - +5 Dexterity.
Feat "Experienced Trader" (during your career you spent 250,000 gold) - +1 Will.
In the Fortress of the Legion, the "last day of Pompeii" is already in full swing.
Walkthrough Dungeon Siege III (with the support of the site and CBR) + Screenshots and wallpapers
 Walkthrough Dungeon Siege III (with the support of the site and CBR) + Screenshots and wallpapers
 Walkthrough Dungeon Siege III (with the support of the site and CBR) + Screenshots and wallpapers
Walkthrough Dungeon Siege III (with the support of the site and CBR) + Screenshots and wallpapers
 Walkthrough Dungeon Siege III (with the support of the site and CBR) + Screenshots and wallpapers
P.S. Most importantly, at the first stage, dodge his energy balls and do not stand still where the archons appear. On the second - do not fall into black puddles and dodge lasers. During the battle, due to the abundance of action, I saw almost nothing and could not orient myself at all, so consider this too.
And now, the long-awaited finale - we talk with Jane, the Luminous Youth, decide on further actions in the kingdom, watch the closing credits, and create the next character to enjoy the game again!
 Walkthrough Dungeon Siege III (with the support of the site and CBR) + Screenshots and wallpapers
The beginning does not particularly burden the brain of even the laziest gamer - I chose a character, who has bigger boobs, which is more like, chose the difficulty corresponding to desire to swear your mosk, clave and mouse your abilities in this genre of games and ... go ahead! By the way, regardless of the chosen character in the game, only the drop, partially dialogues and, of course, satellites will change - the main storyline and locations will remain the same. According to the game itself: some chests and hiding places are hidden behind various obstacles - do not be lazy to search every corner. Also, when choosing certain answer options during a dialogue with the characters, you can increase your influence on the companions (and these are "Feats", and "Feats" are pluses to the characteristics). The game from the very beginning tells us what to press and what to do happens, gives the task "Gathering in the North", and we follow the path to Montbarron estate. The estate is on fire, the corpses of the descendants of the legion are all around. We examine the building (we read the notes and letters on the floor, examine the corpses). As an example for training, you will be asked to examine the first object containing things - a shelf with weapons. We equip better weapons, run down the stairs, eliminate the barricade, search the chest on the left, go down to the floor below, "split" the barrels and another obstacle, and enter into our first battle with the enemy - it will not be difficult to neutralize two Leskantsi mercenaries. We search the chest on the right, down the stairs, deal with bandits, break / shoot barrels, search everything and run with one of the survivors, Martin Guiscard, the son of the Legion, to eat as far as possible from such an unsafe estate. Along the way, we break everything we can and we search, we run along the bridge, activating (setting fire to the fuses) three barrels of gunpowder. Boo-boo!!! Four more scoundrels departed to another world and a wooden bridge with them. Well, we are heading to the Legion's fort - there is hope to find Odo and his surviving friends and associates.
important mission
We are in a new location. Here is our first save point. If you run south to a fallen tree, then you can find something useful in a pile of garbage. Then we go straight along the path, not forgetting to search the nooks with the remains. You can also find a chest in front of the gates of the military camp on the left. In the camp itself, we read a note (a hunt is declared for you - 500 gold per head each), which is attached in front of the nearest cart and search the chest and racks with weapons. Behind the camp we destroy two stumps, we find a chest behind them. Next is the save point and the Bridge to the fort. You can look into another camp to the left of the bridge - beat the bandits and profit from their gizmos. Having crossed the bridge, we encounter the first boss - the mercenary Bogdan, who decided that he would be able to make good money on us - we will upset him and go inside the building. After talking with Odo , we get the task - Go to Vranov Yar and talk to the locals. We are also pumping the level. If we go deep into the fort and go down the stairs to a small room, we will stumble upon spiders - it is better to kill away from cocoons so as not to spawn a bunch of small biting minions. After the massacre, you can collect some useful trophies. We go to Vranov Yar. In front of the gate we speak with Ladislas and find ourselves in Lower Raven Yar. We look around. We take the task from Lyudmila - to take revenge on the murderer of her husband. On the way we meet a messenger / messenger - you are asked to meet with the Leskantsi woman Leona in the cave. Another resident, Anton, will say that he wants to return the family value - of course, we agree to help the unfortunate. We find a merchant nearby. Having crossed the bridge, we take the task from Jacob - you need to "fish out" and kill the devil fish that interferes with his fishing. We go to Western Forest. Keeping to the left, we kill Ottokar and take away the family figurine. We go along the right path, we find ourselves in Singing Storm Cave. We talk with Leona, methodically kill the thugs, fight with Vera and her assistants (I left Vera for a snack, and skeletons and assassins, using dodge, brought down an area attack), and free two captives. If you are not playing for Anjali, then she will join to us. Leona asks to clean up Gunderik estate from thugs. No problem! The room on the left on the second floor of the estate - the ghost of Alice Gunderik complains about her imprisonment. We promise to help her. If you carefully read all the notes along the way, then when talking to the enchanted door, you can say the password and get the "Decipherer" feat - +2 Dexterity. We explore the office behind the door. We pass further, examine the hidden room behind the shelves. We go back and enter the east wing. Unclean people here in bulk! Breaking deep into Ancient Library of Gunderiks. Read books, try to pull the lever. So we got it - we wet the evil spirits. We go through the "open" door. We destroy the 4th liches and the Swamp Horror, which they called, and take the part we need from the skeleton in the corner. We insert the coal stone into the lever and open the door. Inner Sanctuary we will have a choice - to destroy the Heart of the Nagog or leave it alone. 1) We do not touch the heart (the quest to save the ghost of Alice is not performed, apparently a bug) and kills Lord Gunderik. Leona is happy. 2) Destroy the Heart (the quest to save the ghost of Alice ends) and kill Lord Gunderik (he becomes stronger due to the Nagog's broken Heart). Leona is not particularly happy. If you handed over the estate to Leone, you will receive the feat "Leskanzi Ally" - +3 Will, otherwise "Legion Overseer" - +3 Endurance. By the way, if you have collected various records about Ebe (at least 30 pieces), then get the "Keeper of Knowledge" feat - +3 Will. Before the exit, you can walk on foot - collect gold and spheres of life from spawning vases and benches.
Throat of the world
In the Lower Raven Yar, we give the figurine to Antokha (we don’t take money if we want the feat "The Embodiment of Virtue", otherwise they gave me about 800 coins). We speak with Gregory - we go through the city. On the way we meet Tatyana, we get a new task - to bring a package to Nick in the Eastern Cave. Along the way, we kill the vile spirit of water - Nishemma. We pass by the estate. We meet a merchant who asks for help. We go further, collecting along the way the chests set by someone very generous and evenly destroying the local gopota. Further, on a small area with barrels and boxes, we make a cluster of robbers and trade with happy Florin. Having gone deep into the path and to the left, we kill Boris on the instructions of the widow. Nearby is a destroyed bridge and an "explanatory" note to it. Let's go to Nizhny Vranov Yar and turn in two tasks. We inform Lyudmila about revenge (we don’t take money if we want the feat "The Embodiment of Virtue", otherwise they gave me a thing for 1870 coins). We hand over the task to Yakov (we do not take money if we want the feat "The Embodiment of Virtue", otherwise they gave me 712 gold). If all three tasks are passed without requiring a reward, we get the feat "The Embodiment of Virtue" - +5 Will. We go to the estate - we talk with Odo, he directs us to Burning Forest. On the way to East Forest we take the task from the corpse about the treasury. Going to the left, we kill Old Dakkenvir, we take one of the genealogy books of the great families of the Legion (1/3). The next Dakkenvir will be more modest. We search the nearby skeleton for the presence of another book (2/3). Going down and walking along the right branch of the forest, we find ourselves in a cave Shadow Rift. We find the last book (3/3), go deeper, kill the giant White Fang spider, unravel Nick and give him the package. The quest is considered completed - we get experience and an item. In Gorelesye quite a lot of "amphibians". We go, we kill everything that moves, we rummage through the bushes. Arriving at the place where the soldiers of the Legion fell, we pick up Hugh Montbarron's ring. Behind the tree there is a special cache - the Ancient Shield of the Legionnaire drops out (4200 gold). On the way back, the Radiant Youth warns us of the dangers ahead. He teleports us to the entrance to Burntwood. Companion / companion in a little confusion, we calm him / her. By the way, if you completed at least 10 additional assignments, you will receive the feat "Real Hero" - +2 Endurance. We return the genealogy books to their place, search the chest (I have dropped a lot of gold and Ring of the Raven). We speak with Odo, open the Legion Crossing. Enter - we are in Crossing Rukkenwal. We clean the chest. In the next transition, we are at the Mausoleum of Gunderiks. We defile in the most brazen way all the burials in the loot areas. There is a hidden room here (the Corset of the Consort drops out of the sarcophagus in it - 6000 gold), which is not displayed on the map (see screenshot).Next - Cemetery of Vranoy Yar. We go through the graveyard to the Upper Yar. We kill Zaria along the way with a pack of undead. At the Gate Upper Yar We are waiting for Vogomil with "servants" - we deal with him and attack the Town Hall. Ilias, Marek... - everyone should lay down near the save point! Next, we'll knock out Rajani. We take out Lazarus from the chamber and go to the defeated archon. The choice is yours: 1) We let go - the feat "Generosity of the winner" - +2 Will. 2) We kill - the feat "Iron fist" - +2 Attack. You also get a powerful staff - Heavenly Judgment (10080 gold).
Dead King
In the Fortress we talk with Odo. You have to cross the restored bridge. Opening along the way Crypt of Legion Heroes(Lazar's request) - in two statues in front of the entrance we insert the Legion's ring each. Maximilian will ask you to find three artifacts - we will kindly agree to help him. At the first turn to the right there will be a closed door - do not be sad - we will go out through it. Take the Cryptkeeper's Key from the skeleton in the second room on the left in the square hallway. We open the door of the second room on the right of the same square corridor and take the Skull of Norik. After descending the large spiral staircase, we find ourselves in Hall of Heroes.On the left side of the wall of sarcophagi we find the Staff of Meyrik. We kill Dracomir. We go further, we take the Sword of Bolingar, we head to the exit from the crypt. We hand over quests to Maximilian and Lazarus. We cross the bridge, Katarina joins us (if we do not play her) - now we can choose one of the satellites. Next, we will be in Cliffs of the Eastern Swamp.On the way, Leopold will warn that it is not safe to go further, we will thank him and, of course, we will move on. Ahead is a collapse, to the left are Jane Cassinder's soldiers and a passage to the Luminous Caves (the first red medicinal mushroom can be found in it). We destroy its "internal bio-content". At the bottom of the cave, we take Lucas into the group (if you are with one companion). We overcome the barricade and find ourselves on Battlefield in the Swamps. We promise to help Lord Devonsey, arrange a meeting with him and part of his army near the village of the First People. Near the two cannons of Jane Cassinder on a hill there is a hidden passage to the cache: there are two chests and a barrel. We promise to help Roderick in the search for the missing soldiers, we follow the path behind him in Swamp of the Duskwood. Rescue the first squad of scouts. Exploring with the General First People Settlement for the prisoners. With the help of the "valve" we put forward the bridge. We have a dialogue with the leader of the Maru-Yatum tribe, after which we will have to lay down a handful of his "people". We run to rescue the captives. Climbing the giant roots, we find ourselves in the arena where we have to fight with the leader (it is better to open the cages with prisoners so that they also participate in this crazy battle). After the battle, we are presented with a gift in the form of four chests and the leader teaches a spell to "remove" the roots. We chat with Phineas. On the way back, we take a task from Ara to collect slugs eggs. We pass further along the path freed from the roots and free the second detachment of scouts. Further, another such cleared path - there we kill the Ancient Worm and take away its eggs (0_o). We hand over the task to Are, we head to the camp. We hand over the task to Roderick. We speak with Devonsi, then we follow Phineas. We pass through the roots - we are on Road to Stone Bridge.Ahead we destroy a gang of robbers led by Svarbog. At the gates to the Kamennomost we speak with the Automatic Commandant (I remember Oscar from "Siberia"). Here we are in the city.
Court
Ursula asks for help with delaying her goods - she believes that the silk she is expecting could attract thieves. We agree to sort it out. Go ahead, turn left - Great Fortecia. In its right part, we are attacked, as I understand it, by revived armor. We need to collect four books. To do this, we run around the map, wet the warriors, dodge fireballs flying out of the jaws of stone lions and collect ancient volumes. Access to some rooms is limited by bars - you need to press the levers (advice - it's better to examine everything well as you find books, because then access to these rooms will be closed). After all this disgrace, we put all four books on the shelves of a large rack on the second floor and open a secret passage to the portal. Our partner / partner brings Odo with Marten, we speak with them. We need to: enlist the support of the Masters and save the 17-year-old Queen Roslin (you can start with any task). We get a feat for 20 completed additional tasks "Savior of Eba" - +3 Endurance. We go to the Hall of Masters. Gisella with a crowd of protesters demand the release of the krug. Sigismund Wolf will tell you an interesting story and agree to help you get the support of the masters. We go to the council. We need to get at least three votes out of five. Sigismund Wolf promises to vote for you anyway. Mayor Grimmelhaus says he will support the majority. Rorik Kassel will ask you to deal with the task "Strike!". Grezebelly will say that you need to eradicate a gang of thieves in the Crypt. Skripozud will entrust us with the case of the krag. What do we do with the "krag" (talk to him and make a decision)?: let go; leave behind bars; we escort him to the borders of the city, accompanied by machine guns, thereby ensuring his safety. Here we meet Reinhart (unless we play for him) - the last member of the legion team. Next, we resolve the property dispute (we go to the fort): we give the land to Barrenbaron; we leave the land with Hans; we divide the plot of land equally. We hand over the task to Skripozud. Leaving the council hall (by the way, there is a chest on the street immediately to the left, which is constantly updated), turn left and reach the closed gate. Let's talk to the Automaton and say that we were sent on an errand - he will open the gate. V Lower City go to Bolshaya Foundry. Deter Snell asks you to smash the leader of the Cyclopes and restore the functioning of the mechanisms - go ahead, to meet the feats! Yes, the jokes are bad with the Cyclopes ... To the right there will be the first lever that you need to press ... Well, and then - the 2nd, 3rd , and so on until the 5th, as we move along the mine (although in general there will be much more levers; PS: the role of "objects for destruction" in order to profit here is played by "U"-shaped pipes). On the way, we release the hostages (Olbert Lutz , blacksmith and shift supervisor). The leader of the Cyclopes Ergometheus, after a thrashing, enters into a dialogue with you and offers negotiations. We must choose what to do with the Cyclopes: 1) Grant them rights, get the feat "Hero of the working class" - +3 Attack. 2) Deny their demands, get the feat "Riot Suppressor" - +3 Will. Another vote received (depending on which master's interests you supported). We hand over the task to Deter Snell and Olbert. When I left Bolshaya Foundry, I had the feat "Sage" (60 entries about Ebe) - +4 Will. From Foundry to the left and down. We meet Hardtooth, who asks to destroy the out-of-control machine gun. Essno, we agree. Nearby, Herman Holtzman talks about Legion artifacts hidden in the crypt. Well, what else to do? - Let's go look for them in Crypts of the Sacred Blood. Already at the entrance we begin to clean the sarcophagi (Gee-gee-gee ...). Going a little further, we see pieces of disassembled machine guns - Mudbelly was right. Let's go look for the leader of this gang. The lever activates the retractable mechanisms of the bridge. In the room to the right and above we find a bag of silk. Having descended from the stairs, the first battle with reprogrammable automata awaits us (for the first time, my inventory was filled to overflowing). Another lever is another retractable mechanized bridge. Ahead - 3 huge pendulum axes (each removes 153 health). A lever is a bridge, another lever is a door. Another door and more axes-pendulums. Again, the lever (on the left), the door, and behind it, in the room, a load of wool and the Legion's Diary. We go further lever-> bridge-> ax-pendulum and find ourselves at a crossroads. I started from the left room: lever->bridge->pendulum-axe->lever (Katarina joins us, unless we play as her, and we get the feat "We are the Legion" - +4 Stamina), take the Burial Urn Legion, we turn back and bring down the Converted Automaton. We go to the right room: lever-> bridge-> lever, we take away the cargo with parchment. We return, we pull the central lever, we pass along the bridge. Down the stairs - we let the thieves' trash and the Street Boss derailed. We are waiting for a meeting with the godfather Eragott - we fight with him and ask about the Old Frant. We take the Legion Medallion, pull the levers - we head for the exit. In Kamennomost, an emergency - machine guns destroy the city. After an exciting battle with pieces of iron on the streets, we go to the Hall of Masters. They will tell us about the Old Frant - we run after him. It will not be easy to defeat him - first we destroy the machine guns and the capsules from which they come out, then the machine with hoses (similar to an old vacuum cleaner), and remove the lives from the platform on which Frant stands. After the destruction of the platform, we decide the fate of Archambault du Poyen: 1) Return join the ranks - the feat "Savior of the Legion" - +3 Will. 2) Bring to justice - the feat "Patron Lord of the Stone Bridge" - +3 Endurance. We hand over the task to Mudbelly and get a new one (find those responsible for committing crimes against the Legion). The first defendant is the merchant Rudolf Maxwell (we make a decision that you prefer). Entering the Lower City, we disassemble the enraged automatic machine into cogs. We return the goods to the merchant Werner Schnaus, that is, we hand over the quest. Nearby, practically insane, is the former guard Wenzel (the decision is yours). At the Crypts, we hand over the task to Hardtooth and help him in one more thing - for this we go into the crypt and, guided by the marker, we find the part. We return to him, give the gear. Frederik Pratz trades in a small area below the Ketzler bridge - we pass a "sentence" on him. Not far from the entrance to the Stone Bridge, we "remove" a gang of robbers and turn in the quest to Ursula (her assortment of goods is updated - there are much more things for sale and much better quality). In the Hall of Masters, we tell Mudbelly about how we dealt with the "debtors" of the Legion. Cases in Kamennomost are completed.
Epilogue
We go along the transition to Bleskoy. We are on Frosttop. We move forward, trying not to run into fire projectiles (be guided by the sound and do not forget to search the chest behind one of the walls that can be destroyed). We find a cannon with which you can break through the gate. Need gunpowder. Going further, we will meet a sapper of the royal army - you need to help the queen's soldiers retreat and fill up the approaches to the castle. Let's go back - we take cannon gunpowder and break through the very first gate we met with a cannon. We go inside and clear the camp. There is a cannon even lower, but it is without a cannonball. We take the core in a corner nearby. We shoot from a cannon. We cut through a passage overgrown with ice crystals, pass through the waterfall and talk with Ibsen. We go along the right arm of the Kaari pass. We block the third magic channel. In one of the nooks we save the lost soldiers and take them to Ibsen (just go further - you will come to a fork near the "house" of the hermit, and along the left sleeve), not forgetting to block the second magic channel along the way. Now we go along the central path, kill the Old Icy Dakkenvira and block the first channel of Stonestock. Ibsen will give us a waystone and ask us to clean one cave from the local fauna. We go along the right sleeve to the cave, we kill all the creatures, led by Prince Enjekki. Ibsen gives us two rings as a reward. We go on the left sleeve. We go into the cave, cut off the population of endemics and speak with Phineas - he will ask you to see the queen (two chests are hidden behind the crystals to his left). On the right side we go up (the first platform will take you to a room with chests), on the second platform we cross the abyss. Ruined Yard. We talk with the queen and Devonsi - you need to fill up the passages to the cave. Phineas is right there and asks you to collect Painite. Bartholomew talks about the need to find the automatic rifle he abandoned. So, having received the tasks, we go to solve them. deep well we rise above, we meet Roderick. Need to find gunpowder in Southern Mines. The first charge lies not far from the savepoint. We take the second one in the right dead-end tunnel, where we also do not forget to press the crystal-lever. Walking along the left tunnel, we take the third charge of gunpowder. Using the floating platform, we cross to the other side of the tunnel, take the fourth charge of gunpowder, collect painite (4 pieces). In one of the caves, we break the crystals and look for the Bartholomew rifle, simultaneously dodging cannon shells and killing spiders. We explore the tunnel further until we stumble upon Lieutenant-Azunit. After his defeat, we lay a charge on the trolley. We go back, we press the lever, we pass into the opened metal door-lattice. We go down the Deep Well and, focusing on the markers, collect the painite. Before Western mines we meet Roderick, again we agree to help him. Again we collect gunpowder. We raise the first one not far from the savepoint. Then I turned to the right side - in it we alternately activate three lever crystals and save the soldiers from the trap. At the dead end, which became their dungeon, there are three chests and a second charge of gunpowder. Going along the left wing of the Western Mines, we find the other two charges of gunpowder. We move along the platforms, collect the remaining painite. Ahead is another Lieutenant-Azunit. We kill him, lay the explosives in the trolley and tick. You can return to the base to the queen and turn in tasks. Feat "Steady Fighter" (withstand 100,000 damage throughout the game) - +2 Endurance. Feat "Merchant from Eba" (sell goods worth 100,000 gold) - +2 Dexterity. Bartholomew we give the rifle, give Anton the painite, chat with the queen and run to help Phineas stop Kamnestok (he will lower the platform for you). Roderick tells us not very good news - we will have to hold back the onslaught of Jane's army. At the bottom of the well, we will meet her face to face - believe it or not - it's up to you. The negotiations will end in a fight with the Fighting Creature - a powerful animal with tusks, a kind of cross between a rhinoceros and a mammoth. After the battle, in negotiations with the queen and Devonsi, we learn the truth about the murder of the king. The young queen asks to leave Jane alive if she is defeated - we agree or oppose. The feat "Ally of the crown" (you have given decisive support to the crown) - +5 Endurance. Roderick will lead us to the transition. We head to the Stone Bridge Fortress, speak with Odo. We're going to breed masters for an army of machine guns. There are reinforcements, we find ourselves in Castle Courtyard Spire. If you left Rajani alive, then she and Saraya will meet you near the entrance to the castle, and tell you how best to proceed. If you killed Rajani, then you will have a dialogue full of hatred with her sisters. In the end, we learn that we need to kill two distraught archon sisters in order to get to Jane. We go forward, we press the lever, we pass further, another lever and we get the task about the hiding place (we poke into the closed door of the dungeon). We go back to the side doors-lattices, which were closed. To the right of the left side entrance we stand on the golden tile - the secret door is open.
End
V Spire Dungeon we meet with the Weasel (the left sleeve of the dungeon) - you need to find the key to all the cells. For the key we go to the jailer at the end of the central corridor. The jailer is defeated, we have the key. We release the Ferret (or better to leave behind bars). We search the chests and go to the right sleeve of the dungeon. We release political prisoners. We go into the immured chamber through the passages in the next one. In the chest we take the Hand of Azunai (15756 gold) - quite useful armlets. Now you can go to fresh air. We examine the completely left side Castle Court Spire.Near the savepoint, don't miss the secret room with chests. We reach the elevator platform, press the lever, climb up and kill the Archon of War. We turn back and examine the right arm of the yard. In one of the nooks and crannies, you can dress up nicely at one of the "local merchants" (next to it is a hidden room with five chests). Again, take the elevator up, kill the Archon of Retribution, head to Altar of Azunai.In the Altar we kill Jane's minions. Jane runs away fire sanctuary. We run after her, kill her servants. Cassinder again leaves justice. We run after her Holiness Sanctuary. It’s here that we don’t want to plant beans on her! After the battle, we listen to a short conversation and ... yes, yes, yes ... we run after the main enemy in pursuit - Burning Forest should again see its heroes. On the way to the transition, we search the chest with very good things (if the Ferret was released from the dungeon, then the chest will be empty), we trade with the Ferret, we go into the passage. Feat "Savior" (free all prisoners from the Dungeon of the Spire (Ferret does not count)) - +5 Dexterity. Feat " Experienced merchant" (during your career you spent 250,000 gold pieces) - +1 Will. The "last day of Pompeii" is already in full swing in the Legion Fortress. Gorelesye. In the forest we meet with the Luminous Youth, who again warns us of the danger and knows about all the horrors that lie ahead. We spit on everything and go forward, shredding along the path of divine creatures. We will meet Jane in the very depths of the grove. The Distorted Creator, according to Jane's diseased imagination, must fall at the hands of the Legion! P.S. Most importantly, at the first stage, dodge his energy balls and do not stand still where the archons appear. On the second - do not fall into black puddles and dodge lasers. During the battle, due to the abundance of actions, I almost didn’t see anything and couldn’t navigate at all, so take that into account too. , and create the next character to enjoy the game again!End.PS Regarding the bonuses from feats received for increasing the influence of your companions (trust - a quarter of a bar of influence, devotion - half): Anjali: trust - +2 Attack, devotion - another +3 Attack; Reinhart: trust - +2 Will, devotion - another + 3 Will; Lucas: trust - +2 Endurance, devotion - +3 more Endurance; Katarina: trust - +2 Dexterity, devotion - +3 more Dexterity.
download dle 10.6 movies free
Game: Platform: PC, PS3, X360 Genre: rpg Release Date: June 21, 2011 RF: June 16, 2011 Developer: Obsidian Entertainment Publisher: Square Enix RF Publisher: New Disc / Hunt Little control before the game
The game is controlled using the keyboard, or with the mouse, by pressing the left button. At first, the controls feel awkward, given that the camera is curved, but you get used to it over time.
There are practically no branched corridors and wide freedom of action in the game, therefore it is unrealistic to get lost. Moreover, by holding down the R button (by default), you can call up the "golden thread" that will show us the way.
There are few side quests, and even those that are, are made in the course of the main ones.
Items and weapons in the game are divided into 4 colors according to strength and power:
Snow-white - the most ordinary and standard things;
Greenish - things with improved features;
Blue - things with very good features, sometimes just unique;
Orange - unique things that can be purchased for a tidy sum or raised from killed chefs.
In total, you can carry two types of weapons in the game, which one depends on the character. So, for example, Bows can carry a two-handed blade and a one-handed blade with a shield.
In the previous parts, you could choose a few friends and make a whole squad. In this part, you can only choose 1st friend, but it can be changed. By the end of the game, there will be three friends to choose from. You can change them in any peacetime, in other words, when there is no battle.
Often in the game we have to make decisions that will only affect the end screen.
I'm going to pass.
To begin with, we select the character for which we will play. There are 4 heroes to choose from:
Lucas Montbarron is the offspring of the head of the Legion. The young man is excellent with a blade, including a two-handed one.
Anjali is half human, half fire elemental. Equally well handles both cool weapons and fiery mysticism.
Reinhart Manx - an old man who owns "secret magic". Playing as this character, get ready to mow down the ranks of opponents with spells.
Katarina is a woman armed to the teeth with pistols and rifles.
Next, we select the level of difficulty of the game, after that we look at the splash screen in which our character receives a letter from some Odo. In this letter, he asks us to come to the Montabarron estate. In the estate there will be a meeting of all Legionnaires.
Personally, I played for Katarina.
Montbarron's estate
We start the game in the black forest. We get acquainted with the administration and run to the estate of Montbarron. The estate is engulfed in bright flames, three corpses are lying in the courtyard. We get the task - "Find the survivors"! We run into the house, the door explodes ahead. Before running out into the corridor, we read a letter and a page from the diary that are lying on the floor.
We go further. Next to the bookcases we find a rack with a weapon, we select it. We run to the stairs, we blow up the barrels that prevent us from passing. To the left of the stairs lies a letter and there is a chest in which some necessary thing awaits us. We run forward, we kill the first 2 opponents. These are ordinary robbers, fighters of the Leskonzi army. To the right is a chest containing a weapon. We go down even lower. We kill several opponents, after which the door will open, behind which one of the survivors, Martin, will be waiting for us. Before approaching him, we examine the room, break all the barrels, as they may contain gold, open the chest. After looking around, we approach Martin. He is one of the Legionnaires and a friend of Odo. We ask him what happened, then together with him we run away from the estate. On the way, we break the barrels, open the chest. We run to the bridge, set fire to three barrels of explosives and watch the cutscene.
Rukkenwahl
The first point of our journey is Rukkenwall. We conduct a dialogue with Martin, then we start the game. First, pay attention to the large column of light. At this point, you can save the game. We run straight from the save point. On the way, we search the remains, we reach the military camp. In the camp we find an announcement that they give 500 gold for the head of a legionnaire. We search the boxes and go through the gate. After running a couple of steps, we find ourselves near the bridge leading to the Vault. But before crossing them, we visit the 2nd camp, which is located to the left of the bridge. There we kill a couple of opponents and clean the chests. After that, we relax to the bridge and cross it.
On the other side we are waiting for a bunch of robbers led by some Bogdan. Bogdan is our first chief. We kill Bogdan and his minions, we run into the Vault, where Odo is already waiting for us. From his story, we learn that almost all of the Legionnaires are dead, presumably except for Lucas and Angela. We leave Martin in the Vault and go in search of the remaining Legionnaires. First, let's take a look at the small village of Ravens Rill. But before we do that, let's take a good look at the Vault. We look into all the rooms, go down to the lower floors, where there are a lot of spiders, there are closed doors, which we are not yet able to open.
We leave the shelter on the road of the pilgrims. The road will be full of enemies, but in the end it will lead us to the village of Ravens Rill. Before the gates of the village, a local inhabitant will meet us and say that the village is occupied, but still let us through.
The village is a peaceful place, in other words, you cannot shoot and kill civilians here. In the village, you can save and pick up a few side quests. We get the first such quest from an old lady whose husband was destroyed. The lady wants revenge, well, after all, we will help her. It is necessary to destroy some Boris, with a bandage on his face, then bring the bandage to the lady as confirmation. Having taken the quest, we step along the road further. After a few meters we are stopped by a man whom we supposedly had to find out. But, no matter how annoying it may sound, we do not remember him. But, the man aggressively recommends visiting his sister, who is located in a cave in the west of the village. According to him, the sister can answer some of our questions. The conversation will not last long, as the man will run away, afraid that they will be able to catch us.
Next to us at the moment is a trading cart. Here you can take and sell the found things. After bargaining, we cross the bridge, take the quest from the fisherman (you need to go east, throw the hook acquired from the fisherman into the water and destroy the creature that interferes with fishing). We save and leave the village in West Forest (western forest).
At the first fork, turn right and enter the cave. There we meet a sister who will give the key to the dungeon in which the prisoners are kept. These prisoners are survivors of the estate fire. So, after talking, we run to the left, killing heaps of opponents. There are save points ahead, there are stands with weapons and chests. The road zigzags, but it is difficult to get lost. Somewhere, approximately in the middle of the way, you will meet the chief - another leader of the robbers named Barbat. Then, after a couple of steps, we will stumble upon a strong witch guarding the prisoners, named Vera. She will have to fight. In battle, she will be assisted by several robbers and three weaker witches. Be careful at the very beginning of the battle, as the enemies can pinch and destroy, you won’t have time to blink an eye.
After Vera is defeated, we run up to the cells and free the prisoners. Which prisoner will sit in the right cell depends on which character you are playing. Angela sat in my cage. After the prisoner is free, he will become our companion.
We won’t be able to just escape from the cave, as Leona (that sister who gave us the key) will meet us and ask us to clear a place called Gunderic Manor. According to her, this place should be cleared of hordes of opponents living there. Leona herself does not want to do this, but it’s better for us to agree with this task. Not far from Leona, her brother Alexei meets us. We ask him a couple of questions and get out of the cave. At the first fork, turn right and get to a large old crypt. This is Gunderic Manor - the estate of the Gunderic couple. Inside we are met by a ringing wind and emptiness. But emptiness is only our temporary illusion; in fact, ghosts live in this house, which we will meet a little later. In the meantime, we are examining the picture in the hall, go up to the 2nd floor and turn left into the corridor. There we will hear a voice that will open the door to the bedroom, we go in there. We meet a ghost lady - this is Alice Ganderik, the daughter of the owner of the estate. She will ask for help. She is imprisoned in the house and cannot leave it. In order to free her, we must get into some storage, the key to which is in the father's office. We run out of the bedroom, kill the opponents who ran out of other rooms. We turn into another corridor on the second floor, there are three rooms here - one of them is password protected. We clean two rooms, we approach the talking door of the third room. We try to guess the password a couple of times until the door laughs and lets us in. We take the letter from the table, we read the diary on another table. We go down to the bottom floor.
We go into the doors that were previously locked. We pass along the corridors directly to the library. In the library we find locked steel doors. A lever weighs next to the doors, we pull it, but the doors do not open. Our task is to find some heart. After we pull the lever, the door to our left will explode. We kill opponents, prem forward right to the circle, in which several sorcerers summon a demon. Having spied the rite of summoning a demon, we become participants in the massacre. The Imp's name is Mire Hulk Horror. We kill him and his minions. We find a corpse in the battle hall, search it and find the heart we need. We bring it to the lever and open the door. We step forward, we get to the hall, where we meet face to face with Lord Ganderik. To free his daughter, you must destroy him and take the magic ring. It is worth saying that the Lord is a very scary chef. He summons skeletons, knows how to accelerate and peel with mysticism. Having dealt with him, we leave the hall and meet Leona. In the process of talking with her, we learn that she is ... our sister! After the conversation, we can stay in the cottage, or we can end up on the street. In any case, we need to visit another room, which is located to the left of the one in which we destroyed the Lord. This room contains an old Heart of Nagog artifact. This particular artifact keeps the Lord's daughter in the cottage. We destroy the artifact.
All finished with the house. We return to the village, we find Anton. He will ask us to do something, and it turns out that we have already done it, we get merit. We ask Anton about Lazar, Anton will recommend contacting Grigori. We find this old man in the village and ask him a few questions. We leave the village (at the exit we will be met by lady Tatyana and asked to find her husband, who went east of the village) and go towards the Shelter. On the way we find a corpse lying near the water. Here in this place hides a creature that interferes with fishing. We throw the hook into the water and kill the monster. As confirmation, we bring Jacob (that's the name of the fisherman) the creature's tooth. Quest completed.
We go to the Vault, talk to Odo, get the key from him. This key opens the door to the hideout dungeon (yes, the one we couldn't open). But we are not in a hurry to open this door. We run out of cover and step to the left. There we meet a merchant who will ask to release his cart with the product from the robbers. We reach the cart, kill all the Leskantsi. After that, it will be possible to purchase something in this cart. If you go further along the road, you can come across Boris (you need to destroy him, since we have such a quest) and a closed crypt. After killing Boris, we return to the village and give the widow Boris' bandage. We return to the Vault, go down to the basement and open the doors. We fall into the East Forest (eastern forest).
First, we raise the letter from the corpse. After reading it, we learn that the corpse is a thief who tried to find a room that stores information about all members of the Legion. Unfortunately, this room is hidden and in order to find it, you must first find three books that talk about 3 majestic births. These books are scattered throughout the Eastern Forest. One in a cave, in which, by the way, you can complete another quest - to find Tatyana's husband. The husband is already online, and a large snow-white spider is sitting behind him. We kill the spider, we untie the spouse, we get merit. What swings the book, it is easy enough to find in the cave. The 2nd book is in the forest and it is guarded by a forest demon. 3rd - near the entrance to Mournweald (the black forest in which we need to find the ring of the Grand Master of the Legion). Having collected all three books, we go into the forest.
We go straight along the path, there is nowhere to turn anyway. At the end of the path, the corpse of the father of the main character awaits us. We search the corpse and find the ring. We are trying to leave, but we are stopped by a fiery boy named The Radiant Youth. He will ask us never to return here again, tell us how to open the gate we need, and send us to the Eastern Forest.
We return to the Vault, find a secret room (we look at the mini-map, the room is marked with a circle on it) and speak with Odo. After the conversation, we go to the magic gate (in the room with the gun dealer) and open it. We get to Rukkenvahl Causway. This is a typical transitional world, with the help of which in the real world you can move from one point to another. Having crossed to the other side and exited through another gate, we find ourselves in the Gunderic Mausoleum. We clean the mausoleum from opponents and search for treasures. We leave the mausoleum and get into Raven's Rill Graveyard.
In fact, we end up in a cemetery. Having run a little forward, we meet the witch Zaria, naturally we kill her! We run a little more and find ourselves in Upper Raven’s Rill, where, by the way, we were striving. At the entrance to the city, we will be met by a detachment of Leskantsi with a weak leader. By the way, before we enter the church, we will meet two more leaders. And in the church itself, the super-boss, Rajani, is waiting for us. This woman is a warrior and a sorcerer. A very formidable opponent. Shoots blue arrows, makes portals that take lives, delivers a quick series of blows. The battle with her takes place in two steps, in other words, it must be destroyed twice. The first time she just runs and shoots at us, and the second time she makes a whole bunch of portals, shoots a lot of arrows. Her shots are surprisingly accurate and take away a lot of heals.
After Rajani is stunned for the 2nd time (yes, we haven’t been able to destroy her yet), we go to the dungeon and free Lazarus, the nobleman, the head of the village. Together with Lazar we run to the exit, where Rajani and Marten are already waiting for us. During the conversation, we will be offered to either destroy Rajani or release her. This is your choice. After it is made, we will find ourselves in the Vault. We talk with Odo. He will give us a task - to get to the second Shelter in Stonebridge.
Introduction
Anton Golitsin
- And Bill will take a little more, right, buddy?
Sam patted the pony's rump thoughtfully. The answer to him was a rather gloomy look of an almost talking animal.
J.R.R. Tolkien "The Lord of the Rings. The Fellowship of the Ring".
In the beginning was Total Annihilation . The strategy that became the world's first clone C&C who have endured strategic battles, albeit in isometry, but in 3D. After the resounding success of his project Chris Taylor began to think: what else to do as noisy? I looked around and suddenly saw that a crazy amount of people were being cut on the server in Diablo. And what? This is an idea! Is it possible to cross strategy and hack-and-slash RPG? Yes, and try to make the notorious Diablo an order of magnitude better? Such a task will make any master scratch his head and, rolling up his sleeves, get down to business. So did and Chris Taylor. Created a company Gas Powered Games and three years ago began to sculpt Dungeon Siege.
The project immediately became one of the most discussed on the Web: websites were created, the same question hovered on the forums - when? And the release of a new masterpiece was postponed and postponed. Last September Taylor stated: "Dungeon Siege is ready, but we won't release it until we get the balance right!". He could afford to say so - by that time Gas Powered Games already comfortably settled under the wing Microsoft. But finally, this moment has come - on April 5, the game went on sale.
Did it work Gas Powered Games surpass the luminaries of Blizzard? Read about it in the verdict of the June "Mania". And my task is to help you get used to the world of Eb and free it from the invaders.
Character, interface and other husks...
Now you will read a phrase that will shock all adherents of Diablo and other role-playing games: in Dungeon Siege there are no experience points! At all. As a given.
But how then to pump the character? And it’s very simple (“simple” is the main word in Dungeon Siege). But first, let's talk about the skills of the character. There are many of them: as many as four!
Melee Weapons- for all piercing and cutting weapons.
Ranged Weapons- for archery.
Combat Magic- for combat magic (fireballs and others like them).
Nature Magic- for natural magic (well, there are lightnings, all sorts of thunders and at the same time treatment, etc.).
So, if you prefer to clobber enemies with swords, clubs, knives and other scalpels, then your value grows Melee; accordingly, if you like the sight of a fireball escaping from your hand and burning the hell out of a dog, then over time you will turn into a certified magician. Simple, isn't it? Your character class grows automatically, and you don't have to think about where to throw those damn experience points, which are always low (which always killed me in role-playing games). Why then fight, gain exp and generally suffer? But how! After all, your characters will be able to use more powerful blades and spells only after gaining a certain experience in using weapons or magic. Here is your incentive.
Character parameters are also few: three. Strength, Dexterity and Intelligence. The first means, of course, strength, the second - endurance and accuracy, the third - the possession of all sorts of magical things. The class of the character just depends on these parameters: if you fight with swords today, you will be a warrior, tomorrow you are impatient to indulge in magic - welcome to the wizards! And you don’t have to think about who to become when generating a character.
By the way, about generation. She is here. How could it be without her. V The Sims were playing? There you go, same thing. We choose gender, physiognomy, skin color, hairstyle, shirt, panties - and that's it. Your character is already in the game.
Well, about the interface. It is also simpler than a steamed turnip. Top left - icon of the character (characters) with columns of health and mana. Nearby are four slots. The first is for melee weapons, the second is for ranged weapons (your characters can be equipped with both at the same time, but you can only use one of them at a time), then there are two spell slots. How to peck enemies is your business. You can select the necessary weapon or magic either by clicking the mouse or by scrolling through the list with the key Q.
Top right is a compass. At the bottom left is the pause button, which is completely replaced by the spacebar. By the way, in pause mode, you can do absolutely all the actions you need - rebuild the squad, change clothes of the character, transfer things from one character to another, etc.
And finally - the strategic panel at the bottom right. A very necessary thing. With its help, you can change the formation of your squad, expel characters you don't like from the squad, and determine the tactics of action.
The first line from the top means the type of character's actions (from left to right): follow the enemy in any direction, keep at the required distance for an attack, hold the position.
The next line is defense tactics: the character attacks any enemy, the character does not attack, but only responds to the attack, the character does not attack at all.
And the last line - shooting commands: the character attacks the closest enemy, the character attacks the strongest, the character attacks the weakest.
The pouch button tells the selected character(s) to pick up anything that doesn't lie well within sight.
All panels can be partially removed from the screen - so as not to cover.
Well, in the lower right corner - four icons.
The leftmost one makes it possible to see the names of objects lying on the ground. The same can be done by clicking alt. Very comfortably.
The next icon calls up the map (key Tab). Such a completely strategic map, and you can perform all actions directly on it: well, if you don’t like how the main game screen looks, please call the map and wander around it as in an ordinary strategy, fight, collect property. Although how one can not like the main screen - I don't understand ...
And finally, the right icon is the game menu (key Esc).
In general, hotkeys in Dungeon Siege very convenient to use. The mouse is needed only for movement, killing and picking up - everything else can (and should, because it's more convenient) be done from the keyboard.
In addition to the keys already mentioned, there are several more:
M- replenishes mana (if there is a reserve, of course);
H- does the same with health;
I- calls the inventory screen;
TO- arranges items in the inventory;
G- protect the selected character;
Ctrl+A or E- select all members of the squad;
Ctrl+1-9/1-9- assign/activate weapon combinations;
Ctrl+F1-F8/F1-F8- assign / engage groups in the detachment;
F9/F11- quick save/load.
That seems to be all the "hot keys" used in the game. It is easy to remember them, and their usefulness is obvious. However, all of them can be reassigned, but for me - and it's very convenient.
Something useful is taken from the strategies. Namely - a "rubber" frame. As soon as she selects the items lying on the ground and press the button with the bag, they will be selected and suitable for picking up. The group of characters also stands out. You can add or remove a character from a group by holding ctrl and clicking on portraits.
As for mana and health, everything is also great here: exactly as much is drunk from the cones as necessary to replenish the lost. So don't be surprised to see a three-quarters empty bottle of medicine in your inventory - your hero just drank exactly as much as he needed, and not a gram more. Mana and health are restored instantly, but it takes time for your hero to get the necessary cone from the gas holder. Everything is like in life. However, both health and mana can be restored automatically, however, over time.
Inventory screen. He is standard. In it you see all the statistics about the selected character, items, spells. By pressing a button view, you will be able to look at your hero in all his glory - with all the armor and weapons put on him. Spells are added to the Spell Book(s) by dragging them from the inventory onto the book. To make a spell active, simply click on it in the character panel (top right). The list of spells (if you have more than two of them in the Book, and there can be no more than 12 of them in one Book) is called up by holding the left mouse button on the spell icon, then select the one you need, click - and it's done, that is, the spell is in the slot.
You need to carefully collect the Book - think about who you want to make your character: a militant magician or a good healer. While there is nothing stopping you from buying additional Books and equipping them as well, you will only need to change the Books in the inventory screen in a timely manner.
To exchange things between the inventories of two or more heroes, you just need to select the necessary characters using ctrl and call the inventory with the key I. Then by simple drag and drop you make the necessary evolutions.
Dungeon Siege- the game is completely three-dimensional, so we can't do without camera control. The camera rotates either with the mouse (when you bring it to any edge of the screen), or with the arrow keys. I personally liked using arrows more. Although this is, of course, a matter of taste. Using the keys + and - the camera can be zoomed in by taking off into the heavenly heights and literally sticking your nose into the back of the character. Zoom, by the way, also works on the map. Thank you Uncle Taylor!
Character, interface and other husks... (part 2)
However, I don’t quite understand why I’m describing this to you - everything is clear anyway. I told you - SIMPLE! Moreover, when you hover the cursor anywhere below, a lengthy hint pops up, describing in detail where you have pointed: if the item, then get the characteristics of the object, if the character - the characteristics of the character, the enemy - its characteristics, the panel button - what it does and etc. Well, passion, how convenient ...
Yes. About your party. It can have up to 8 characters. But do not be afraid that you will not be able to cope with such a crowd - in principle, four or five, well, six are quite enough. If you are a fan of picking up everything that lies badly, then, of course, all the good stuff will not fit in your inventory. But the developers have provided the opportunity to purchase pack donkeys and use them to drag what is not currently needed or does not fit in the inventory (this is the question of the epigraph!). Another nod to Gas Powered Games. By the way, donkeys during the fight run back to a safe distance and prefer to watch the fight from the side. If someone attacks them, then they will do their best to protect the master's property, kicking the hated enemy (although this makes a very weak impression on the monsters). Donkeys also tend to get stuck anywhere - this is already a national character trait of these animals - so keep a close eye on them. But keep in mind that donkeys, oddly enough, are also members of your team, so they are included in the number 8.
Items on the ground roll for a limited time - 10 minutes! So here you also have to think: take it - don’t take it, otherwise you decide not to take it, then realize it, but no - the ship has left.
On the issue of strategy. Everything is trite here: those who can hit the enemy from afar (archers, magicians with remote spells) are located behind, all the rest go to the enemy with their chest. And the ability to divide the party into groups, assign each character its own tactics of action and build each group in its own way, give strategists complete expanse for action.
Dying in Dungeon Siege is difficult, but possible. If your character runs out of all health, he will go into a coma for a while, and then revive (especially with the support of heavily spellcasting party mates). But if the fallen comrade continues to be kicked hard by the monsters and the healing witchcraft does not overpower their kicks - then do not blame me: sing in chorus "Eternal memory ..." and conjure "Revival" (if you have it).
Here, it seems, with everything sorted out. If anything else comes up, more on that as we go along.
Oh yes, to the question "where to go, where to go" ... In this regard, the game is very friendly - there are practically no plugs. All movements usually take place along a well-marked road. In places where there is no road, the route is usually marked with a chain of torches or lamps. In the dungeons, lamps and torches, of course, are hung on all the walls, but there is still only one way, and the study of extra rooms only benefits in terms of getting gold and clothes. Yes, and the exp from this is added. So, with your permission, in most cases I will not focus on turns and other landmark-related things. If you need to turn off somewhere so as not to miss something vital, I will tell you about it.
Chapter 1 The Road to Stonebridge
The events in Dungeon Siege take place on the Aranna continent. The once mighty Star Empire fell apart under the influence of its Legions, each of which craved power. The Tenth Legion traveled to the west of the continent and founded the Kingdom of Eb. For 300 years the kingdom lived in peace and prosperity. However, everything has its price. The evil Krug tribe attacked Eb. From this moment on, your character - an ordinary peasant (who, by the way, is only 15 years old. True, there is not a word about this in the game itself) - and enters the game.
First of all, you meet your old (in every sense) friend Norik. Dying in your arms, he reports the Krug attack and asks you to go to the city of Stonebridge and meet with his friend - Gjorn. Go across the bridge along the road. After the third bridge, next to the pond, it makes sense to examine a two-story house: firstly, there is gold in barrels next to the house, and secondly, on the second floor you can find the Book of Crypts. To read it, go to inventory and right-click on the Book.
The Book of Crypts says that southeast of Stonebridge is the most revered burial site in Eba. It was here that the dead of royal blood were buried. Crypts are literally stuffed with traps in order to protect the dead from robbers. Currently, the crypts are abandoned, and all burials are made in ordinary cemeteries.
Go further down the road. In a small hut you will find Edgaar, who will ask you to clear his basement of intruders. As a reward, you can take everything you find from there. If you are interested, go clear the basement - it is located on the left side of the house and consists of two levels. You can go down to the lower floor by standing on the elevator at the end of the first level of the basement and pressing the button on the wall. In fact, there is not much in the basement - a few weapons, and that's it. As a reward for the work done, do not forget to get a cone of mana and a cone of health from Edgaar. And again forward on the road.
In the mountain range to the left of the road you can find a cave. In it you will meet a rather serious opponent, but the game is worth the candle - you will pump over, and at the same time you will get smart, but to go there or not is up to you, of course.
At the destroyed bridge, talk to Skartish. He will tell you that the Krugs set fire to this bridge and then moved over it, and now the only way to Stonebridge is through the crypts that you already know about. Go there, for fidelity, looking at the pointer (just hover over each arrow with the mouse, and you will see what is written there below).
Chapter 1
On the way to the crypts, you will meet wolves - serious opponents, and the main trouble is that they run in packs. So gather your thoughts and sharpen your weapons.
Next to the first CRYPTS stone marker you will find the so-called circle of life. Let's learn how to use it. Behind the circle of life hangs out a pack of wolves with a boss at the head. Lure them onto you and stand in the center of this circle. Everything. Now you are not afraid of any bites - life will have time to be replenished earlier. Further, you will meet the same circles and circles of mana - do not fail to use them.
At the second stone sign with the inscription CRYPTS, you can go to the right. By turning the statue, you will open the entrance to one of the crypts. You can examine it. There are few enemies there: two pairs of gargoyles and two skeletons, which you can summon by turning the statue at the end of the tomb. As a reward, you will receive a mana vial, a hat and some weapons.
Return to the road to the crypts and stomp further. Explore the second crypt. It is very large, and there are a lot of all sorts of evil spirits, including a very powerful skeleton captain and a slightly less powerful gargoyle captain who can shoot with his eyes. In this crypt you will find a book with a biography of Ethan Stonebridge, after whom the city was apparently named. There is nothing particularly interesting in this biography - the former soldier of the Second Legion became famous in the field of trade, that's all. Climbing deep into the crypt, you will meet the scribe Ulora, who will offer to take her as a partner. Take it or not - you decide. I took.
Ulora has a book describing the Azunai cult, an ancient belief that originated 200 years before the founding of the Star Empire. Azunites professed Eternal Passion and earthly remuneration for work. It was easy to become an Azunite: it was enough to recognize the power of the Protector and pass under the Sacred Helm. The children of some especially zealous followers of Azunai inflicted mortal wounds on themselves, which were cured as soon as they passed under the Holy Shield.
Oh, by the way, Ulora - if you take her with you - will tell you that the exit from the crypt should be somewhere nearby, in the east. Go there.
After getting out of the crypt, go further along the road. Forward and forward. You will have a lot of furious skirmishes with hordes of krugs, so Ulora still should have been taken as a partner. In the very first Krug camp, climb the watchtower and fight the local shaman there.
After going through all the fights, you will eventually find yourself in front of the Stonebridge gates.
Chapter 1. Stonebridge
Everyone in Stonebridge is complaining about the Krug invasion that happened the day before. But the city looks quite decent. Only one house burned down.
But back to business. We had to find Gjorn - he is standing right outside the gate and asking to join you. The decision on the need for such a partner, as usual, is yours. But in any case, he will give you a quest - to deliver a report about the Krug attack to the Overseer in the city of Glacern.
In Stonebridge, you can get two more quests.
The first is from Ella Riverstarn, who is found on the second floor of the Ed's Chicken Coop Inn. Ella asks you to deliver a letter to her sister - Ada from Glacern.
You will receive the second quest from Ordus Jarell (he stands by the only house that burned down in the city). He needs you to retrieve his ax from the North Watchtower. The ax is in the lower, fortified part of the tower, and Ordus thinks that the Krugs have not yet found the entrance to it. In "Ed's Chicken Coop" you can also hire the wizard Zed for 900 coins, and in the temple - the archer Naidya, however, she will cost more - 1000 gold.
And of course, in Stonebridge you can buy yourself something from the ammunition in the blacksmith's shop and some of the spells in the temple. And also for 370 c.u. hire a donkey, and not even one.
Well, all the work is done, all the quests are received, you can hit the road. At the sign in the center of Stonebridge, look which way Glacerne is and hit the road. The northern watchtower is on the same side, so you don't have to worry about Ordus' mission.
Chapter 2
Exit the Stonebridge gate and go straight along the road without turning anywhere. With hordes of krugs, I think, now, in an expanded composition, you can handle it without difficulty.
The northern watchtower is located just after the steep climb, to the left. Get up with the whole crowd on the elevator and go down to the basement for the ax of Ordus. The basement consists of two rooms and, if I'm not mistaken, nine krags. Show them Kuzkin's mother, take the ax and get out upstairs. Try not to forget anyone in the basement, otherwise you will have to go down after him later.
Well, we took the ax, we continue our journey to Glacern.
Chapter 2
Here's the problem! If you follow the arrow indicating the direction to Glazern, then you will stumble upon a locked gate that does not want to open in any way. But smart uphill ... But we are oo-smart! Walk along the path that leads to the East Tower - the ruins of the Vesrin Cross, which you could read about in a book borrowed from the basement of the North Watchtower.
Vesrinsky Cross - majestic ruins, an architectural monument, protected by the state! Spiders, skeletons and other undead, including spitting flying skulls, have taken to these ruins. And in quantities that are incalculable! The battle will be long, the battle will be hot, there will be many battles. A lot... But you're oo-smart... You can handle it.
Having cleared the first floor of the dungeon and thoroughly pumped up, go down the elevator to the second. Same story here. Only instead of narrow passages, majestic huge halls await you, reminiscent of the halls of Moria in their scope. In the very last, largest of them, carry out a total sweep, carefully searching all the corners. In the center of the hall there is a room in which you should press the lever, well, and drink to your heart's content from the fountains of life and mana.
Opposite the entrance to this hall, you will safely find the exit. Behind the door that hides this exit, well, just a very large spider with 148 units of life is hiding. How you destroy it is up to you. It doesn't concern me!
Having dealt with the spider, take two elevators up, and you will find yourself at the same locked door, only on the opposite side of it. Having smashed the red barrel at this door, you will finally be able to open it, for which the warriors standing behind the door will tell you a big human merci. A trifle, but nice.
Chapter 2
But we don't need to go through the door. Go again along the arrows, go down the hill, deal with the krags (which after the dungeons of the Vesrin Cross will seem like a mere trifle to you) and enter the city of Glitterdelv.
In Glitterdelve, you can take Gloern to your team. But even if you do not take it, you will still receive the quest from him. The quest is this: save Gloern's brother - Torg, who was caught by the hags and is being held somewhere in the mines of Glitterdelva. (By the way, in the center of Glitterdelva there is a monument to the legendary donkey Mags, who, after an explosion in the mine, pulled three half-dead miners out of the rubble. You can read this heartbreaking story in full in the book that Gloern has).
The mines are nearby. So go straight there.
In addition to krugs, scorpions, stone idols, cave worms and funny red-eyed devils await you in the mine. Deal with them all and look for Torg. It is located on the lowest - the third level. Several elevators lead to the third level from the second, but only one will bring you to the Market, the rest of the elevators will lower you into rooms filled with monsters. Try all the elevators, at the same time you will gain exp.
When you find Torg, he will give you an amulet and a message to the Overseer, while he himself will remain in the mine to return it to normal functioning. When you take the elevator up from Torg to the second level, look for an iron door in the dead end, open it and take the elevator to the surface.
Chapter 2
Blimey! Snow. "Winter-cold, lonely houses ..." And to Glacern still walk and walk. Well, follow the signs. Higher, higher, even higher. On the way to the left you can find a large ice cave. If you have not yet lost the desire to wave, feel free to step into the realm of ice and fight to your heart's content with leggings and bigfoots. Earn money and strength.
After that, go outside and continue your way to Glacern. When you enter the city, immediately head to the hotel, located to the left of the city square - this way you will immediately complete two quests, that is, pass all your messages to Overseer Ibsen Yamas. He will immediately give you a quest for the future, even two: go to help the Legionnaires in the Mole fortress, and along the way, since he passes through the Ice Caves, find the magician Merik there. The same task will be given to you by the hostess of the hotel - Julinna.
Chat with people at the hotel. It turns out that the Overseer is gathering Legionnaires in Glacerne in order to repel the Krug invasion with a counterattack. Here you can also hire someone, since there is an offer. There would be money. And you, in theory, should have them.
Enter the temple. On the right is the student Ardun, who will complain to you about his bitter life: he took the trilogy about the Path of Fedvir from the master Onok, gave it to his friends to read, and as a result, he only had the third volume left, and whoever has two more - he does not remember. Here is another task for you. We can handle it without leaving the city.
One book is in the house behind the temple, and the second is by the guard on the tower at the entrance to the city. Having taken both books, return to the temple, give them to Ardun and receive the reward due to you - 200 gold.
Now all that's left is to send greetings from Ella in Stonebridge, and there's nothing else for you to do in Glacerne. The house of Ella's sister - Ada - is located behind the blacksmith's house, you have to climb two small ladders to it.
Well, now that all the affairs in Glacerne have been settled, people have been hired, new clothes and spells have been bought, maybe even one more donkey has been acquired - you can go further to look for adventures on your own head.
Chapter 3
After leaving Glacern through the northern gate, go forward along the road (in fact, there is nowhere else to go). Dealing with hordes of krugs along the way, Bigfoot and packs of white wolves, you can explore the abandoned hut, which stands to the left of the road, and the basement, located after the stairs to the right of the turn.
When it finally seems to you that you are completely lost in the fog and snowfall and will never come anywhere again, you will face the huge gates of the Ice Caves, which will open hospitably so that your company will be immediately attacked by ice birds and krugs. Understand.
Chapter 3
There is only one way through the Ice Caverns, so don't get lost. For better orientation, follow the sign that says "Jerry's Trading Post". Massive battles await you in this refrigerator. Almost like on the Kulikovo field. First of all, destroy the magicians, causing new portions of enemies from oblivion, and the nests of ice birds. And then as you please.
Having made a long journey along the icy serpentine, sooner or later you will find yourself at the ice cliff, in which the magician Merik is immured. Break the rock, and the revived magician will immediately give you a task: to find his Guardian Wand - a magical artifact that the Krugs are hunting for. Thanks to Merik, the Krugs think that the Guardian Rod has some magical power that it doesn't actually have, but it's still a terrible weapon.
If you wish, you can accept Merik into your company. Go further.
Chapter 4
Having dealt with the ice dragon, which has as much as 1000 health units, go out into the fresh air and continue moving along the road, dealing with enemies along the way.
Soon you will come to a lonely hut - this is Jerry's trading post. The owner himself is a very unfriendly and rude person, however, he will be able to merchandise you in full, if you have that desire. Buy what you need and move on.
Chapter 4
Soon you will reach a stone wall, in which a single passage will be found. Feel free to go there. Ahead of you is a huge cave inhabited by a variety of living creatures, which even the tongue does not dare to name somehow. Lots of fauna there! First of all, you should deal with a certain crystalline substance of green and blue colors, emitting electrical discharges from itself. These creatures prefer to stay at a considerable distance, so they are easily overlooked in the general swara.
Move forward and forward - especially there is nowhere to turn off. When you reach the stone arch, you can turn right, go through the second stone arch and explore the dungeon - there is nothing particularly interesting there, so, a little gold.
Go back and go through the first stone archway. Go where you go, since the stone path will not let you turn anywhere. At the second sign with the inscription "Dark Forest" go down and follow the underground lake to the shore. Having got out on land, destroy the last horde of monsters in this cave, decompose into components two large crystalline substances of purple color and go out into the passage between them into the Dark Forest.
Chapter 4
In the Dark Forest, in addition to the already familiar creatures with spikes on their backs, you will also meet forest trolls. Trolls are very unpleasant creatures, because, having entered into battle with you and feeling a threat to their lives, they retreat, hiding in the wilds of the forest, and, making their way under the cover of the thicket, attack your pack animals. So be careful and don't let any troll get away with impunity.
Gradually you will reach the camp of travelers. Despite the completely peaceful appearance of the camp, you will quickly find out that the head of the caravan has had his daughter, Sykra, kidnapped, and the bandits rampaging in these forests promised to come and rob the caravan that night, taking goods and women. You are invited to deal with the leader of the bandits, taking everything that you find in their camp as a reward. You have no choice but to accept the offer.
The camp of bandits is located next to the Eastern Swamps, go there. After destroying several flocks of monsters and a local variety of wild boars along the way, you will reach the first bandit camp. Hold on tight, it's about to get messy.
If you survived the first mess, then you already imagine what awaits you next. Go forward, slowly, slowly cracking down on crowds of bandits. After some time, you will reach a pack of wolves. Destroy them and turn right. If you see another platoon of bandits in front of you, guarding a passage in the rock, then you are almost there. Deal with the bandits, go into the cave and destroy everything that moves there. Of the moving one, you should be most interested in the person over whom the red rays glow invitingly - this is the Bandit Boss.
After the victory, plunder the local analogue of Sim-Sim, and since nothing else connects you with traveling merchants, go further - in search of Merik's wand.
Chapter 4
Having finally reached the swamp and dealt with new packs of wolves and bandits, you will reach the swamp lake. Go around it to the right. You will meet a wounded Azunite apprentice lying on the ground (remember, you have already read about them?). He will ask you to cleanse the Temple of the Azunites from evil and place an amulet on the altar, which he will give you. The student tried to do it himself, but failed.
Temple ahead in the direction of travel.
Go forward along the walkways, defending yourself from the local swamp creatures along the way. Here you will meet a swamp variety of forest trolls - these are less cowardly than their counterparts, but also not averse to slip away and see what is in your luggage. Try to immediately deal with the swamp magicians and witches - these sorcerers tend to summon huge and very healthy swamp creatures, which, well, there is absolutely no time to deal with.
Eventually you will come to the Temple. The cemetery at the Temple will expel crowds of zombies, which scatter very effectively when killed into bloody lumps. When the area around the Temple is cleared, you can go inside and destroy the main zombie. After successfully resting the monster, approach the altar and click on it. Now the Temple is cleared, and the next quest is completed.
Go to the back gate, over which the elf flies. And go along the only road in these places, which again leads through the swamp. Trolls hang out in the huts, witches roam around the huts, swamp creatures crawl out in droves. Lepota! True, in one of the huts you can stock up on healing potions, and this is at least something in such a disastrous place.
After the hut with drugs, a chain of torches will show you the right way. You will realize that you have reached the edge of the swamp when a couple of goblins begin to pour flames from flamethrowers at you. Beautiful thing, right? Do you want the same? Will.
Chapter 4
Enter the goblin lair by standing on the round elevator and turning the valve in the center. It turns out that goblins are artisans! In addition to flamethrowers, they came up with a whole bunch of other equipment: hand-held stun guns, flying stun guns, riding wedges with a flamethrower, just wedges, walking robots, which in no case should be allowed into the center of the formation - they explode, simple mechanical spiders ... Just a feast for the eyes. Especially if you imagine that all this beauty will now start to shoot you! Well, what can you do - defend yourself. Sooner or later, you will get a hand-held flamethrower, and a hand-held stun gun, and a light mortar, and a light machine gun. If one of your wards has already reached the required level of development to use this technique, immediately hand over the newly acquired toys to him - this way you will greatly facilitate your work at this very difficult stage.
You will not get lost - the road is one and does not provide for any branches, know that you should tighten all the valves you meet in order to stop the access of poisonous gas or hot steam. The only thing that can make you break your head is a rotating bridge. There is nothing to break it (head): turn the bridge, go to the other side, conduct Total Annihilation in the next couple of halls, go to the next platform, rotate the bridge again and go further - in this way you make some kind of loop.
After this loop, a couple of more halls await you, stuffed with goblins and their samples. military equipment, and, finally, a meeting with the Goblin Boss - a miracle of enemy technology, "Terminator 3. Judgment Day Has Finally Come", a huge, enormous robot. I don’t know what your party is at the moment, what your characters are armed with, I don’t know anything about you, so I can’t give any advice on destroying this monster. Kill him and that's it!
As a reward, you will receive the rod of Merik you have been looking for for so long and the gentle parting words of the head of the goblins: "Ancient Evil will still destroy people, and all their riches will go to us!" So it will be or not, but you have nothing more to do here - go into the next room and use the round elevator to get upstairs.
Chapter 5
You have one unfinished quest left in your journal: get to the Krot fortress. That's where your path is now. At the exit from the cave - on the left - two guards are sitting, talk to them. It turns out that a certain necromancer Gresh, the current ruler of the Sek tribe, sent crowds of undead to the Mole fortress. Six Legionnaires tried to inform the fortress commandant, Captain Tarish, of this scourge by using the ancient temple route, but Gresh's undead lay in wait for them there too - only the two of them managed to escape.
Well, now you know how to get into the fortress itself - through the temple. And the undead? What are you undead after all those trials that you had to overcome!
It remains to understand where to go. It's more difficult. At least there are no familiar roads here. Exit to the sea coast to the right of the exit from the cave and go forward until you come across a pointer with arrows. One of them says "Krot Fortress". Orient yourself where she points, go there and spank. The idea is to climb the hill in the indicated direction until you hit the first torch. Further on, a chain of torches will show you the way.
In the first hut you come across, merchant Thane will offer you a bunch of different goods to choose from. Behind the lake, on the outskirts, there is another hut. In it, Thane's partner Gregor will ask you to find out what happened to a group of treasure hunters who recently climbed into underground communications to fish and still have not returned. For information about their fate, Gregor promises not to remain in debt.
Return to the Thane's hut and follow further along the torches. In the basement of the next hut, where the chain of torches breaks, and the entrance to underground utilities begins. Get down and start methodically examining all the rooms of the dungeon. In the end, you will stumble upon the corpses of unlucky explorers. You can immediately go tell Gregor about your find, or you can continue the work begun by the treasure hunters - thoroughly examine the entire dungeon, collect everything that is poorly packed in boxes and barrels, and only then run with a report to Gregor. This dungeon is a horseshoe - one exit is in the basement of the hut, and the second is guarded behind it large quantity monster stock, keep that in mind.
They got rid of Gregor, you can continue to look for the entrance to the temple complex. The road to it is located at the hut with a basement on the side opposite from the basement - on a hillock. Crowds of revived ghosts and devils will meet you at the ruined temple. Destroy them and enter the temple.
Inside, again, skeletons, ghosts, devils and the most abomination are waiting for you - healthy grave worms that may well bite your donkeys. Be methodical and that's it. Use scorched earth tactics.
Chapter 5
It will not be difficult to find the way to the exit - just pay attention to the burning torches: where there is fire, there is a road. Having got out to the surface, you will immediately meet with Boriev, the brother of the girl Sikra, who was kidnapped from wandering merchants, whom you freed from robbers a long time ago. You can take him as a companion.
Walk forward along the road. You can ignore the crowds of people hanging around with clearly non-peaceful intentions, except for those who are clearly standing in the way. After walking a little further along the road, you will finally come face to face with the necromancer Gresh. Although he is a strong man, he cannot compete with the goblin Terminator, so there should not be any problems here.
After killing Gresh, look at the sign and go to the Mole fortress.
Chapter 5
In the fortress, report to Captain Tarish (he is standing next to the house burned to the ground) and get a task from him: to capture the Druug village, located in the east. The Druugs have formed an alliance with the Sek, and more than 120 people have already died in the battles for the fortress. As usual, you can stock up on ammunition, spells, medicines, donkeys and hit the road.
Use the compass to navigate and exit through the back gate of the fortress.
And all around everyone is talking about some girl that the druugs recently dragged in the direction of the Hall of Skulls. You don't have to be seven spans in your forehead to understand that this is the same Sikra. Captain Tarish sent a detachment to save the girl, but so far no news has been received from him. Fortunately, the only way to the desert lies just through the Hall of Skulls. So, you will save the girl and complete the captain's task. Glory to you and honor!
Chapter 6
After going down, go straight and straight, repelling the attacks of skeletons and druugs - there are not many of them here. Soon you will come to the Hall of Skulls, but there is nothing here but bones. Move on and get out into the fresh air.
How wonderful here! The river runs, biting bees fly, swordsmen and archers of druugs grow right out of the ground, small magicians from behind the bushes throw fireballs ... Lepota! It's the magicians that you should pay attention to in the first place. Do not look that they are small: firstly, there are a lot of them, and secondly, they are far from always visible, they prefer to sit in the bushes and in secluded corners, and they launch fireballs tirelessly, which, of course, does not add health.
Step along the river, moving from bank to bank and destroying everything in your path. In one place you have to make a steep enough descent, where you can take another member to your team. Well, then the path lies up, up and up again. Needless to say, druugs, bees, magicians and other crocodiles will not let you look at truly breathtaking landscapes. Having climbed to the very top, you will find yourself in front of a druug village, more like a small fortress. A sign with three arrows will help you check the correctness of your location: "Krot Fortress", "Fiery Rocks" and "Eb Castle".
Chapter 6
The sign "Castle Eb" just points to the entrance to the village. Go there. However, it's nice - the druugs are bowing low, and you have to make your way up the village along the ramp along the wall. Having climbed up and along the way, having destroyed five or six more recalcitrant drugs, go to the butt and go into the hut.
You don't have to persuade a druug elder with a weapon. Just chat with her, and she will tell you a story about the fact that the Seki captured the drugs many years ago, but then disappeared. And now, to attack, they appeared again and by force forced the drugs to obey them and carry out their orders. But the Druugs are a peaceful people, not willing to fight, and the elder will tell you that the Seki are planning to attack Castle Eb in order to capture the Secret Chamber with jewels.
Naturally, your task will be to prevent this barbarism, especially since this is the only quest that has not been completed at the moment. Thankfully you just received it.
After leaving the elder's hut, go a little forward and turn right, and then - forward along the ramp up.
Chapter 7
Climbing up, you will see a friend fighting a dragon. You've already seen these. Having hurried to the other in killing the dragon, talk to him (and not with the dragon, of course, but with the other). Joshua - that's the name of the druug - will tell you that before the reappearance of the Seks, dragons began to attack the druugs. When the seki came, they told the druugs that the Legionnaires dominated the dragons and kept the main and most ancient dragon - Rathe, planning to take over the world with it. However, Joshua did not believe these tales and asks you to kill the Ancient Dragon Rate before the Seki freed him and began to use him for their own purposes. That's new quest appeared!
To the left of Joshua there is a densely populated place - you can visit there: weapons, gold and other junk are provided. If you manage.
Well, if there is no desire to once again expose the blades, go further along the road. After breaking a couple of gangs of thugs, you will find yourself at the next sign. Examine it, and let's first kill the dragon. Get down downward and iditol along the road. You will see a cave not far away - this is the lair of the Ancient Dragon. Come in there.
Reminds me of Tolkien. But not "Lord", but "The Hobbit". A piece of gold is lying around, guarded by some worthless dragon, which immediately falls to the ground like a cold corpse. Collecting gold, gradually move deeper into the cave. Here He is - Ancient Dragon Rate. Ancient, he is ancient, and how much strength he has - over 20 thousand rolls over. Can you handle it? And where are you going...
Chapter 7
After killing the oldest of the ancients, collect what you didn’t have time to and return to the road to Eb Castle. In the cave, as usual, lamps will show you the way. Two groups of bandit youths after the battle with the Dragon do not count.
Once out into the light, take the road down and repel another attack. Going a little further, you will meet with Lord Bolingar, who will tell you that the castle has been captured and the King is in captivity. And it is not known where. Will have to search. If there is still room in your squad, you can take Bolingar with you.
Move on, keeping your eyes open and your blades at the ready. Before the bridge, look to the right: do you see a chain of lamps going into the distance? Why not see what is there ... And there - royal entertainment: a labyrinth. In fact, nothing but a couple of dozen monsters is hidden in the labyrinth, but why not have some fun? Labyrinth plan attached.
Chapter 7
Returning back to the road, cross the bridge, and here it is in front of you, in all its glory - Castle Eb, captured, but not defeated. So! We must find the king. And where do all normal people keep prisoners? In the dungeon And how do all normal people get into the dungeon? Clear pepper, through the roof!
Go through the door, carry out a total cleansing of all adjacent premises, exit through another door (in the dining room), deal with spiders in horse stalls and climb the fortress wall, go through it to the throne room and the temple. Clean them up. Using the stairs leading to the throne, climb the enfilade and methodically clear the bedroom, library, armory and a couple of other rooms from all rubbish.
Now you can go outside. Navigating here is not as difficult as it might seem at first glance. Just go down all the stairs, look where your foot hasn't set foot yet, and in the end you should end up at a wooden bridge with the corpse of a guard lying on it (you saw him in the video before entering the castle).
Cross this bridge and you will see a small tower with a three-candle lamp in it. This is what you need. This is an elevator to the local dungeon. Climb to the platform and wait a bit. The elevator will come to you. Now quickly run to him and wait again.
Chapter 7
Here you are in the basement. Don't be intimidated by the large number of doors. Still, this is a castle, not Diablo's catacombs - its smart people designed it. Clear the main corridor, and only then open the doors one at a time. In order not to get confused where you have already been and where you haven’t, do not close the doors behind you. So it is very easy to see where else you can expect the enemy.
So, the top floor of the dungeon has been cleared, you can go down the stairs - here is the castle prison. The king is in the central chamber, but before throwing yourself into his fatherly arms, get rid of the skeletons, skulls and knights that guard him. Now you can listen to the words of gratitude, and wipe the mean male tear of tenderness.
But everything is not so simple. It turns out that people three hundred years ago put the leader of the Sek, sorry for the expression, Goma, in a magical prison. But during this time, the forces of magic have weakened, and Gom can break free, which is what the seki who have awakened from sleep want to contribute to. They are trying to capture the Star Chamber hidden in the palace, which contains the artifacts that keep Gom in the dungeon.
Your next task, as you might guess, will be to prevent the release of Goma and the capture of the Star Chamber with artifacts. All clear? You can do it!
Chapter 8
Do not forget to grab the star key from the king and go beyond his dungeon. Although no. If you have not yet opened the cell doors in the part of the prison where the king is, do so. Don't leave enemies behind. Now you can run ahead. The tactics are the same as before: not a single closed door, not a single unexamined camera!
We cleared the hall, checked all the cameras in this hall, run further.
In the hall, which is located after the narrow stone bridge, everything is the same. The cages are raised and lowered by rotating the wheel on the floor next to them. In one of the cells is one of the prison guards - crazy as a March hare - he does not want to admit where the Star Chamber is, taking your squad for seks. At the expense of it!
Well, that's all, the hall is completely cleared... Exactly? Check it out.
Now you can run to the next stone bridge with torches (if you stand with your back to the cage with the jailer and the cells, then right in front of you). To the right is a locked door, to the left is a circle at the end of the path. Put the star key on it and step forward along the descending walkways.
Here you are in the Star Chamber. Walk up the ramp, rotating each chalice statue. When you turn them all, the central mechanism will start working, you will see an extravaganza of colors (as usual in such cases) and after all this carnival you will be able to get some of the rarest items from the chests - you can be sure that no one but you has such!
Exit the Chamber.
Chapter 9
This is the last chapter, and as usual for the final part - there is almost nothing to write here. After you leave the Chamber, go through the previously locked door. Well, then ... What do you think happens in the finale? Well, run, well, beat everyone, run further, since there is only one way and turning the wrong way is not only difficult, but simply impossible.
Well, yes - there are a lot of enemies, a lot, a crazy lot ... But they are all rather weak, even the frightening lava giants ...
A more or less serious danger is only fiery knights and crowds of small fire-spitting magicians.
When the lava field is left behind and you get (hopefully without tangible losses) along the bone path to the flow of extinct (raspberry-colored) lava flowing from nowhere to nowhere, go around this flow. This is the only place where the path forks - keep this flow all the time to your right. Well, then go straight and straight all the time, fighting dragons and knights, until you get to the final. stone circle surrounded by lamps.
When all the lamps are lit, the circle will fall down - right to the throne, on which sits the ruler of the Seks - Gom.
Understandably, now final battle. After his death, Gom will be reborn, and you have to fight him again. The first time he has a little over 6000 HP, the second time he has a little over 11000 HP. So in general, the guy turns out to be weaker than the Ancient Dragon. True, he shoots fireworks from all the cracks, so there is no hope for an easy victory.
After winning a victory, you can run around the level, and transfer your most pumped character to the multiplayer battlefields. But that's a completely different story.
A little pre-game guide
The game is controlled using the keyboard, or with the mouse, by holding the left button. At first, the control seems inconvenient, given that the camera is curved, but you can get used to it over time.
There are almost no branched corridors and extensive freedom of action in the game, so it is impossible to get lost. Moreover, by holding down the R key (by default), you can call up the "golden thread" that will show us the way.
There are few side quests, and even those that are, are completed in the course of the main ones.
Items and weapons in the game are divided into 4 colors according to strength and power:
White - the most simple and standard things;
Green - things with improved characteristics;
Blue - things with very good characteristics, sometimes simply unique;
Orange - unique items that can be bought for a tidy sum or raised from killed bosses.
In total, you can carry two types of weapons in the game, which one depends on the character. So, for example, Lukam can carry a two-handed sword and a one-handed sword with a shield.
In the previous parts, you could choose several companions and create an entire squad. In this part, you can only choose one companion, but it will be possible to change it. By the end of the game, there will be three companions to choose from. You can change them at any time of peace, that is, when there is no battle.
Often in the game we have to make decisions that will only affect the end screen.
I'm going to pass.
To begin with, we select the character for which we will play. There are 4 heroes to choose from:
Lucas Montbarron is the son of the head of the Legion. The guy is great with a sword, including a two-handed one.
Anjali is half human, half fire elemental. Equally well handles both melee weapons and fire magic.
Reinhart Manx is an old man who possesses "secret magic". Playing as this character, get ready to mow down the ranks of enemies with spells.
Katarina is a girl armed to the teeth with pistols and rifles.
Next, we select the level of difficulty of the game, after which we watch the splash screen in which our character receives a letter from a certain Odo. In this letter, he asks us to come to the Montabarron estate. In the estate there will be a meeting of all Legionnaires.
Personally, I played for Katarina.
Montbarron's estate
We start the game at dark forest. We get acquainted with the administration and run to the estate of Montbarron. The estate is blazing with bright flames, three corpses are lying in the courtyard. We get the task - "Find the survivors"! We run into the house, the door explodes ahead. Before running out into the corridor, we read a letter and a page from the diary that are lying on the floor.
We step further. Next to the bookcases we find a rack with weapons, we select it. We run to the stairs, we blow up the barrels that prevent us from passing. To the left of the stairs lies a letter and there is a chest in which some kind of useful thing. Run forward, kill the first two enemies. These are simple robbers, soldiers of the Leskonzi army. To the right is a chest containing a weapon. We go down even lower. We kill several enemies, after which the door will open, behind which one of the survivors, Martin, will be waiting for us. Before approaching him, we examine the room, break all the barrels, since they may contain gold, open the chest. After looking around, we approach Martin. He is one of the Legionnaires and a friend of Odo. We ask him what happened, then we run away from the estate with him. On the way, we break the barrels, open the chest. We run to the bridge, set fire to three barrels of explosives and watch the cutscene.
Rukkenwahl
The first point of our journey is Rukkenwall.

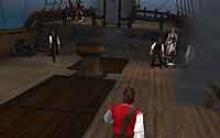


Corsairs To Each His Own Passage Of The Quest In Search Of The Guardian Of Truth - tioneproperties
Walkthrough "Corsairs: To Each His Own"
Walkthrough "Corsairs: To Each His Own"
Cell biology puzzles
Why hasn't the computer beat the human yet?