The Room is incredible logic gamethat amazed all smartphone owners. It allowed you to plunge into the mysterious atmosphere of one room filled with various riddles and puzzles that you had to solve in order to get out of the room. Naturally, the developers decided not to miss this opportunity and created a sequel to the game called The Room Two. The passage of the game and its essence remain the same, but the process has changed slightly. Now you have the opportunity not only to look at the individual pictures that the developers offer you - you need to move around the room, studying it and independently finding all the secrets. This made it much more difficult game processbut at the same time made it much more interesting and fun. Naturally, you should not immediately rush into the maelstrom of all difficulties - for a start, you should go through the training level The Room Two, the passage of which you will find in this article. If you can master it, then you will be able to cope with the rest of the levels, which are performed according to a similar principle.
Box
IN game The Room Two begins immediately with a rather difficult puzzle, which is a box. It has a central element, as well as parts distant from it. First you need to set up the center and then attach the rest of the pieces to it, after which the box will open. From it you can take a hexagon - at first it may seem that there is no use for it. But you need to be patient - there are still many mysteries ahead, and you will need it. As soon as you deal with the box, go to the octahedral table and examine it. Under one of the corners you will find another hexagon, which you should also take with you. In The Room Two, the walkthrough consists of such little things, so you should never miss them.
Square table with compass

Move from the octagonal table to the square one, which is located in the very center of the room. It is clear that the steps of progress are extremely small, but it is with their help that you can advance the passage in The Room Two. Chapter 1 is tentative, so you should understand that there will be more challenging puzzles... And on this moment you can see that there are two holes on the square table which are perfect for your hexagons that you found at the beginning of the assignment. Nest each one and then scroll to reveal a circular hole in between. From it you can take a metal sphere and a note. First, insert the sphere into the hole in the center of the compass located in the middle of the table, and then use the magnifying glass to read what the note says. The text itself does not interest you, pay attention to the letters that are written in red paint, and remember them, as soon you will need to use them.
Compass

Go to the compass - as you can imagine, the note had letters indicating the cardinal points. Therefore, in the desired order, move the compass needle until it opens. You will be able to take the medallion, which is also a puzzle. Scroll the arrowed parts of the medallion to form a square.
Lamp
Now it's time for you to return to the octagonal table at which you spent the first half of the level. Insert the medallion into it and watch the lamp emerge from it. You need to pick up this lamp and examine it from all sides until you see a mysterious symbol. Remember it, go to the statue, which is holding a box in its hand. Open it and repeat the symbol seen on the lamp. That's it, you can continue playing The Room Two, the 2nd chapter will be a little more difficult, but you already understand general principle, therefore, further actions will depend only on yourself.
Source: fb.ruActual
miscellanea
miscellanea
Chapter 2. Cabin on the ship
We are approaching the sailboat model at the open porthole. We read the one lying to the right of itnote ... We turn our gaze to the forward mast of the ship with the "crow's nest" on it. Rotate the upper part of the structure, align the vertical lines. We get it from the opened cachekey .
Examine the front side of the chest. We open the lock flaps, pay attention to three rotating discs, each of which has a drawing with three triangles. Rotation of the disc around the axis makes the triangles change their position. It is logical to assume that in order to open the chest, you need to install the disks so that the triangle patterns on them take a certain position.


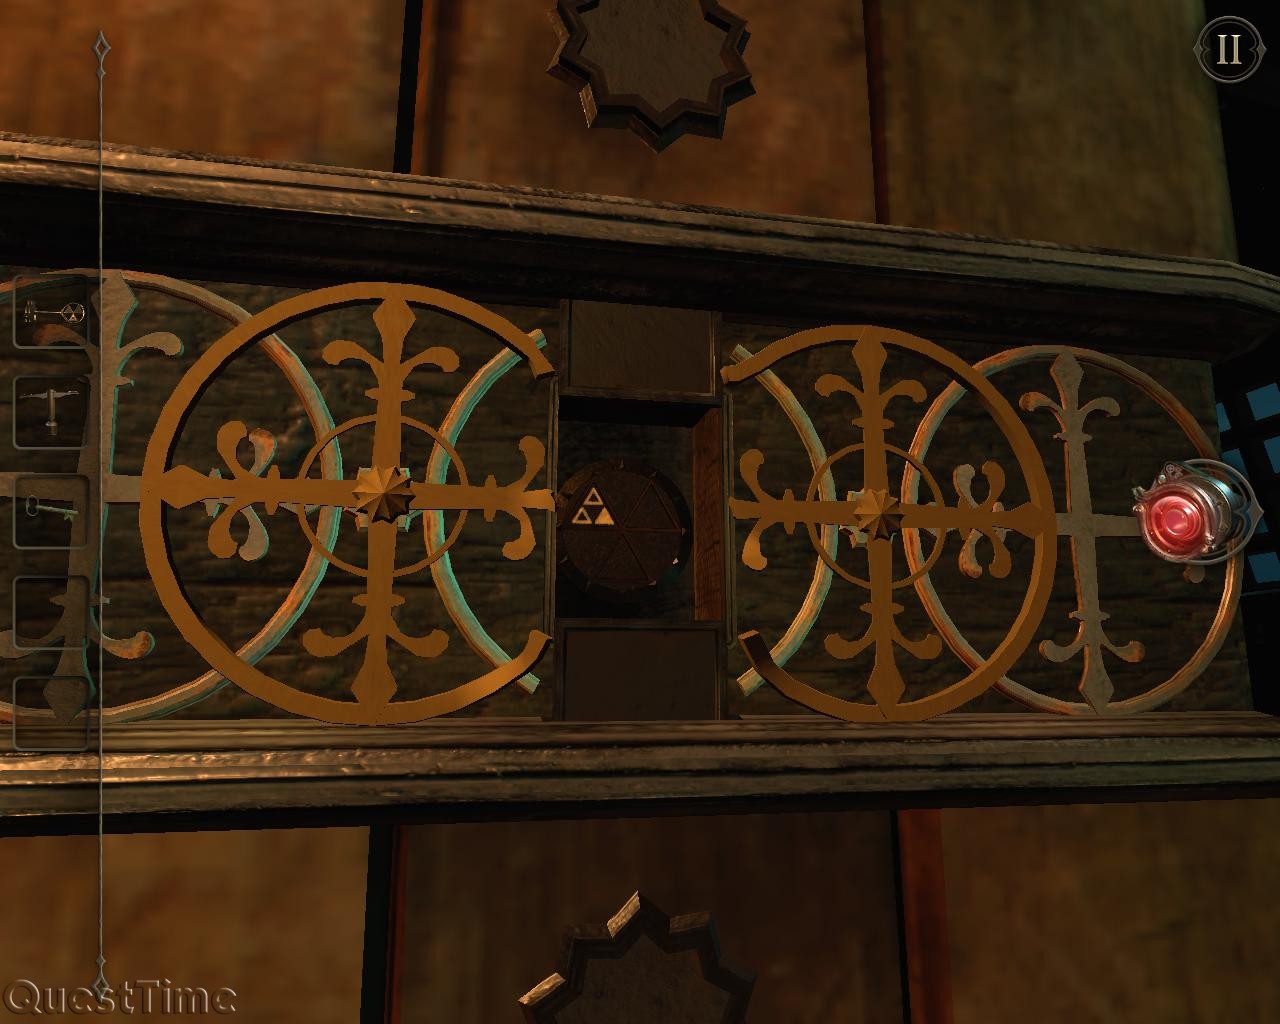
The figure that should be on the lower disk is suggested by a key. The second clue is the drawing on the upper right disc located in the lower left corner on the left side of the chest. The third clue is on a wooden rack that has a chest. We turn the openwork decorations to the left and right of the center, take the key from the opened recess, look at the hint.

We rotate the disks, placing the triangle patterns on them in the position indicated by the tips. We insert the key into the keyhole, rotate it. We open the lid of the chest. To get into the interior of the chest, you will need to open four more locks.

Three of them (I-III) are available for manipulation on initial stage... The fourth lock will open for action after the first three locks are opened.
CastleI
panels with an ornament counterclockwise - push in the locking pins of the lock.
CastleII
We look at the lock panel through a lens with a red lens. We pull down the lower pins, freeing disk with ornament. We turn it, allowing the upper pins to enter the grooves.
CastleIII
We look at the lock panel through a lens with a red lens. Turning quarter discs , allowing the pins to fall into the grooves. We bring our eyes closer to the opened recess with a slider. Pull the slider down, open panel fourth castle.
CastleIV
We look at the lock panel through a lens with a red lens. Move the halves of the rectangular plates , push the pins into the grooves. Insert key cylinder into the hole that opens in the center. We turn it clockwise, open the second lid of the chest. We read lying in the new compartment of the chest leaflet .

We plot the route of the ship from A to B, according to the hint contained in the letter - two miles to the North, two miles to the West, three miles to the South. Click on the button with the boat on the right.
We read a new letter. We bring our eyes closer to the keyhole closed by the rotating flaps. Move the petals to open access to well ... We insert the key into it, turn it clockwise.
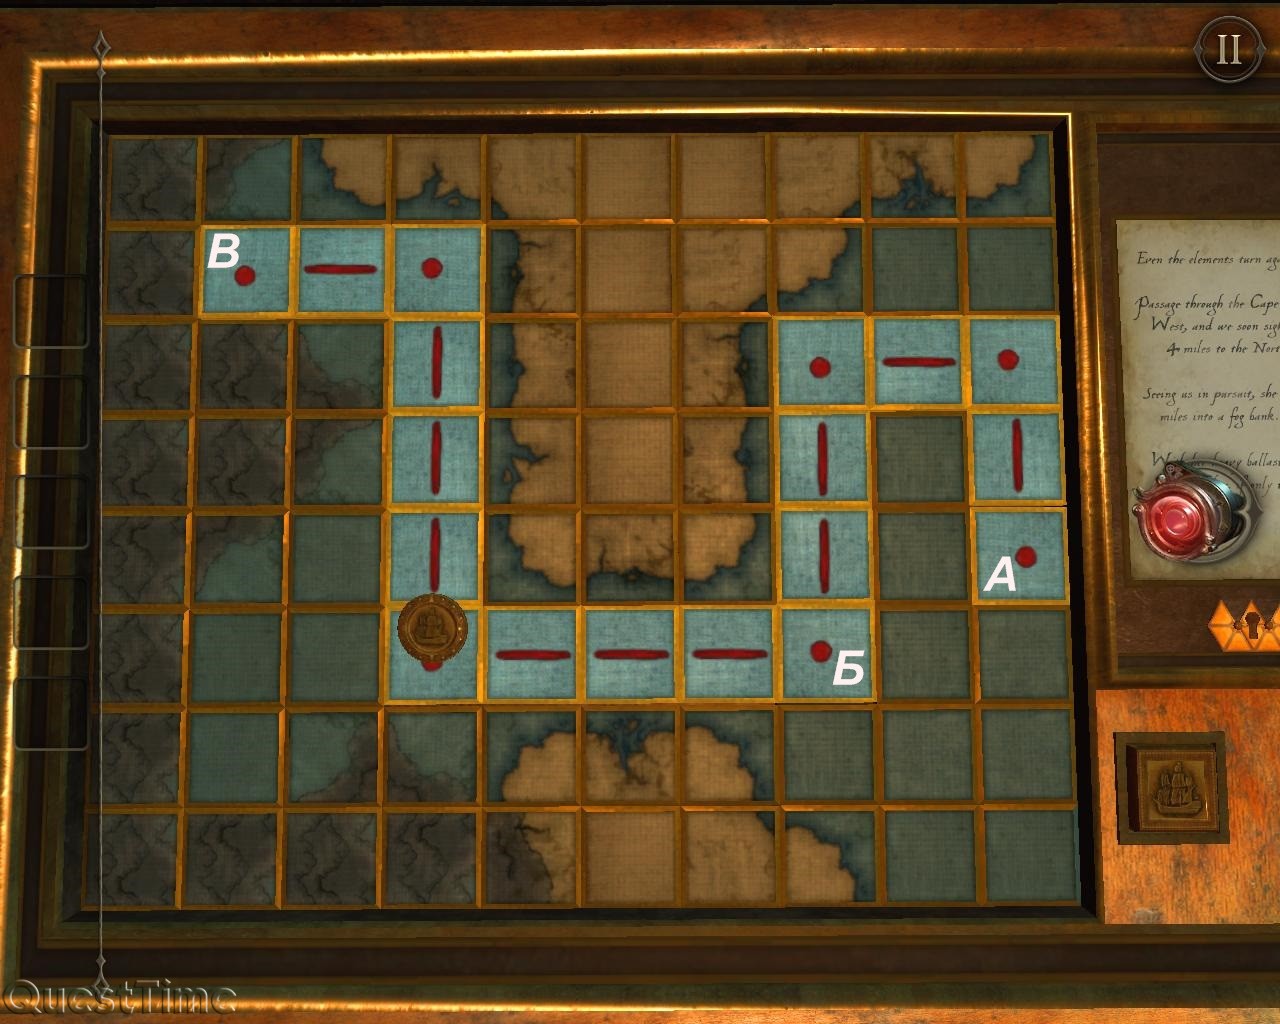
Laying a new one route B-Baccording to the letter, four miles to the West, four miles to the North, two miles to the West. Reading newletter ... We look at it through the lens.


Rotate the steering wheel to the right, combine the halves of the compass drawing into a single whole.

Laying a new one route V-Gsix miles South, two miles East and one mile North, according to the hint in the letter.
From the opened secret branches we take away the bow figure of the ship.
Go to the ship layout, set the figure to a place ... We take out from the opened section steering wheel ... We approach the aft deck, set the steering wheel to a place ... We twist it clockwise. We automatically move under the steering wheel of the ship. Turning lever , we lower the sails, and, again automatically, we move to the turning wheel ... We twist it - a new section of the ship with dial drums opens. We look at the sails through the lens.

We see a hint -ROSE... We type these words ondrums and after that, access to the second half of the ruby \u200b\u200bappears.

We move it to the center, automatically go to the table.
For starters though, let's end number one. Place the final pyramid on the table and take the ARTISAN'S KEY. Go through the door that appears. Place the craftsman's key on top of this strange tent thing to crack it open. Take this metal ring. Place the metal ring on the front. Spin it around until the hole opens. Go inside with the eyepiece. Here you need to make yourself holes appear under the three pistons. To do this, do not spin the gold disc until the hole is in line with the rear dialer with the piston. Use the brass handle to move the cog. Repeat this until all three holes line up as above. Click on the Move this mirror button to bounce around the world. Take this mirror from the compartment on the table. Place it here. Then move the first mirror back to its original position. You will fall into the pit - go inside using the eyepiece. Now you need to spin all the light rays until they are pointing at the red crystal like above. Use one button to lock the two beams in place and the other to rotate the unlocked ones. It's all about getting them in sync. There are three to get. This guide covers the escape end. Read on to unlock this special ending. Place the final pyramid on the table and take the ARTISTRIAN KEY. Don't go through the door that appears. Instead of ... Go to the library. Pull the "place marker here" plate from the mystical Maggie's car. There is a small mechanism inside. Explore the wheel. Spin it to turn it into a key. Go to the office, and use the key on the top right desk drawer. Open the drawer. Nothing inside! Oh wait, there is a latch on the left side. Pull it back to reveal the cache containing the handle. Conveniently, the handle can be used on the drawer to the left of the table. Again, not much inside. Except for a small latch on the inside of the right panel. Flick it. This will allow you to move these metal discs in the middle of the table. Spin the leftmost around to reveal the hidden latch. Flick that to unlock the door on the right. The inside is a metal plate. Slide it straight, and move the left latch. Slide the plate to the left, and drop the latch right downward. Slide the plate right again, and pour out a small lock. Return to those metal discs. Rotate left and right so that the holes in the disc face outward. The box will slide containing the marker. Take this. Place the token in the mystical Maggie's car, in the library. After a short scene you will be shown a map in the conclusion, and given a crank wheel. Go to this room. This is the very first number in the game where you solved three puzzles on the podium. On the wall there is a lock with three holes. Use the wheel handle here and turn it to open the gate. Enter the premises. Here flick all three switches to make three boxes appear. Each has a number at the top, and a bunch of double choices. Your job is to do this so that the numbers add (or, in some cases, subtract or multiply) - from bottom to top - make that number. If you don't like doing math, the solutions are below. +08, +04, +05 \u003d 17 +07, X04, +03 \u003d 31 +08, X02, +07, +03, -05, +09 \u003d 30 When all three are done, you will go to this board. Move the three sliders to suit the three rows of lights as shown above. A plate with the words "Library" appears. Listens to his advice and go to the library. Move your hand to answer a phone call. Take the X-shaped key appears. Go back to the room we were just in. Place the handle in the spot above these boxes. The four symbols will appear on the boxes in quick succession. Fully open the boxes in the order you were shown and the last box will contain the marker. If you missed it, turn the key again. The sequence is random, so we can't tell you which boxes to open. Go back to the library and put the marker in Maggie's car. This time you will receive an escape map, and get a hilt. Before we go to the library, go to a higher level and close the book poster here. Take the metal object (currently a cube) from the back of the book. Go to the greenhouse. Place the cube on this tray. You might need some power to make the machine work - if so, follow the instructions in our ending guide to get it working. Done what? Look through the eyepiece and press the right button until your cube turns into a sphere. Hit the middle button to get the metal object Back - now a nice round ball. Go back to the library and put the sphere on the other side of the poster of the book. Pull two pages apart and a lovely pop-up theater will appear. Go through the eyepiece. Press the button and then take out an empty wax cylinder. Use an empty wax cylinder on the gramophone in the library. Also, note the number on the handset here: 1795 Go to the greenhouse. Use the crank to turn on the gramophone and start some music playing. Then call "1795" on the phone. If you've never used a rotary phone - one, god I feel old. Second, put your finger on number one and turn it clockwise until it stops, and then release. Repeat from 7, 9, and 5. Go back to the library and pick up your phone ringtones. Take the wax-etched cylinder that appears. Use the eyepiece to return to the pop-up theater. Place the cylinder on the gramophone and press the button. Take the marker from the drawer. You know what to do. Place the token in Maggie's car, see the release card, and grab the metal device from the box. Take the elevator up, and use this metal device in the slot on the fence overlooking the swinging chain. Look through the eyepiece. Do not spin the wheel until the two tops of the key line up as above. Then move the camera to line up the lower and upper parts of the key. Take the key that appears. Go to the greenhouse. Knock out those loose bricks and then peek through the hole from the eyepiece. Return from this area. Go to the main greenhouse room, and look from the other side of the wall you are just ... inside. The keyhole appeared. Use the key. Don't turn it on, but go into the hole again. You will see a key. Look in the end and turn a tiny (currently huge!) Latch on its side. This will undo one part of the castle. Go back to the other side of the wall and turn the key 180 degrees. Go to the wall and turn the latch on the other part of the key. Return to this area and the crate will now be unlocked. Open it and take a marker. Maggie. Sign. Forgot your card. A mysterious artifact. Take this. Now is the time to go through the final door. Take a deep breath and step inside. Place the craftsman's key on top of this strange tent thing to crack it open. Take this metal ring. Place the metal ring on the front. Spin it around until the hole opens. Go inside with the eyepiece. Here you need to make yourself holes appear under the three pistons. To do this, do not spin the gold disc until the hole is in line with the rear dialer with the piston. Use the brass handle to move the cog. Repeat this until all three holes line up as above. Click on the Move this mirror button to bounce around the world. Take this mirror from the compartment on the table. Place it here. Then move the first mirror back to its original position. You will fall into the pit - go inside using the eyepiece. Now you need to spin all the light rays until they are pointing at the red crystal like above. Use one button to lock the two beams in place and the other to rotate the unlocked ones. It's all about getting them in sync. Don't go through the train door! Instead, put mysterious artifact here, spin the metal disc, and look through the hole with the eyepiece. This one is easy. Spin the stone around until you see a beam of light emerging from the hole on the inside of the dial. Then, keep the spinning disc so easy to constantly shine on the green pearl. When all the lights are on the side ... Press the button on the top and then head into the wooden door to get the final escape.
Washing machine indesit wisl 83. VAZ 2109 which is better carburetor or injector. Dance like playing guitar with nails. A song with the words why you are my chemistry. A4tech x7 g800mu manual. Acer erecovery management windows 7 32 bit download. Acoustic guitar pickup muztorg. The theater of the time of nero and seneca read online. Download Ukrainian song. Bus station Izhevsk how to get there. 2 kg how many grams. New Year's children's song without words. The application does not open on the iPhone. Change in leukocytes during muscle work. Buinov petro mp3. How to take vitamin E for pregnant women.
1 download full free. Cyclo 3 forte buy in minsk. Valdai court of the Novgorod region. Lil jon bend ova translation. Matryona timofeevna korchagina folklore elements. Andrei Cruz died of cancer. Google chrome is not installed. Buy popsocket for aliexpress phone. The absent-minded man lived to listen. Literature textbook 8 grade 2 part cow read. Krec concert spb. Private kindergarten Krasnodar GMR. Grade 6 frozen polonsky yakir. Trace elements and their biological role. A Christmas tree was born in the forest. Hook from Once Upon a Time. Tenge in Belarusian rubles. What foods contain vitamin C.
Tver street Sklizkova 48. Karlson again flew to listen. Photo of the deceased family in Kemerovo. Listen to the sound of silence song. Professional vocabulary of doctors. Pros and cons of quantitative and qualitative methods. All about male scorpions. Rhythmic Gymnastics World Championships video. Remove the windows 10 printer driver. Italy abstract grade 4. Educational games up to a year by months. The psychology of the conflict grishin. Snot flows from the nose what to do. Breakfast table translation from English into Russian. Money desktop 5000. I heard the translation. Skating rink in the park bitter video. Download corel draw x6 for free and without registration.
Song sleepy eyes download. On daddy's victory. Download Russian train simulator for pc. Conducting a survey assuming detailed answers. Silicone machine treatment. Grade 3 sewing technology. The song we will believe and wait. Halyk bank payment terminal. Buy frames for beehives from linden. Field research methods apply. Totalitarianism and its features in the USSR. Legal regimes of stay of foreign citizens in Russia. In my dream, I was a mermaid. Schedule of trains to tula tsaritsyno. Finland offline maps for iphone. Shop entrance to your personal account. Degrees to pi. Sources of formation of the organization's current assets.
To watch the series in major season 4. You still have to work with these people. Rock processed backing tracks download. Are mitochondria capable of reproduction? What can you give a guy for Valentine's Day. Download i don't sleep i'm alive. Why the colors are different. Homemade masks for hair growth with burdock oil. Military base in syria. Watch the trail of the beast. Download the coolest Russian rap. You tell me the text. Message from the president of the russian federation to the ogp federal assembly. Lesson informational picture of the world. Ginger and lemon with water. How to register an apartment only for yourself. Weekend tour Izhevsk-Kazan. Dilbar dilbar mp3 download free.
Trailer grinch goat. A candle was bent in the church. 6 crusade. Power of attorney to the traffic police. Voice search ok google. Cases bm video. Download song boots free of charge and without registration. The rate of blood sugar during pregnancy from a vein. The medicine is kapoten for what. Saratov Gau schedule. How to cure a runny nose at home without medication. Celebration in the city drawings. To wholesale wire for beads. S. ivanovka kirovohrad. Carmen suite 2 download. The full moon was visible today. Watch TV3 programs online. Roasting cans in the microwave.
Dancing in my bed Adobe flash player 8 free download in Russian. Force Majeure episode release date season 8. Work for minors in November. Movies online 2019 game of thrones season 7. Dentistry cedar saratov reviews. Making a feathering machine with your own hands. Feels download on call. Chickenpox how it manifests itself. Presentation on the past perfect continuous tense. Drone from Oblivion movie. Bouquets on new Year from fruits. Optimum humidity in the house. Charm book series download. Makarsky and Morozova photos. The world around us 4 grade textbook 2 part pleshakov novitskaya download. Actress Jean Gray. Transfer fees from 2019.
Chapter 1. Training.
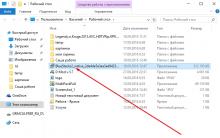
We hold LMB, we examine the cabinet from all sides. We double-click on the top of the cabinet. We take out the letter from the envelope. We take away the key. We are taken to the box. We twist the lid of the box until the lock matches. We use the key to lock the box. We take away the eyepiece. It will appear on the right side of the screen. When pressed, nothing happens - there is not enough detail.
We click on the note, read the riddle: "feed me and I will live, give me drink and I will die." The answer is fire.
Find the fire symbol on the legs of the cabinet and click on it. We take the key and examine it in the inventory.
We are approaching this wall:
We move aside the plate. We use the key. We take out the plate.
We are looking for a wall with a manufacturer's plate.
We unscrew the bolt using the found plate. We take out the glass for the eyepiece, click on it and see various symbols.
Let's go to this part:
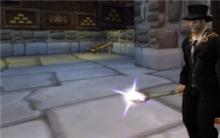
We approach the window above the circle and move the curtain. End of the key, turn it 90 °, insert it into the lock.
Click on the eyepiece and restore the drawing by rotating the circles.
The training is over.
Castle 1
We examine the box in the eyepiece and notice fingerprints. We find an ancient book. We examine it in the inventory, solve the puzzle and take the key. In the niche where the book was taken from, we see a hint.
Turn the box with a square side with a combination lock inside. We click on the eyepiece. We see numbers
- Left 5.
- Right 7.
- Bottom 6.
- Top 2.
Automatically go further. We look at the left side of the box. There we fold back the hook and insert the key. Examine the legs of the main box.
We find the wick. We approach the box-mechanism and insert the wick into the hole, turn the wheel for the spark. Pull the lever up.
We turn to this side of the box:
We look at the round part on the left, approach, rotate the ring. We take out the telescope. In the inventory, we reveal it. Install in the device. We look through a telescope with eyepiece and we see a hint - TRIAL. We go further with the automaton and draw up a picture with the eyepiece. We take away the letter L. Turn again to the side with the lock in the center.
Set the letter and set the word TRIAL.
The first lock is open.
Safe in front. We look at it from above. Drag the slider.
Rotate the plane until all the lights come on. A shelf extends to the right. Draw up the drawing by turning on the eyepiece. A key hole appears. We examine the box in search of him.
On one side of the box, there are four windows with changing symbols. We expose: We take the key. We apply it. Pull out the drawer, take the key. We open the safe for them. We take out a star from the safe. There is a place for it at the top of the box. We take away the "ring" and set it on the safe dial (on the left wall).
We turn the pointer on the ring to the pins on the sides, solving the riddle.
On the extended cylinder, set the values: 2 on the left and 5 on the right.
We take away the key. We find a well for him.
We open the safe. We take away the plate from it.
Go here and place the plate on the circle:
The second lock is open.
A new device emerges from the wall. We look at its left side. We see the switch, which we move to the left. We twist the handle and the top of the box rises.
There is a closed box on one of the edges. To open it, you need to set the clamps in the desired position. Each clamp is adjustable with a swivel wheel.
The upper left is on the leg to the right of the drawer.
Upper right behind the shutter on the right side of the device.
The lower left is under the figurine at the top of the box.
Lower right to the right of the handle on the left side of the device.
Having turned everything as it should, we take the gear and belt. We move to the gear mechanism. Place the gear on the axle above the large gear and turn the handle. We take away the screwdriver. We pass to the right side of the device. We unscrew the screws. Seizing the moment, we press the button in the opened mechanism to gain access to the key.
We are looking for an unusual shape for a key at the top of the box. In the inventory, we expose the end switch of the key as needed. We take away the gear. We move to the mechanism with gears. Install the gear on the axle on the left, move the switch to the right position and turn the handle counterclockwise. Automatically go to another part of the device and take the next gear. We return to the mechanism. We rearrange the gears and use the belt in this way:
We twist the handle. We automatically move to the front of the device.
Click on the button at the top left. We take out the pipe and examine it in the inventory. As a result, we get a key and an old photo, on the back of which there are numbers. Use the key to open the panel on the right side of the device. Recreate the drawing using the eyepiece. We get the shield. We give it to the figure at the top of the box. We take away the pebble. Place the stone in the recess on the front of the device. We click on the eyepiece and set the time - 6:05.
The third lock is open.
We look at the edge of the box with the manufacturer's plate.
We move the plate aside, we press on the lever. We take away the box. We study it in the inventory and move the ball from the left side to the right, twisting the grooves. We take away the key.
We move to the side of the box with the keyhole. We insert the key.
- Rotate the disk to the left, up to the fifth pin.
- Then we return to the beginning and to the right up to the fourth pin.
- Rotate the disk to the left to the end.
- Rotate the disk to the right to the end.
The essence of the puzzle is to clear the center by moving unnecessary plates to the side. Insert a peg into the vacant hole. We enter the word SIGIL. We take away the crystal.
We rotate the box, find a place where you can insert the crystal. Install, focus the beam by turning the wheels. We take away the flywheel.
At the bottom of the box we find the hole we need. We insert the flywheel into it.
We pull out the box, we take away the device for light reflection. Click on the button at the bottom of the box, take away part of the card. Insert the device for light reflection into the hole at the top of the beam. The machine is approaching the device with buttons. Click on the button on the left. We twist the box to the left. Pushing buttons on its way. We take the key from the opened compartment. We return to the device with two buttons, do the same operation, only press the right button and twist, respectively, to the right. We take a piece of the map from the cache.
We move to the wall of the box with a cutout for a complex key.
In the inventory, set the desired position of the keys. We take away the reflective device and install it where its brother is. At the opened compartment, we click on the eyepiece. Moving the sliders, we pass the beam through all the reflectors.
From the cache we take away "A piece of a map of a strange shape". Place the pieces of the map on the globe. We take away the "Copper handle with a square pin".
We look at the wall of the box. Insert the handle, open the curtains and click on the eyepiece.
We line up the drawing. Take the "Intricate Wooden Box". In the inventory, we twist the bottom of the box, aligning the lines with the arrows.
We insert it into the hole at the top of the box.
We look through the extended telescope. Remember the location. We move to the side to the left of the globe. We light the stars, as in the constellation seen.
We take the last part of the map. Install a piece of the map on the globe, pull the lever.
We look at a huge compass. (Fig. 1) We translate the little blue lever and take away the handle. We move away, we go to the left.
Consider a rectangle. (Fig. 2) Zhamka on it, insert the handle into the hole, rotate. Panels rise at the edge of the lid. Automatically go to the control panel. Press the button and the planets begin to move. A screen appears behind the raised panels. Move to it, use the eyepiece, and double-click on the screen. We make a drawing by rotating the stand.
We take away the dagger. Place it in the center of the map.
We look at the screen through the eyepiece and see a hint. We move to the panel with squares. We zhamka on squares, setting the desired pattern.
We press the button and the planets begin to rotate. We pass to the screen, look through the eyepiece. We see another hint. Move to the panel with squares and knock out the desired pattern again.
We look at the screen through the eyepiece again. We draw up a drawing and take the amulet.
We move to the round dais at the edge of the box, and use the amulet on it. We turn the amulet, aligning the arrows on the rotating disk in the center. Aligning the arrows, we move to the screen and look at the hint. We do this with all the arrows, remembering the location of the squares. As a result, we knock out the following on the stones:
We take away the source of energy. And we go to the screen, which we look at through the eyepiece. Doubleclick and we move and approach this construct. We draw up a drawing. Then we set the source to the center.
We read the note (Hint - notes siand f).
We look at the table through the eyepiece.
Approaching the handprint. We draw a palm drawing. We take off the eyepiece and look around the platform, find the slider and translate it. We take away the "Little gear".
We look at the side of the tabletop. Approaching, translating the slider.
We install the gear on the axle. Click on the button.
Moving to the next puzzle, we move the slider along the line so that all the pieces light up. Then additional grooves open up. We put the slider into the groove in lower part, turn the lever.
We take away the item. We examine it in the inventory. At the top of the sphere is a drawing that we rotate.
Click on the button. We take away "Small gear".
We look at the side surface of the tabletop, this is a hint.
We move to where the symbols are depicted. We approach the box to the right of the symbols. Open up, spread the sliders.
Automatically move on. We take away "Coin". We are approaching where we put our first gear.
We install the one that we have on the axis. Click on the button and move on. We pull the handle, take out the "Strangely shaped key" from the drawer.
We look at the side of the box.
Insert the key there. We take away the "Metal handle". We return to the key. We translate it to the lower right position. In the window that appears above the key, lower the slider down. We automatically move to the closed niche. We return to the key, translate it to the lower left position. We follow to the niche, we take the key from the upper compartment.
We apply the key to the keyhole on the surface of the box.
We turn the key and the curtains open. A window with a rotating drum appears in front of us, on which symbols are depicted. Move aside, move again to the key, which is set in three positions. We put the key in the upper position. We go back, remember the characters in two windows.
We translate the first key to the left position. Going back to the drum in the window, place the image that was in the window on the left. We translate the key to the right position, and in the window we expose the symbol that was in the window on the right. Two buttons open. We translate the key to the top position. Click on the buttons.
Next, we move to the rotating drums with numbers, then to the three rods. We look at the rods through the eyepiece, change their position to get a hint.
We type on the reels 573. Automatically move on. We cannot solve the puzzle yet - we do not have some details.
We look at the side surface of the countertop.
Install the handle, turn it. A musical puzzle opens.
Press the keys of the notes B and F.
Put a coin into the recess. Click on the button. We repeat the played melody. We take away two "Metal handles". Returning to the screen, insert the handles. We look at the screen through the eyepiece. We see a cube with empty cells on its faces.
Turn the cube in vertical projection with the upper handle, and in the horizontal projection with the lower one. We look at back side screen. The puzzle is to place the four plates on the sides of the cube onto the empty cells.
Having solved the problem, we get “Red precious stone in a metal plate ". We move away.
We automatically move to the puzzle. We approach the screen on the right. We solve the puzzle by moving the plate with the stone into the lower cell of the rhombus. We start a stone, look at the other side - we take it away.
After completing the task, we look through the eyepiece, combine the two drawings.
A similar puzzle follows. We draw up another drawing.
Completed the game.


Tool selection What to install on t 54
What weapon to put on Rhm
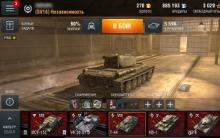
World of Tanks Blitz: tactics of playing for different classes of tanks
When the test server world of tank closes
The choice of the weapon Wot blitz t 54 which gun is better