This guide was written for new players and covers most aspects of EVE exploration. It consists of two parts: the first deals with scientific research and the second deals with applied research.
Scientific research involves working with a research agent of an NPC corporation; the purpose of this research is to obtain a new Tech Level II blueprint that is not available on the market. Applied research is carried out according to existing drawings; their goal is to increase productivity while producing according to this blueprint.
Requirements
| Required skills | Recommended skills | Equipment |
| For scientific research Science 5 |
For scientific research Science 5 Research Project Management 3 |
- Not necessary |
| For applied research Science 1 A specific skill at the appropriate level for the chosen research area and the corresponding secondary skill requirements, i.e., for example, Electronics, Engineering, or Mechanic 5. |
For applied research Science 4 Laboratory Operations 3 Metallurgy 4 A specific skill at level 4 for the chosen research area and the corresponding secondary skill requirements, i.e., for example, Electronics, Engineering, or Mechanics 5. Research lab slot at any station |
Scientific research
The mission of research agents is to introduce new technology to EVE. Players can now turn to those agents who work for the Research and Development (R&D) division of the research corporation (research agents), and they will appoint them as the head of the research team that conducts research for them.
As research progresses, the player accumulates research points (RPs), which serve as Blueprints (BP) lottery tickets. Every hour, a lottery is held in selected research fields, which gives players blueprints for Tier II technology items, chosen at random. Players who accept a BP offer receive BP, and their RP counter in the corresponding area is reset to zero.
This guide covers how to access research agents, how to research with research agents, and how to maximize your RP counter to improve your chances in the BP lottery.
Research corporations
Although all NPC corporations have agents, not all of them have Research and Development units and, as a result, not all of them have research agents.
The following list represents corporations that have publicly available research agents:
| Amarr | Caldari | Gallente | Minmatar |
| Carthum conglomerate | Ishukone Corporation | Creodron | Boundless Creation |
| Viziam | Kalaakiota Corporation | Duvolle Laboratories | Core Complexion, Inc. |
| . | Lai Dai Corporation | Roden shipyards | Thukker mix |
More information about these corporations can be found in the World of EVE section of the official EVE website: http://www.eve-online.com/corporations/ (not in-game).
Research Areas
Research can be done in a wide variety of engineering disciplines and different areas of physics, such as Caldari Spaceship Engineering, Plasma Physics, or Rocket Science.
Skill books that allow you to train these skills are not available in schools. They are given as bonus rewards for regular agency missions and can drop as trophies from NPCs. Many players also resell such skill books in the SCC marketplace under the Skill / Science category. Prices in different regions can vary greatly. For more information on agency missions, please consult the Agency Missions Guide.
All research area skills have Science 5 as the core skill required. In addition, they have a secondary skill requirement, also level 5.
Research Areas and Secondary Skill Requirements:
Astronautic Engineering - Mechanic 5
Amarrian Starship Engineering - Mechanic 5
Caldari Starship Engineering - Mechanic 5
Gallentian Starship Engineering - Mechanic 5
Minmatar Starship Engineering - Mechanic 5
Engineering / Other:
Electronic Engineering - Electronics 5
Mechanical Engineering - Mechanic 5
Molecular Engineering - Mechanic 5
Nanite Engineering - Electronics 5
Physics:
Electromagnetic Physics - Electronics 5
Graviton Physics - Engineering 5
High Energy Physics - Engineering 5
Hydromagnetic Physics - Engineering 5
Laser Physics - Engineering 5
Nuclear Physics - Engineering 5
Plasma Physics - Engineering 5
Quantum Physics - Engineering 5
Other:
Rocket Science - Mechanic 5
Choosing an area is entirely a matter of your priorities. Many are investing in spacecraft engineering because they hope they get lucky and get the BP of a ship with Tier II technology. However, a large number of research points in this area significantly lowers the chances of each player to win the lottery.
Research Areas and Potential Results:
Spacecraft Engineering:
Astronautic Engineering - not working now
Amarrian Starship Engineering - Amarr Spaceships
Caldari Starship Engineering - Caldari spaceships
Gallentian Starship Engineering - Gallente Spaceships
Minmatar Starship Engineering - Minmatar spaceships
Engineering / Other:
Electronic Engineering - Electronic Systems and Drones
Mechanical Engineering - Spaceships, armor and hull repair systems
Molecular Engineering - Enclosures & Overclocking Systems
Nanite Engineering - Hulls and Armor Systems
Physics:
Electromagnetic Physics - Rail guns and electronic systems
Graviton Physics - Space violation equipment, missiles, smart bombs
High Energy Physics - Power Grid Modules, Smart Bombs, Energy Weapons
Hydromagnetic Physics - Protection Systems
Laser Physics - Energy weapons, missiles, smart bombs
Nuclear Physics - Throwing weapons, missiles, smart bombs
Plasma Physics - Particle weapons, rockets, smart bombs
Quantum Physics - Defense systems, particle weapons
Other :
Rocket Science - Rockets and Propulsion Systems
Finding a research agent
If you know how to find a simple agent, then you also know how to find a research agent: the Research and Development unit category in the agent window on the research corporation information screen will show you all research agents and their availability. Agents unavailable due to their reputation requirements will show the required reputation when you request their agent information.
While regular agents require reputation in only one category to complete missions, be it factional, corporate or personal, research agents require reputation in two of these three categories in order to be available to you.
In general, to start a research project with a research agent, you must also satisfy the agent's skill level in the chosen research area. All research agents can carry out research in different areas and have different skill levels in each of them, but you should only satisfy the agent level in the area you intend to research.
If you have the Research Project Management skill (RPM), you can conduct research with more than one research agent - one additional project per skill level. You cannot do research in more than one area with the same research agent, even if you have an RPM.
Open People and Places from the NeoCom panel.
Set the search type to "Corporation".
Type in the name of the research corporation you want to work for.
Click on the information icon in the results window.
Activate the "Agents" register.
Click the down arrow next to Research and Development.
Click on the information icon next to the first agent listed as “Not available to you”.
Check the relationship requirements and decide if you want to work towards meeting them.
Or: Click on the info button of the last agent listed as "Available to you".
Check the location of the agent relative to your location on the map.
If the agent is too far, check the agent with the line above, or check other places.
Go to an appointment with your research agent.
When you dock at the agent's station, activate the "Agents" window in the station services, right-click on the agent and select "Contact / Talk". The agent will invite you to lead your research project. Confirm the dialog box option, select the study field from the pop-up menu with a left click and confirm again with OK.
You now have an active research project.
Promotion
As your research project progresses, you earn Research points (RP) on a fixed daily basis. Open the information window of the research agent to find out the exact number.
The number of research points you earn per day is determined by the agent's effective quality (i.e. the agent quality modified by your attitude and social skills), the agent's skill level, and your own skill level in the chosen research area.
RP / day = (Agent skill level + player skill level) ² x [(Effective agent quality / 100) +1]
RP / day doubles for weapons-related research areas and triples for spacecraft engineering research.
To increase the number of RP earned per day, improve your relationship by completing missions for a regular agent using the Mission service, which belongs to the research agent's corporation, and / or train the skill in the chosen research area to a higher level. RP / day is a dynamic number that changes with modifiers even while working on a project.
A research agent will contact you about every 8 pm to report the problem. The agent will tell you about the progress, but will also ask you to complete his assignment before he can continue research. Your research will not stop at all: even if you refuse or do not accept the mission, waiting for the time offer to end, you will simply miss the opportunity to increase the RP / day. You will continue to participate in the BP lottery despite the research stoppage. If the agent doesn't contact you, talk to him yourself. He may have a mission that is not yet at the stage to force him to contact you right now.
If you accept and successfully complete the mission, you will receive daily RP volume as a bonus and research will continue. If you abandon the mission, you will lose a possible bonus, but research will continue anyway.
Note that research agents can provide a wide variety of these additional missions, including missions to kill groups of cruisers. If you cannot complete such a mission or simply do not have time to transport 12,000 pieces of garbage - just refuse. There is no reputation penalty associated with refusing to complete the mission of a research agent - you simply won't get the boost that you could get if you completed this mission.
Where is the reward?
Research Agents issue Technical Level II Blueprints when a research project succeeds. The agents will inform you that the project was a success and describe the resulting drawing to you. You have 7 days to accept or refuse the proposed blueprint.
If you refuse to accept BP or cannot get it, BP goes back into the lottery and your research project continues. If you accept BP, the agent places BP in your hangar at the agent station and your RPs are reset to zero. If you do not interrupt a research project with this agent, he will start a new research project.
Please note that the success of your research project is completely coincidental. The number of RPs you have earned reflects only the number of tickets you have in the BP lottery. Even 50,000 RP is far from guaranteeing good luck in an area that accumulates several million RP.
So your chances of getting BP are very, very small, and there is absolutely no guarantee that you will get anything at all. If you're doing your research to hit the jackpot, expect disappointment. However, a huge amount of BP goes to people who have very little RP, simply because most researchers are in the same position. Since all your efforts can only marginally improve your chances, patience and calmness are the highest virtues for the persistent scientist.
Applied research
Applied research is closely related to manufacturing: By researching BP so that manufacturing is faster or requires fewer resources, you can increase the productivity of the manufacturing process and lower the cost of the product. You can also copy a well researched BP and sell copies to recoup the cost of the original BP.
Applied research can only be carried out on original blueprints (BPO). Blueprint copies (BPCs) cannot be examined.
Lab rat work
All you need to do applied research is access to a lab. Laboratories are available for rent at a variety of space stations, and can be used with a corporate hangar if your corporation has an office at that station, or with its own personal hangar. By default, labs use a corporate hangar.
The rental price includes 5 days of work. When the due date arrives, you will find the invoice in the Wallet / Invoices / Payout section. Next to the line "Pay the bill" there will be a square with an arrow. Click on it to pay the bill. Be sure to pay the invoice when you receive such notice, otherwise the Station Owner will pick up the lab when the invoice is overdue. You will receive a notification when the Station Owner selects the lab for overdue bills.
Labs must be used during the 5 day rental period. If the laboratory was not used during the rental period, it will be selected by the station owner. There is no minimum amount of time a lab needs to be used, but a lab should generally be used at least sometime during the rental period.
To operate a laboratory, you only need the Science feat at level 1. The Laboratory Operations feat allows you to work with more than one laboratory at a time, giving you one additional laboratory per skill level.
To conduct BP research, place the original blueprint in the hangar that you intend to use with the laboratory. Open the lab screen in the station services, select your lab slot, click the Install button at the top of the window, and follow the instructions in the installation wizard.
Tech Level II BPs and some Level I BPs require materials that are consumed in the research process. BPs that require such materials include a list of the required quantities. The lab installation wizard will ask you for a hangar that will be used to store consumables, even if the materials are not required.
Using BP in a corporate hangar for research requires you to have Query Access to the hangar. Using materials from the corporate hangar for research requires Take Access from the hangar. When the research is completed, the BP will be placed in the same hangar in which it was before the research.
Material efficiency
The most important research activity that can be performed in a laboratory is Material Efficiency Research (ME-R).
ME-R reduces the amount of materials used in the manufacturing process. ME-R offers a diminishing result with each next test run. As a consequence, the ME level to be achieved differs for each BP class. Mass produced cartridges can offer significant savings when produced in large quantities if BP is used that has gone through multiple ME-R passes. But BP for ships is very profitable at ME levels from 9 to 15. At higher ME levels, only BP for battleships gives significant savings, not so much in the cost of materials, but in their quantity, i.e., for example, you can get reduction of the required amount of tritanium by several hundred thousand units. After a certain level, it usually makes more sense for a manufacturer to focus on improving their Manufacturing Efficiency skill than to continue with the ME-R process.
Production efficiency
Not to be confused with the Production Efficiency skill (PE), Productivity Efficiency Research (PE-R) reduces the amount of time it takes to produce based on researched BP.
Currently, the savings based on PE-R are almost imperceptible compared to the time spent researching even one level of Production Efficiency. Use this type of research only if you need to load the labs with something so as not to lose them.
Copying
Copy operations, like any other research, can only be performed on original BPs. The lab install wizard asks you how many production runs you want to complete based on the copied BP. It makes little sense to set the maximum here and invite anyone to compete with your own production capacity, making a profit from your research. Oddly enough, many manufacturers and their research departments completely ignore this very obvious concept.
Remember that blueprint copies (BPCs) cannot be sold on the SCC marketplace and must be placed on the Escrow or sold through the trade channel. We recommend that you reserve the last option as a sophisticated form of punishment for non-traditional representatives of the corporation.
Reverse engineering
You cannot do reverse engineering at this time. It was originally planned as a method for obtaining BP for found items, but it was never implemented. All other research options that the laboratory installation wizard can offer and which were not listed above are also inactive.
Small (small) ship - frigate.
Medium ship is a cruiser.
A large ship is a battle cruiser.
Angel Sanctum. The first type of anomaly eve-online, Sanctum "with base", the most difficult anomaly of all, contains more than five respawns (spawning mobs). Small, medium and large mobs fly in each, a good load. Earning about 30-35kk (million), tengu can go through this anomaly, it is better to go on Tanatos (Carrier ship) and Vargur (Battleship of the second technology). The second type "with rings" is slightly easier in difficulty than the most difficult Haven. Contains mobs of all types, there are five respawns, and six can fly. Earnings 20-25 million, You can pass on tengu, preferably Vargur. Can be put in diz and scrambler in all types, only small mobs. It produces a very good exp, but very rarely
Angel Hub. The first type is very similar to the second, they contain small and medium mobs at the beginning, and large ones arrive in the last respawn. Earnings 5-7kk. Not a profitable anomaly. Can be put in diz and scrambler in all types, only small mobs. The next four will be better.
Angel Forsaken Hub. Almost the same, earning 15kk, good loot (cargo). A very profitable anomaly. There are all kinds of mobs. Small NPCs arrive only in the second pocket (second rep). It goes very quickly, a good exp can drop out, which is quickly done and brings a normal income.
Angel Forsaken Ralli Point. Types like brothers, pass very easily and quickly, bring in income of 10-15 million. Mobs of all kinds. Not bad loot. It also drops a good expedition.
Angel Yard. A wonderful exp falls out, the anomaly brings very little income, but it also passes very quickly in time. Although it is a small income, the expa will pay for everything. Loot is bad, mobs are only small and medium-sized ships.
Angel Haven. The difficult type is in the second place of difficulty, it brings a very good income of 25kk and just as quickly passes. Mobs of all kinds. Loot is normal, you can collect it. The expedition is wonderful, the maximum income from it is 2,150kkk (two billion, one hundred fifty million). The most profitable anomaly of all. The second type, which is lighter, consists of the same mobs, but with each respawn fewer of them fly out. The income is the same, although there are fewer mobs. Made on all upgraded ships, except for frigates and the first cruiser technology.
 (This is not Haven).
Angel Ralli Point. A very slight anomaly, very little money. Not the same as Yard, exp did not fall to me, but it fell to my Sokorpovtsy, it seems to be not bad. Not a profitable anomaly. Contains medium and small NPC ships.
Angel Port. Not a bad anomaly, profit is several times greater than the rally point, it seems that the expedition drops out. Large mobs will only arrive in the last respawn. Loot is bad.
Angel Hidden Ralli Point. Only with small and medium mobs, I did not knock out the exp and I think it will not be there. A very unprofitable anomaly, so I advise you not to go through.
Angel Hidden Den. Nice anomaly, but there are only small and medium mobs. There are a lot of respawns, but I know for sure that the exp is falling, it fell to my Sokorp. The earnings are not big, you can do it only for the sake of the expedition.
Angel Forsaken Den. I don't know for sure, there seems to be only medium and small mobs. Not a profitable anomaly, the expedition is unlikely to fall. The income is small and the loot is poor.
Angel Forlon Hub. Large mobs in the last two respawns, small ones only in a few respawns, there will be arrivals only with medium mobs. Expedition of difficulty 9/10 drops.
Angel Forlon Den. There are no large mobs, only medium and small ones, I advise you not to go through, just a waste of time on all sorts of nonsense. Not a profitable anamaly, the exp also does not seem to fall, therefore it looks more like the worst anomaly.
Ever since the very conception of civilization, people have always been burning with curiosity to find out what is in the mysterious cosmic unknown. This curiosity has not faded until now, and the exploration of boundless space continues both by private players and corporations. New Eden is the perfect place to explore, where every player can discover something interesting.
If you started your adventure in the vastness of the legendary space MMO, then the first thing you need to learn is to scan. The game features over 5200 unique star systems, each of which is fraught with many secrets. These secrets will be able to bring you valuable items and a lot.
At a basic level of scanning Eve online use special probes. They are able to detect so-called cosmic signatures. There are 4 types of objects (or sites, sites) that can be detected during a signature scan:
- The EVE Online gas fields are an area where gas collects in interstellar clouds. This gas is widely used in the EVE industry and is very profitable to collect and sell. Although it is not particularly valuable for the average player, it is a very good find for true miners. But we will not go into details, since we have a number of separate articles on this topic.
- Combat Sites are part of the game's PvE mode, which includes battles against factional enemies and pirates. Clearing such areas of hostile NPCs will reward you with valuable loot, like Deadspace and Faction. But if you are an ordinary explorer and do not have combat capabilities, then it is better to avoid such finds.
- Wormhole, or - these are unstable rifts in space that lead to various star systems. But the problem is that you cannot know what is at the other end of this rift. Wormhole research can be fun and rewarding. We also have a separate article about this, so we will not dwell on the details here either.
- Relics and Valuable Data - In these places there are special containers that can be hacked by a data analyzer. There can be five categories: sleeper sites, sleeper caches, ghost sites, drone data sites, and pirate information and relics. For researchers, these areas are of the greatest interest, which is why they will be the focus of this guide.
But before talking about the possible location of the relics and dates of EVE Online, we first need to master the basics of scanning and learn all the skills, modules and ships necessary for this.
Eve online scanning and required skills
Any activity in EVE online requires skill. Without development, you will not be able to experience the many pleasures of the game. Therefore, for a researcher in EVE online you need your own set of skills.
Some will help you with hacking data and relics, some will increase your survivability in especially dangerous places, and some will allow you to use better research. All of them are presented in the table below.
|
Skill name |
Description |
|
Racial Frigate Skills |
This skill allows you to fly Tech 1 research frigates (Caldari -, Amarr -, Minimatar -, Gellente -). It belongs to the initial skill level, and you must definitely learn it in order to start using the basic research ship (all four ships also require the Spaceship Command I skill) Important Note: The Amarr Frigate III and Gallante Frigate III are required for the Astero-class pirate frigate. |
|
This skill will allow you to fly Tech 2 racial research ships (Caldari -, Amarr -, Minimatar -, Gallente -). This is an advanced research skill that requires other skills such as Spaceship Command III and Electronic Upgrades V. |
|
|
This skill is required to use scanning probes that identify cosmic signatures. It is also required as a basic skill that, among other things, requires the study of Science III. Without it, you will not be able to carry out even the simplest research. |
|
|
Astrometric Acquisition |
A skill that will increase your knowledge of scanners and reduce scan times for probes. It is an auxiliary skill that will increase your effectiveness; requires Astrometrics III skill to learn. |
|
Astrometric Pinpointing |
This skill will allow you to find scanned targets with increased accuracy. It is an auxiliary skill that improves the accuracy of scanners; requires Astrometrics IV. |
|
Astrometric Rangefinding |
This skill will increase the strength of your scanning probes. This is an auxiliary intelligence skill that will require Science III knowledge. |
|
This skill will allow you to obtain more accurate information about ancient artifacts, allowing you to analyze and identify them. This is the basic skill required to operate the Relic Analyzer module. Requires Survey III and Science III skills to learn. |
|
|
A skill that allows you to access items at the location of data and relics. To do this, you need to hack security computer systems. This is the basic skill required to operate the Data Analyzer module. Requires Electronics Upgrades III and Science III skills. |
|
|
This is a skill required to use a cloaking device that allows you to remain invisible to hostile players. This is an advanced skill that requires CPU Management IV. |
Modules for
The correct set of modules will greatly increase the efficiency of exploration and survivability. That is why this point cannot be ignored. The customization of your ship will largely depend on the number of high, medium and low power slots available in it, as well as the rig. The tables present and describe modules to help you with your research.
High power modules:
|
Module name |
Description |
|
Core Probe Launcher (required module) |
This module will allow you to launch Core Scanner Probes used to scan space signatures. The basic version of this module will require knowledge of Astrometrics I, and the Tech 2 version will require Astrometrics V. Alternatively, you can install Expanded Probe Launcher, which will also launch scan probes, but has much higher requirements. |
|
This is a cloaking module that will hide your ship from enemy detection. This is the best form of defense for every research ship. The base version of this module requires Cloaking I, and the Tech 2 version requires Cloaking IV. |
|
|
Salvager Module (optional) |
This specialized scanner allows you to locate and collect valuable items from shipwrecks. This can serve as an alternative source of income during your research. The basic version of the module requires knowledge of Salvaging I, and the Tech 2 version requires Salvaging V. |
|
Capacitor Neutralizers, Launchers, Turrets etc. (completely optional) |
There are many weapon modules available, and you can choose the ones that suit your PvP or PvE style. These are optional modules, and most likely they will not save your life. You can use them to clear battlefields, but that's not what exploration ships are for. |
EVE Online Medium Power Modules:
|
EVE Online Brick Name |
Description |
|
(required module) |
It is a module used to analyze and search for ancient ruins. It is required for looting at relic sites. The basic version of the module will require Archeology I, and Tech 2 will require Archeology V. |
|
It is a hacker module used to break into security computer systems. Required to loot data locations. It will not give you as much profit as Relic Analyzer does, so it is not required. The basic version of this module requires Hacking I and Management II, while the Tech 2 version requires Hacking V and Management II. |
|
|
Micro Jump Drive (required module) |
Also known as Microwarp Drive (MWD). This module allows your ship to jump 100 km forward in a given direction. It will significantly increase research efficiency (containers with data or relics are often far from each other) and survivability (you can combine Micro Jump Drive with your cloaking device, activating one immediately after another) and will provide the ability to perform MWD Cloak Trick, which will allow you to simultaneously bounce from danger and hide from it. |
|
Allows you to scan the cargo holds of other ships. It can also be used to scan data and relic locations to determine their value. This is a great efficiency tool as it lets you skip space that costs little. The basic version of this module requires CPU Management I, and the Tech 2 version requires CPU Management II. |
|
|
Scan Rangefinding Array (optional) |
This module increases the strength of your scanning of your probes. This will make your scans more reliable. The basic version of the module will require Astrometric Rangefinding II, and the Tech 2 version will require Astrometric Rangefinding V. |
|
Scan Pinpointing Array (optional) |
This module enhances your scanning probes by reducing their deflection from scanning. Like the previous module, this one will make your scans more reliable. The basic version of the module will require Astrometric Pinpointing II, and Tech 2 will require Astrometric Pinpointing V. |
|
Scan Acquisition Array (optional) |
With this module the scanning time of your probes will be reduced. This will make it possible to perform more often scanning... The basic version of this module will require Astrometric Acquisition II, and Tech 2 requires Astrometric Acquisition V. |
EVE Online Low Power Modules:
|
EVE Online Brick Name |
Description |
|
Inertial Stabilizers (completely optional) |
This module will improve the maneuverability and handling of your ship through its signature. But Mounting Inertial Stabilizers will create a lot of problems for you, so it's best to avoid it. The basic version of the module requires Hull Upgrades I, and the Tech 2 version requires Hull Upgrades II. |
|
This module compensates for glitches and fluctuations in the ship's warp. It is a very powerful defensive tool that eliminates warp disturbances caused by attackers; however, it is only useful in high-secs and low-secs. The basic version of the module requires knowledge of Warp Drive Operation I, while the Tech 2 version requires Warp Drive Operation IV. |
|
|
It will make your ship's components lighter, but fragile at the same time. As a result, this will increase the maneuverability and speed of the ship, but by itself will reduce the strength of the hull. Every researcher's best strategy is to run away before something bad happens, so this module has essentially no flaws. The basic version of this module requires the Hull Upgrades I skills, and the Tech 2 version requires Hull Upgrades II. |
|
|
Damage Control (optional) |
This module prevents damage to the system using a combination of redundancy and containment field emitters. In simpler terms, this is an increase in the resistance of your hull, armor and shield. This is not to say that it will bring absolute protection, so we classified it as optional. |
Riga EVE Online:
|
EVE Online Brick Name |
Description |
|
Small Gravity Capacitor Upgrade (highly recommended) |
This setting will enhance the scanning of your ship. It will significantly update your probes, which will undoubtedly be beneficial. The basic version will require the Jury Rigging I skill, and the Tech 2 version will require Jury Rigging IV. |
|
Small Memetic Algorithm Bank (completely optional) |
This setup increases the efficiency of the data modules installed on your boat, which in turn has a beneficial effect on the efficiency of the data analyzer. The basic version of the module requires Jury Rigging I, and the Tech 2 version requires Jury Rigging IV. |
|
Small Emission Scope Sharpener (completely optional) |
This installation increases the efficiency of the relic modules installed on your ship; this will increase the durability of the Relic Analyzer. The basic version of the module requires Jury Rigging I, and the Tech 2 version requires Jury Rigging IV. |
|
Cargohold Optimization (optional) |
This rig increases the carrying capacity of your ship, but reduces the armor. This will make the research longer and therefore more profitable. Although the only negative is vulnerability to enemies. The basic version of the module requires Astronautics Rigging I, and the Tech 2 version requires Astronautics Rigging IV. |
|
This equipment will increase the maneuverability and speed of your ship, but reduce its armor, that is, you will become faster and more agile, but it will be much easier to shoot you down. The basic version of the module requires Astronautics Rigging I, and the Tech 2 version requires Astronautics Rigging IV. |
|
|
This rig will increase the agility of your ship, but reduce its armor; that is, you will be able to level jumps along the warp, which will increase your survivability, allowing you to quickly escape from danger. The basic version of the module requires Astronautics Rigging I, and the Tech 2 version requires Astronautics Rigging IV. |
|
|
This rig will improve your warp but increase your signature radius; this will greatly increase the speed of your research. The basic version of the module requires Astronautics Rigging I, and the Tech 2 version requires Astronautics Rigging IV. |
|
EVE Online Brick Name |
Description |
|
Salvage Drones (optional) |
They are used to search and rescue wrecked ships. They can also come in handy as an additional source of research income. |
|
Caldari Electronic Warfare Drones; ECM Drones |
These drones specialize in jamming enemy sensors and guidance systems. ECM Drones are a great defense option, as they can bring you a few precious minutes, in which you can warp away from danger. Caldari Electronic Warfare drones are best used as perimeter defenses. Both types of drones require the Electronic Warfare III skill. |
|
Combat Drones (optional) |
These specialize in damaging and destroying enemy ships. Research vessels use them primarily for defensive purposes to compensate for their low firepower. They are less effective as a protective tool than ECM Drones. Combat drones come in three flavors: light, medium, and heavy. |
We have provided you with information about and, but which ones to put, it's up to you. In the next part of our guide, we will talk about the ships that are used for scanning in EVE Online.
Choosing the right exploration ship can be quite difficult for a beginner as it depends a lot on the player's style, experience and level. Therefore, we decided to describe three types of research ships and 9 available models. Of these, you will find the one that best suits your skill and level.
Before going into details, we will provide a brief description of each of the ships. Heron is a great starter exploration ship thanks to its 5 medium slots; Buzzard upgraded it to Tech 2; if you are a complete beginner, then these two should be your starting points. Probe and Cheetah have a more dynamic playstyle and suit more experienced players. Magnate is one of the strongest exploration frigates, but its disadvantage is the small number of medium slots. But you shouldn't worry about this: the "elder brother" of this ship, Anathema, compensates for this lack in its characteristics. The Helios may be a fairly versatile exploration ship, but you can only get to it with the mediocre Imicus. And finally, if you decide to conduct research with aggression, then Astero can offer you everything you need for this: a powerful platform for drones and advanced camouflage technology. Its power will also come in handy in wormhole and nullsec EVE Online.
Exploration Frigates for scan
These ships are purposefully created for space exploration. They have good hacking and scanning bonuses, which means it is suitable for any aspiring explorer. However, the combat power of these ships is painfully ridiculous, so don't even think about engaging in open combat with them. Only drones can increase their survivability, but only on condition that they are correctly selected.
This type:
- Heron
- Magnate
It is the heaviest of all Tech 1 research frigates, but it only has 3 medium module slots and this reduces its research potential. It has one more slots for low power modules, namely 4. To control it requires the Amarr Frigate I skill, and gives the following bonuses:
1. 7.5% bonus to the power of combat and main scanners (a percentage is awarded for each level of the Amarr Frigate skill);
2. Reducing the duration of salvaging by 5% (a percentage is calculated for each level of the Amarr Frigate skill);
3.5% bonus to data analyzer and relics (role bonus).It is the fastest and most agile of all Tech 1 research frigates. Probe is very adept at avoiding trouble, and its 4 medium module slots make it a competitive explorer. The three low slots are best used for modules that give the ability to avoid pursuers. Requires Minmatar Frigate I skill and provides a way to:
1. 7.5% bonus to the power of combat and main scanners (a percentage is awarded for each level of the Minmatar Frigate skill);
2. Reducing the duration of salvaging by 5% (a percentage is calculated for each level of the Minmatar Frigate skill);
3.5% bonus to data analyzer and relics (role bonus). - Imicus
Slowest of all Tech 1 exploration frigates, but also the best in drone control (20Mbit / sec Drone Bandwitch). Therefore, the correct selection of combat drones is essential in order to compensate for Imicuse's poor survivability. Its four middle slots are enough to make it work like a solid exploration ship. Requires Gallente Frigate I skill and provides bonuses:
1. 7.5% bonus to the power of combat and main scanners (a percentage is awarded for each level of Gallente Frigate skill);
2. Reducing the duration of salvaging by 5% (a percentage is calculated for each level of the Gallente Frigate skill);
3.5% bonus to data analyzer and relics (role bonus).
A feature of this ship is as many as five medium slots. This makes it very easy to research. If you're a beginner, choosing this as your first exploration ship will save you the trouble of deciding which mid-power module to install and which to skip. To control Heron requires Caldari Frigate I and provides the following bonuses:
1. 7.5% bonus to the power of combat and main scanners (a percentage is awarded for each level of the Caldari Frigate skill);
2. Reducing the duration of salvaging by 5% (a percentage is charged for each level of the Caldari Frigate skill);
Covert Ops Frigates and Scanning
Essentially, these are Tech 2 upgraded versions of regular research. Their most notable feature is the warp with an active cloaking device. This feature makes them one of the trickiest ships in the game. The ability to stay under enemy radar is often used in PvP wars, where frigates for special operations will be able to get a lot of valuable data to corporations. In addition, they have good bonuses for research and use scanning extremely good, which, combined with advanced masking technologies, makes them a very good choice for scanning in zero-sec and wormhole.
Ships of this type:
- Buzzard
Like Heron, it has its own strengths and weaknesses. Like the Heron, it has 5 medium slots to help set up your ship to navigate dangerous areas in space. Buzzard does not have a Drone Bay. This ship can deploy Covert Ops Cloaking Devices and Covert Cynosural Field Generators, and its cloak reactivation delay has been reduced to 5 seconds. Requires Caldari Frigate V and Covert Ops I to control, and provides the following bonuses:
1. Bonus of 5% to rocket and kinetically light rocket damage (a percentage is calculated for each level of the Caldari Frigate skill);
2. Bonus 5% to the rate of fire from rocket and light rocket launchers (a percentage is awarded for each level of the Caldari Frigate skill); - Anathema
An advanced version of the Magnate, this ship has a good tank for a special operations frigate. Unlike its predecessor, it has 4 middle slots, which gives it much more opportunities to explore. Anathema does not have Drone Bay. This ship can deploy Covert Ops Cloaking Devices and Covert Cynosural Field Generators, and its cloak reactivation delay has been reduced to 5 seconds. Requires Amarr Frigate V and Covert Ops I skills and provides the following bonuses:
1.5% bonus to rocket damage (a percentage is awarded for each level of the Amarr Frigate skill);
2. Reducing the recharge time of the capsitor by 5% (the percentage is calculated for each level of the Amarr Frigate skill);
3. Reducing the requirements for Cloaking Devices by 20% (a percentage is calculated for each level of the Covert Ops skill);
4. Bonus of 10% to the probes of the combat and main scanner (a percentage is awarded for each level of the Covert Ops skill);
5. Reduction of Survey Probes flight time by 10% (a percentage is calculated for each level of the Covert Ops skill);
6. Bonus +10 to the analyzer of data and relics (role bonus). - Cheetah
It is the fastest and most agile special operations frigate, but the low CPU power and not the best capacitor characteristics reduce its versatility. But nevertheless, as with the Probe, it helps to avoid certain troubles. Due to its speed and agility, the Cheetah plays the role of a scout and spy. It also doesn't have a Drone Bay. This ship can also deploy Covert Ops Cloaking Devices and Covert Cynosural Field Generators, and its cloak reactivation delay has been reduced to 5 seconds. The skills to control it are Minmatar Frigate V and Covert Ops I. It also provides the following bonuses:
1.5% bonus to damage from a small projectile (a percentage is awarded for each level of the Minmatar Frigate skill);
2. 10% to the optimal range of Small Projectile Turrets (a percentage is awarded for each level of the Minmatar Frigate skill);
3. Reducing the requirements for Cloaking Devices by 20% (a percentage is calculated for each level of the Covert Ops skill);
4. Bonus of 10% to the probes of the combat and main scanner (a percentage is awarded for each level of the Covert Ops skill);
5. Reduction of Survey Probes flight time by 10% (a percentage is calculated for each level of the Covert Ops skill);
6. Bonus +10 to the analyzer of data and relics (role bonus). - Helios
This is the only Special Ops frigate to have a Drone Bay, but the low drone capacity and the dreaded Drone Bandwitch make this advantage almost useless. It only has two slots for high power modules. This is sufficient for research purposes, but not ideal at all; this is somewhat offset by the 5 medium slots. It can also be equipped with Covert Ops Cloaking Devices and Covert Cynosural Field Generators, and its cloak reactivation delay has been reduced to 5 seconds. To control it, you will need the skills of Gallente Frigate V and Covert Ops I, and, in turn, it will provide the following bonuses:
1.5% bonus to damage from Small Hybrid Turret (percentage is calculated for each level of Gallente Frigate skill);
2. Bonus 10% to thermal damage from Scout Drones (a percentage is calculated for each level of Gallente Frigate skill);
3. Reducing the requirements for Cloaking Devices by 20% (a percentage is calculated for each level of the Covert Ops skill);
4. Bonus of 10% to the probes of the combat and main scanner (a percentage is awarded for each level of the Covert Ops skill);
5. Reduction of Survey Probes flight time by 10% (a percentage is calculated for each level of the Covert Ops skill);
6. Bonus +10 to the analyzer of data and relics (role bonus).
Pirate Frigates - Aggressive Scanning
Unlike other research ships, pirate frigates can not only defend themselves, but also be aggressors. These vessels are designed for long missions and are not required to visit the stations too often.
Ships of this type:
- Astero
This is a one-of-a-kind exploration pirate ship. It outperforms other models in cunning exploration and attack power. It has the largest drone capacity of any research frigate (75m³ and 25 Mbit / s). And even though it's Tech 1, it can be fitted with Covert Ops Cloaking Devices and has a cloak reactivation delay reduced to 15 seconds.
All this made Astero one of the most popular spacecraft for space exploration, despite its high price. To control it, you need the skills Gallente Frigate III and Amarr Frigate III, and it gives the following bonuses:
1.20% bonus to hit points of drones (a percentage is calculated for each level of Gallente Frigate skill);
2. Bonus of 4% to all armor resists (a percentage is awarded for each level of the Amarr Frigate skill);
3. Reducing the requirements for Cloaking Devices by 100% (role bonus);
4. Bonus 37.5% to the power of combat and basic scanners (role bonus);
5. Bonus +10 to the analyzer of data and relics (role bonus).
This was the list of EVE Online space exploration ships. Now that you have all the proper information about the modules, skills and ships that will be needed for scanning, you can move on to describing the scanning process itself and the places where it is most profitable to do it.
So, after we told you about the skills, modules and ships required to explore space in EVE Online, it's time to start directly with the scanning process itself. In this part, we will tell the reader about the places where scanning can take place, as well as about the relics and data you can come across during your travels.
Scanning systems
There are 4 types of systems that are separated by the security level of the area: high security space (high sec), low security space (low sec), zero security space (zero sec), and wormhole space. It is easy to guess that the higher the complexity of the system, the more profitable the scanning will be. We propose to consider each of these systems in more detail.
- High security systems. These systems are popular not only among beginners, but also among those who are afraid to take risks in dangerous parts of space. This means that the already limited resources located in this territory are diminishing even more due to the huge number of competitors in it. If you plan to do more lawsuits, then leaving this system as soon as you have the necessary experience is the right decision.
- Low security systems. Here you can find much more valuable objects with relics and data; the more so as there will be an order of magnitude less competitors for these objects. However, the danger here will be much greater.
- Zero safety systems. There are very valuable places for mining data and relics here, and due to their large number, the risk of being attacked here is not so high. Combined with the fact that many researchers are too afraid to visit null-seki, there is plenty of room to turn around. But on the other hand, a lot of dangers have gathered here in the face of aggressive factions of NPCs and gankers who have extensive experience in killing researchers.
- Wormhole spaces. The value of finds in these systems is comparable to the value in zero-sec. There are even fewer visitors here than zero, so research here will be very lucrative. The risk of being attacked here is very low, but this danger cannot be ruled out, and you need to be well prepared before going to the wormhole. The complexity is further increased by the fact that you do not know how many people are in the same space with you, and even more so you do not know who they are (unless, of course, the players type something in the local chat). Although, in general, these systems are safe and there can be plenty of lawsuits.
Data and Relic Sites
The sites or (i.e. location) of data and relics that you will have to deal with will vary greatly in both complexity and potential profit. In total, there are five types of these date sites:
- Sleeper Sites. They are in Wormhole space. These places are well protected, and it is impossible to hack them without first defeating the defenders. The hostile NPCs that defend this site are valuable on their own, as they lose good loot during defeat. Therefore, even those ships that are not able to hack sites will find work here.
- Sleeper Caches. This is a very complex data site full of dangers and triggers (an unsuccessful hack could explode the container, and the sentry guns present could launch an attack on you). These sites do not appear in wormholes and can be found on normal systems. Sleeper Caches are of three different types: higher (scanning difficulty - level 5), standard (scanning difficulty - level 4), and limited (scanning difficulty - level 4); and may contain blueprints for polarized weapons, skill books, and crafting materials.
- Ghost Sites. These are data objects that are controlled by pirates, and pirates do not like unwanted guests on their territory. After these sites are hacked, a timer starts, during which pirates can overtake you if you are not fast enough. Unsuccessful hacking attempts will cause the container to explode and damage every ship within 10 km. These locations may contain various blueprints of Ascendency Blueprints, "Yurt" and "Wetu" Mobile Depot Blueprints, and "Magpie" Mobile Tractor Unit Blueprints.
- Drone Data Sites. They are available in just a few regions: The Spire, Ethernium Reach, Outer Passage, Kalevala Expanse, Oasa, Malpais, Perrigen Falls, and Cobalt Edge. And these sites contain three containers: 1 in Research and Development Laboratories and two in the High-Security Containment Facility. A second unsuccessful hacking attempt here will result in enemy frigates spawning and no further hacking attempts will be possible until the emerging enemies are destroyed. These sites also contain Racial Drone Components and Blueprints (specific to the race that owns the site).
- Pirate Relic and Data Sites. They can be found in class 2 and 3 wormhole, as well as in all common space systems. At the moment, these are the safest places to hack data and relics, as there are no hostile NPCs or any other defenses here. Each of these sites contains multiple jailbreak containers, emergency stations, abandoned cars, etc. Pirate relic sites contain skill books, blueprints, T1 and T2 salvaging materials; and pirated data sites include skill books, Decryptors, Data Cores, blueprints, and manufacturing materials.
Hacking process
Hacking is an integral part of EVE Online research. The main goal of the hack is to disable the kernel of the container system. A successful hack is made only by passing the mini-game. This game is about maneuvering a computer virus through the container board. At its core, the hacking process resembles a typical Minesweeper, so if you have mastered the classics from Windows, then you should have no problems with hacking in EVE.
Secrets and tips
Now that the basics have been covered, we can leave some helpful hints on how to scan and use for beginners (and not only) researchers. scanning.
- Use hotkeys, as they speed up your actions (although this is a trivial advice, but it is still worth pointing out it, since many players rarely use them).
- Take full advantage of your cloaking device. This is your best defense and you should invest as much as you can in it.
- Try to avoid densely populated systems. Configure the map to display ships that have been destroyed in the last hour; it will help you estimate how many players are in the system with you; if your map shows a lot of destroyed ships, then it would be better to leave here as soon as possible.
- Learn how to use Secure Safe Spot Bookmarks.
- Never try to fight attacking ships, because most likely you will not survive (ships that attack research ships are often well prepared for battle). You should use superior (if, of course, you equipped your ship correctly) speed, agility and ECM Drones.
- Use directional scanning as often as possible when your disguise is inactive and run away at the slightest enemy activity.
And in conclusion of all this, I would like to say that scanning is not only a profitable business, but also just an interesting activity. You may face many difficulties, but if you are calm and attentive, you will be able to avoid danger.
If you need help, you can always find it on the website. We are an online store that sells game, ships and other items for EVE Online. We also sell accounts, services and consultations.
Introduction
There are usually two sides to everything. Our beloved moon also has a visible and invisible side. What you see on a regular EVE map is the bright (explored) side visible to all regular pilots. What is on the back of it and is not visible on the map is a dark ("unexplored") part of EVE.
The unexplored part of the universe is quite similar to the regular EVE universe. It also has its own regions, constellations, star systems, moons, planets, but meanwhile it is significantly different from what you are already used to. "I'm in a hole," "I'm in a wormhole," "I'm in VX," is the usual description of the pilot's location, familiar to our ears and chat.
Wormhole (BX, WH), "Wormhole", "Hole" are just a temporary bridge (gate) between two star systems, and staying in it usually lasts less than a second, staying in BX for a long time (jumping between systems) is a sign of bad the quality of the internet.
In space, VX is seen as an object in the form of a sphere, which refracts light from the stars and emits a special and unique sound. You can contact with wormholes (VX) as with ordinary gates (gates) - go through them.
Wormholes (VX) can connect any solar systems, except for the solar systems of the Jove region (they are not available under the terms of game mechanics), and explored space with unexplored systems (except for class 4 systems).
After VX first appeared in EVE, many loners and groups of players flocked to them. They were brave and at the same time curious players, because they did not have information about what they would face. These were truly fantastic explorations.
Living in unexplored space is a special style of play. Not everyone is capable of adapting to this type of game. Different formations of players live in unexplored space: miners, crabs (carebears), raiders, lonely wanderers and stray crabs from ordinary space.
The beauty of unexplored space is that the number of pilots and the size of the corporation is not practical, it all depends on the ability to control the wormholes. And this means that a fairly small corporation is able to completely clean out the system belonging to a corporation that is part of the largest and most invincible alliance, painting their killboard in shameful bright red, completely killing packs of cars, dreadlocks and capsules that are in fear and horror with complete impunity. fly out of them. Axiom of the unexplored space: "Who controls the hole - he controls everything!"
Of course, some players strive into unexplored space solely for the purpose of stuffing their pockets with suits, but playing in order to stuff their pockets with suits is not the best option, because these people spend real hours of their real life for worthless suits! which are then taken away or destroyed by airborne raiders. In fact, the raiders of unexplored space are not robbing lawsuits, but real days, weeks, months and even years of people's lives.
In any case, if for some reason you have become not interested in life in the familiar explored part of EVE or you are not interested in hidden slavery in exchange for lawsuits, obligatory KTA, betrayal, intrigue, deceit, wars for other people's technoons, stations, climes or endless KTA for killing structures and you are looking for new decent options for killing the most valuable time for everyone in life, then this text was written just for you.
In unexplored space, gaming fun can be obtained on the spot "without leaving the cash register" on your territory and on your own terms, while unexplored systems are the best place for obtaining ISK and free T3 ships. But the most valuable thing is the constant growth of experience, coordination and quality of the corporation's pilots. In any case, you have nothing to lose by getting to know this part of EVE.
The unexplored part of EVE
I will not pull the cat for the "personal belongings". I will start with the facts known to me at the moment, and I will try to present everything as briefly as possible, but at the same time it is fun and interesting, taking into account the amendments voiced in this topic.
The EVE universe consists of 23 imperial regions, 41 low-security regions and 3 closed Jovian regions, all of which you can see on the regular EVE map. All of these 67 regions are already well researched and have jump gates installed and added to the visible EVE map.
In addition to them, there are 30 more regions not shown on the map, in which there are 2498 star systems of dark yet unexplored space, which cannot be entered in the usual way. Personally, I am amazed at so many unexplored systems, and you?

In general, at the moment, the alignment of the number of stellar systems is as follows:
Low seki zeros - 3294
Unexplored Systems - 2498
High seki - 1907
Jovi - 230
In total, there are 7699 available systems. Unknown regions make up 32% of the star systems available to players. The potential hidden in them is not yet sufficiently appreciated by the EVE community, the mythical isolation and inaccessibility of some of these systems are both a minus and a huge plus. I'll tell you a secret - in fact, everything is much better than it seems at first glance.
Many people are very much afraid of exploring unexplored space, believing that this is a one-way road - cloning (this is mainly the result of an unsuccessful first acquaintance due to lack of experience). I think many will be interested to know the statistics of deaths for different types of systems. If we add up all the kills and calculate the percentage for each type of star system, we get the percentage results.

- By NPC deaths (PvE): High: 84%, Zeros: 8%, Low: 7%, Uncharted: 2%
- By PvP Keels: Zeros: 52%, Low: 30%, High: 15%, Uncharted: 3%
The fact is that when calculating the number of PvP kills and deaths from NPCs, their percentage does not exceed 3, and this despite the fact that the number of solar systems is 32% of the available ones.
Taking into account the statistics of deaths, it can be assumed that at least 3% of EVE players are actively active in unexplored systems (they die equally from both NPCs and PvP). With 40,000 people online, 3% of that number will be 1,200. If one player is placed in a separate unexplored system, then they will occupy only 48% of unexplored systems, but usually players are in such systems in groups of at least 3-10 people. As they say - fear has big eyes, but you shouldn't relax either. And it is very possible not to enter these 3% of corpses by reading the guide to the end.
Wormholes (WX)
Now we know that 32% of EVE's solar systems are not accessible to us for direct visits through regular gates, they are not displayed on the map and their population is very low. If you are a person looking for adventure, then of course you already have a logical question - "How to get there?"
For this, the EVE developers have made a very interesting way for you - accidentally (and not always accidentally) created wormholes, wormholes (VX), the gates through which you can enter these systems and exit them, as through ordinary gates.
After the VX is created as an object by the game server, it becomes available for scanning by probes (using the "Probe Launcher") at the place of its birth. Some VHs have a much higher signal than many other anomalies, especially VHs connecting highsec and unexplored space, so such Imperial VHs are available to a not very advanced pilot with ordinary samples. More complete information on the link.
If a novice researcher knows how to drag and drop samples using the held down key " SHIFT"and \ or" ALT", then the cost of his time will be significantly reduced. In addition, taking into account the latest updates, the number of VX in highsecs, it seems to me, has grown sharply, before you had to look for them, and now the excess of VX creates problems. in one highsec system.

For those who have not done this before, but have just started the game, I will give the composition of the minimum set of the researcher:
- Racial frigate with bonuses (Magnate, Heron, Imicus, Probe) - 1 pc. (120 thousand ISK).
- Expanded Probe Launcher I - 1pc. (7.5k ISK)
- Small Gravity Capacitor Upgrade I - 2 pcs. (150 thousand ISK)
- 1MN MicroWarpdrive I - 1 piece (20 thousand ISK)
- * Prototype Cloaking Device I - 1 pc. (900 thousand ISK)
- * Sisters Core Scanner Probe - 6 pcs. (2,400 thousand ISK)
In total, your first ship will cost 4 million ISK with fractional samples and an invisibility module, or 500 thousand in the budget version.
The VX created by the server always has a unique signature number displayed on the scanner, as well as the place and coordinates from where it opened, or the exact place and coordinates where it opened. All these coordinates can be obtained only by scanning or creating a bookmark on the VX signature, and of course you can get its coordinates in the corporate bookmarks that your comrades have made.
It is worth paying attention to the fact that the unique signature number of all created anomalies in the system change after the next daily restart of the server. After reloading and indexing, their numbers become sequential: AAA-100, BAA-100, CAA-100, DAA-100, etc. If you see on the scanner a signature with a number that is clearly different from the sequence, then we can definitely say that this signature appeared after "DT". In the same way, you can quickly find a new or rediscovered VX.

What you should pay attention to when assessing VX, first of all, it is its type. The exit (in the place where it leads) is always designated "K162", this indicates that this VX was born in another solar system and we found only the place of its exit. To find out exactly in which solar system it originated, there is only one correct option, brazenly climb into it and look from the inside. Although of course you can wait near the VX and ask the person who left it where he came from, but I would advise you to refrain from such conversations if you are not a fan of extremely unexpected meetings.

You can also pay attention to the color of BX, the blue color often indicates that BX leads to class 1.2 systems, yellowish to class 3 systems, etc., in general, the BX color corresponds to the color of the solar system on the back side, and taking into account the new beautiful textures of imperial space, you can even on the "K162" ВХ determine exactly which region it leads to, the level of security of the system to which it leads is written in the information about ВХ.
A particularly separate and important moment is the process of birth (creation) of a new VX, this is either a matter of chance or the need for game mechanics to restore the "statics" of an unexplored system.
It does not matter what caused the creation of the object by chance or necessity, but everyone has long noticed that anomalies in EVE tend to accumulate, which means that at the moment of accumulation they do not age, they wait for the moment of their activation from which the countdown of their time will begin life. The same rule applies to wormholes; in order to activate VX as a game object, the server must receive a message from the game client about the start of warp in the grid (scope) of this anomaly. It is from this moment that the anomaly is activated, its life counter turns on, the mass is established, the system is selected where the VX leads and where the connected VX of the "K162" type will be born.
In any case, to start counting the life of any anomaly, it is necessary to activate it, no matter what type of VX anomaly it is, magnetic, radar, gravimetric or combat anomaly.
Suppose you found a VX of type D845, and already from these figures, as a specialist in VX, you determined that this VX lives for 24 hours, it leads to stellar systems with a high level of security (highsec), the total mass that it can pass is 5kkk tons, the maximum ship mask for the passage is 300kk (BSh without AB / MVD weighs about 100kk), etc. Actually, how did you find out? You just use the long-explored plate following the link, because it was previously added to your bookmarks of the EVE browser in-game by you, but there are a lot of other more convenient sites and options. You can also watch the dotted line.
Let's not rush, and we will deal with VX in more detail, since this is the key moment on which everything rests and interacts in the inside of EvE. Any BX is called unstable for the reason that it is not eternal. For the natural death (closure) of the VX, one of two events must occur:
1. The lifetime of the VX, counted from the moment of its creation by the server, has ended.
2. The mass of VX that she could pass through herself has ended.
Immediately it becomes clear to us that we cannot accelerate the passage of time of the activated anomaly, but only observe how our own life and the life of the VX created by the computer inevitably flies into the past.
The residual mass is very subject to us and we can influence it by pushing our ships back and forth, thereby depleting the VX energy. It is thanks to this feature that we have the ability not only to close but also to open (reopen) the VX, the same feature allows us to "press down" or completely close the VX for security purposes.
The developers made us a favor, or rather a gift, adding to the description of the wormhole its remainder in time and mass, but for this they introduced some error in the parameters of the activated VX, which complicates the calculation a little.
As for the mass of VX, then in the information about VX you can read the following:
1. Was not significantly disturbed by passing ships - 100-49% of the mass.
2. Was significantly broken but not in critical condition - 49-10% of the mass.
3. Was significantly disrupted and began to collapse - 10% of the mass or less.

Do not forget that the mass and lifetime of the activated VX may differ from the tabular indicators by both + 10% and -10%, taking this into account, it will go into a state of collapse with different masses and at different times.
As an example, a VX type M267 leading to an unexplored system of class 3, its tabular mass is 1 kkk, taking into account the error in both directions, its delta is 200 kk, this is the mass of two BSh or about 18 BC.
Since you are already experienced pilots and you know that AB or the Ministry of Internal Affairs change the mass of the ship, that is, the ability to change the mass at the time of passage through the VX (by installing 10MW and 100MW "AB" on the BC, you will receive masses of 10k \ 20k \ 60k, respectively).
Suppose we have a "Dominix" with a mass of 146k and 96k without AB, the resulting mass of 146k is more than 10% of the remainder of the mass of the VX that has passed into a critical state, the passage of a ship with such a mass will completely exhaust the remainder and force VX given as an example dissolve. The main thing remains - to learn in practice to calculate the residual mass of VC.
As an example, the calculation of the effect on the residual mass of VH with a mass of 1 kkk during the passage of ships:
- 146 + 146 Dominix round trip (292 tons);
- 146 + 146 Dominix round trip (584 tons);
- 146 - Dominix entered, (730 tons have accumulated, the mass has been significantly violated, Dominix remains for the final closure);
Thus, we have reached the minimum limit of -10% of the error, then by a light ship (BK class), the VX is brought to the critical mass without causing the VX to close. As soon as the mass reaches the critical one, the passage in the opposite direction of the 146 tonnes prepared for closing Dominix will lead to the depletion of the VX mass and its death.
There are many options for exhausting the masses, everyone comes up with the best scheme for himself, the above example shows the mechanics and nothing more.
With the correct calculation of the masses of the ships and the presence of several pilots, it is possible to terminate the life of the VX ahead of schedule within a few minutes, without taking into account the time for scanning it.
The heavier (larger in mass) VX are first pushed up to half, along which the initial full size of the mass is very accurately determined, then VX is pushed in the same way to the critical mass and closed.
There are several reasons for the death of VX, the main one is the reopening of VX into new systems you need, and the second reason is the conclusion to a critical state of statics or the closure of activated VX through which unwanted guests can come to you through its associated "K162" VX (which will be described below).
There is a time left for VX, you just need to remember that after setting the status "Life cycle is coming to an end", the residual life of VX is less than 3 hours and VX is on the verge of death from old age, if you do not plan to stay on the other side, then it is better to refrain from traveling.
If you live in unexplored space, it is recommended after the end of the activity to close all VX located in your system and not activate them with a warp until the next day, this will allow you not to receive guests through statics and will enable you to start the statics life counter the next day at a convenient time for you. ...
Any of the unexplored solar systems can simultaneously have 7 VX, four of which are outgoing, and three incoming "K162" types, judging by the info in EVE WiKi.
Inside unexplored systems, all restrictions are removed, you can use all PvP modules and mass action modules, you will not get aggression on the passage, which means that during the battle near the VX you can fall into it on the structure without waiting for the aggression timer and not it is important where VX leads.
After passing through the VX, a 10 second session change timer is turned on, until the expiration of which you will not be able to go in the opposite direction, this is another reason not to rush to reset the insta clock. If you have gone through one and the same VX in both directions twice in an interval of less than 4 minutes, then until the next attempt, a 4-minute timer is imposed on you until the expiration of which passage into the same VX will be prohibited, so you will not be able to often jump over BX when you are caught from both sides, by this time you need to add two periods of 10 seconds insta clock.
An undoubted plus is the ability of two Bubble announcers to put on a bubble and immediately, without a timer, fall on the other side and put the second one. At the same time, the timer can be used by spreading the enemy directly to ВХ, winning the timer if the enemy retreats back through ВХ.
The size of the VX visually changes with a change in its residual mass, the moment of the change in the residual mass is accompanied by effects (tremor and compression of the VX), with sound of course.
If inside the unexplored system of the 5.6 class, it is the random VX leading to the highsec that opens, then the maximum mass of the ship that she can pass 1kkk (Freighter) is a big plus of logistics.
Capital ships can only enter unexplored systems of class 5.6 through zero security systems, in all other BX classes they can be built without the possibility of removal from the system, and only for the purpose of protecting the home system.
There is some exception with class 4 systems, of which, and in them, random VXs leading to the explored space are never created, Class 4 systems can be accessed exclusively through passage unexplored systems of other classes.
With VX, most of the questions seem to be resolved, and the needy will find the answer if he wants. Now it's time to move on to describing unexplored regions and solar systems located in them.
Uncharted solar systems
The unexplored solar systems are located in 30 regions, the regions are divided according to the levels of difficulty, availability and profitability, respectively.

There are 6 types (classes) of systems from the 1st simplest to the 6th most complex - not subject to a lone researcher.
In any unexplored solar system, there is at least one VX, which, in the event of its closure or death as a result of aging, is immediately reborn in an unactivated state along new coordinates in the same system, while the type of VX remains the same.
This means that you can endlessly close such VX and receive new VX with the same parameters but leading after activation to other star systems in accordance with the type of VX. This feature is inherent in all unexplored systems and ensures the constant availability of all unexplored systems from the outside and among themselves.
Such infinitely reborn VX are called static "Static", the expression: "a two with a statics in a three" means that we are talking about an unexplored system of class 2 in which there is always a VX leading to an unexplored system of the 3rd complexity class, and when it closes or dies from old age, a new one VX will lead to another class 3 system with the same parameters.
Statics maps from research projects can be viewed at the link, Project Atlas, Project Snapshot
In unexplored systems of the 2nd class of such static VH (but of a different type) there can be two at the same time, a kind of bridge between solar systems of different types.
If you settled in a class 1 system with a static access to the "N110" empire, this means that although you live in unexplored space, in any case you will have a VX in a system with a high security level, the VX will simply open in different places of the imperial highsec ... A kind of small zeros - a paradise for booster production, polymer production, periodic mining, etc. All this becomes even more attractive if you keep the BX leading in highsec not activated all the time, in which case you can only get through random BX or other statics, the signatures of which are immediately detected by ordinary probes throughout the system.
In addition to "static" VH, there are also "random" VHs - they are born randomly with a random type, they can lead anywhere and from anywhere. Thanks to such random VC, the inhabitants of all unexplored and studied systems have the opportunity to get directly into any solar system (taking into account the above-described feature of class 4 systems).
This feature in the game mechanics adds more surprises and pleasures, makes it possible to settle into the unexplored system of 5.6 classes directly from the highsec without dragging structures and fuel along the chain of passage systems.
The developers have divided the unexplored solar systems into 6 classes (difficulty levels), distributing them across 30 regions:
R01-R03 - 1 class - 348 systems
R04-R08 - class 2 - 525 systems
R09-R15 - 3 class - 495 systems
R16-R23 - 4 class - 505 systems
R24-R29 - 5 class - 512 systems
R30 - 6 class - 113 systems
Based on some personal observation experience, I will describe some of the unexplored regions in the light in which I saw them (it is worth remembering that there are some exceptions and what has been said is not 100% reliable for all systems).
Unexplored Class 1 Systems
They are very simple, but since they live in themselves and almost never have statics in other VCs, they are sparsely populated, but the absence of statics does not mean that statics from another will not open into this system, or a random VH will not open.
Good gravel mining systems for a small group of people, an excellent choice for industrialists with structures that cannot be installed in systems with a high security level, a lot of cheap gas anomalies, decent planetary resources. In addition, it is almost impossible to kill a large POS in such a system, and it will not be easy to find your VX if you always keep the statics in the empire in an unactivated state.
Region R01 mostly has static at zero and low.
R02, R03 are almost completely connected only with highsecs, they have holes of the "N110" type, into which the maximum of the BK can go.
In systems of the 1st class with one combat anomaly, it was sometimes possible to get 100kk (in one they sawed very quickly). The inhabitants of these systems are often planetary workers, fanatical miners, drug producers and alchemists with lunar materials.
Possible arrivals of mining corporations during the digging of gravels, during which a temporary resin POS is installed under which ships and structures with ore are hidden. Immediately after the arrival, the imperial entrance and all random VXs are closed, after which a very safe destruction of anomalies begins. The watchman with the battalion jams when new signatures appear, he simply warps the "AFK digger fleet" under the POS field.
Since the maximum battlecruiser will climb into class 1, it is impossible for an orc to get into this class (but it can be built on the spot). A miner corporation can stake out several such VXs and roam around them when gravels are repaired in them.
Unexplored Class 2 Systems

Here prospects begin to open up, as they say - "small and large." In fact, these are doors between worlds (2 static VXs at the same time), almost all unexplored systems of the 2nd class serve as a gateway to the world of higher classes from which there is no static access to the explored space. These systems are very promising, and despite their low class, they are an excellent base for all types of beginners' activities. It is very easy to get into these systems from explored space, on the one hand, it is good for logistics, and on the other hand, it is very bad for protecting the system, because your enemy will be able to send hordes of ships to you from the empire nonstop camping your system like a normal gate on the border of a lowsec, after all to access your system, you do not need to fly along the chain of walk-through VX.
R04 - 104 systems with static gates between highsec and class 3 systems, almost universally occupied, sometimes defended systems, with a constant presence of players. A good base for the extraction of polymers, ore, sleepers, anomalies from class 3 systems, which are mastered by pilots with 2-3 months of playing experience, and most importantly on unmanned ships, mainly "Drake". Quick and easy mobilization allows people from the empire (or other systems) to be assembled directly to the site for protection if the attackers allow, a very popular region.
R05 - 102 solar systems of interest to experienced pilots, sometimes abandoned. The main difference from the previous regions is the static output of 505 class 4 systems, which, of course, are slightly richer than class 3 systems, moreover, they are closed for access from the explored part of space directly, and therefore are safer for resource extraction. Simultaneous static VX in highsec makes this region the target of many corporations, maintaining such systems is not an easy task in view of its constant availability from highsec. All the pros and cons of static output to imriya also apply to these systems. Static VH with a mass of 2kkk and a maximum passage mass of 300kk in both directions contribute to this.
In any case, this region is much more convenient than the previous one, because unlike systems of the 3rd class leading only to the explored space in systems of the 4th class of statics there are any unexplored systems. This means that you can choose any class by choosing the appropriate class 4 system (4-1.4-2.4-3.4-4.4-5.4-6). By closing all random VXs and not activating the static exit to the empire, you can get a 2-4 corridor, which is very convenient.
R06 - a passable region of 141 systems between lowsec and class 2 systems, a dubious choice, since with its some wealth it always leads to the above class 2 systems, where you will certainly be glad and gladly sent by express to the clone, not the best choice and in terms of logistics. Usually an empty region, but if the system is busy, then as a rule beginner raiders and just PvP pilots who are looking for their victims in systems of the 2nd class and like to throw the fleet into the low, breed local residents. It is enough to throw a brigade through a static into a low, then at the right moment, unexpectedly for the enemies, help comes from nowhere. These systems sometimes accumulate mountains of anomalies, gas and ore because it is problematic to remove them.
R07 is a gateway region of 50 systems that makes systems of the 5.6 class available, but this luxury comes at the price of a static exit to zero. The region is not very populated, because it is impossible to get rid of guests from the zero space, but you can keep the leading BX unactivated to zero. This region is a good option for the "top" polymer producing groups, since S-320 becomes available from the spot, the polymer of which is much higher in class 5.6 systems, again, it is possible to create a corridor 2-5, which makes the task easier. Random VX periodically gives access to highsec, which allows you to take out polymers and start fuel for the POS. At the same time, going to zeros allows you to fold ganks directly from the VX on the "maddened" enemy in the zeros, this is sooooo interesting! with an empty security channel, the inhabitants of the zeros are very willing to assemble a fleet to capture two conventional ammo, from which they suffer later. In principle, the same forwardings are possible through the VX connecting different systems of zeros.
R08 - An excellent choice for start-up corporations, 128 systems with statics in class 1 systems and empire. No matter how they say - "nanoribons" do not smell, but they fall from frigates and cruisers by 3 pieces, easily accessible anomalies allow you to start the mining process on stream, a lot of unclaimed gas, ladar, radar and magnetic anomalies are always available. It is not a problem to return to the home system after logging out of the 1st class system and fly to the entrance to the home system if the VX fails to close. It is also very pleasant to open a VX into a class 1 system with statics in low or zero, since there are a lot of different polymers that are waiting for you to make new T3 ships out of them. In addition, often you will get access to the R06 region, which is not very suitable for permanent life, but if it opens only to you, then you can safely and relatively calmly clean it without consequences.
The best place for start-up mining gas corporations, it is possible to create corridors 2-1 by closing all unnecessary VX without activating them, which will allow you to quickly clean only C50, C32 gas and the most expensive ore in gravels. At the same time, shoot some sleepers with almost any ship.
Unexplored Class 3 Systems
The most complex systems are directly accessible from the explored space. The main purpose is a place for a hunt with PvP elements. Crabs and killer crabs enter and are found in these systems entering them through the unexplored systems of the 2,4,5 class and the usual explored space. Dangerous systems, something like a dark forest, found a clearing of mushrooms, no one is there, you sit calmly and relaxed cutting the fly-mushrooms, folding them into a cargo tied from twigs. Suddenly someone grabs you and holds you, then something small and nondescript runs up, sending you into an endless jam.
If you have already gone through this, then you understand that it is better to die with dignity - you manage to open your veins, while talking about compensation or the weather, and while the rapists are waiting for the whole team to take you hard at the same time, or every little by little you suddenly die for them. The funniest thing about this is that they have been waiting for you for a long time in this clearing and were disguised, all the fly agarics and their coordinates were in their notebook. They knew that you would come, but you actually were not the first.
In a word, grade 3 is a place where the evil of the unknown cosmos is concentrated, they do not go there one at a time, and even more so this is not the best place for the life of honest and kind people.
But this is a great place that does not have a scorching locale, connecting fat Caribbean living in class 4,5,6 systems with the empire they urgently need, carrying good buns equally actively in both directions.
A good place for solo PvP, you just need to be patient and wait for your victim, and she will definitely come in a "crab" fit, especially if the static is in highsec. Although it is very possible to fly solo on a bomber jacket, kill a "crab" noctix and spoil yourself with all the sweetest while the crabs are rushing about in panic, you can just steal ribbons and blue, you can destroy wrecks with bombs looking at the tears that flow from all the cracks of their ships
A very fun activity is a tidy camp, a tidy fleet will be driven into a system with static in low or highsec, an armored house with a gas digger and points is fitted, all this is put on the gas digging and victims are expected))) This is something like an AFK camp, some of the people may just logos in optimals, everyone is sitting in a voice talking about life.
If you like extreme caribas, PvP, long ambushes for fatty prey, then you are in the right place in these systems. If you are a fan of faction T3 solo crab, then these systems are not the best choice.
At the same time, these are the most profitable systems for solo blitzing Radarok and Magnitok directly through the empire, the profit from which can reach 200-500kk on a good evening.
Usually these systems are populated by very young pilots who are very quickly disappointed in their choice. After all, they did not read this guide and did not know that after they cleaned all the anomalies in their system, they would have to sit on a starvation diet waiting for new ones.
Absolutely all level 3 systems are directly accessible from explored space, R12 - 105 systems from highsec, R09, R10, R11, R13, R15 - 294 systems from lowsec, R14 - 96 systems from zeros.
Unexplored systems of 4,5,6 grades
Unavailable directly from normal space. Class 5 and 6 systems are often accessible from explored space through random high-mass VHs (Freiter). Let me remind you once again that it is impossible to get into Class 4 systems directly from the explored space. Class 4 systems belong to the group of average complexity, systems 5 and 6 class to complex.
Class 4 systems are sparsely populated due to the great complexity of logistics, of which it is very difficult to find a way out into the explored space, this is also the reason for the safety for those living in them. Nobody wants to stay for a couple of days of eviction of the aborigines in a system from which it will be very gemorno to get out, especially if it is a 4-ka with a static in a 4-ku. From a logistics point of view, this is the worst choice, from a security point of view, it is the best option.
The disadvantages of all upper classes (4-6) are difficulties in logistics, but these are trifles compared to the greater security of these systems, it will be very difficult to drag the enemy's main fleet and reinforcements in them, because it can take a lot of time to find a way into ordinary space, they will have to go through many walk-throughs.
Choosing a class 4 system as a home system is a better option than living in a class 2 walk-through system, which is more suitable for academies of VX corporations due to the constant wandering and uncertainty of newcomers.
In systems of class 4, the likelihood of raiders entering your system is significantly reduced, since raiders prefer systems with static in class 5, which makes it possible to quickly drag their fleet and reinforcements through the explored space (including dragging dreadlocks into the attacked system through zeros).
Inhabitants of class 4 systems with static in class 5 can allow cleaning class 5 anomalies without capital dorep and protect themselves from the possibility of dragging through the capital of the raider fleet (it is impossible to sneak capital spikes into class 4).
To protect the class 4 system, you can build your capital a fleet that will really complicate your eviction, but it will not be possible to withdraw it from this system.
The difference between combat plexuses and class 3 systems is the range of appearance of sleepers' waves, it reaches 180 km, for this reason, the optimal ship suitable for these systems is Tengu in a remote relief fit, their number in the fleet is 2-3 pieces.
Class 4 systems (505 systems):
R18 - static class 1
R21, R23 - static class 3
R19,20 - static in grade 4
R22 - static grade 5
R24 - static in grades 5,1,2 (a hodgepodge of constellations)
R16, R17 - static grade 6
Class 5 systems, the best choice for the average strength of corporations and corporations of raiders, in these systems capital of doreps becomes available on the combat plexes of sleepers in which very large isk profits are hidden. The best choice of a system with statics in the 5th class, which gives scope for action both for the extraction of isk and for the extraction of keels. At the same time, there is the possibility of reopening the VX to search for another pass-through system of class 5 with static in any class (for example, 5 with static in class 1).
Choosing a class 5 system with static in class 1,2,3 is a bad decision, in which case it is much safer to move into a class 4 system.
Class 5 systems (512 systems):
R27 - static grade 3
R29 - static grade 4
R25, R28 - static grade 5
R26 - static grade 6
Class 6 systems (113 systems in total):
R30 is static mostly in grade 5 (but there are 1,2,3,4), except for the explored space, again for each constellation individually. Populated densely with real farmers under cover and constant protection of raiders (especially systems with good bonuses). The profit of the renters of these systems amounts to hundreds of millions in a few hours of farming. These systems are protected exclusively by raider alliances, although sometimes there are empty class 6 systems with bad bonuses, but there are also abandoned systems.
Differences between unexplored solar systems
To be honest, I did not know much about this issue, because in the process of my travels, with periodic start from the cloner, many aspects did not concern me.
In order not to blow up all the game mechanics, and so that everyone would not be dumped into unexplored space, because it is cooler and more interesting there, the developers made it impossible to live in them autonomously. All this is due to the fact that it is impossible to obtain isotopes of ice, use cloners, install a claim on the system, set up stations, dig moons (it would be better to add technoons to VX than alchemical formulas, it would be a crazy performance !!! and would make you fight for systems , and not for the capital of dorepa).

The current state of uncharted space provides: the extraction of minerals, planetary resources, all resources for the invention and production of T3 ships and their subsystems, elements for the production of fractional modules in which the skill of ancient races is used, data blocks that are bought by NPC corporations. We can say that ships with pilots and caps fly into VX, only minirals, a planetary ship, sleeper fat, T3 ships with or without eggs
In unknown space, there are no asteroid belts as such, the only thing that can be dug there is gravimetric signatures (gravels). All objects are scanned exclusively by the on-board scanner and samples. Only combat anomalies can be found with the onboard scanner without samples. New VX (including the one you entered through), Ladar, Radar, Magnetic and Gravity can only be found by samples.
The inhabitants of uncharted space are exclusively rabid mutant drones called Sleepers. They fly in places strictly designated for them, in a certain amount and in a certain color. You can see a bunch of them in the museum, following the link.
A description of the available anomalies can be peeped elsewhere, just select the appropriate class.
In principle, it is not difficult to calculate from the above two links how much and what kind of damage you will receive on each anomaly on each respawn and at what distance they will rotate the orbit.
Unlike the researched systems, bonuses and penalties apply to some unexplored solar systems, something similar to penalties when the system is captured by "sansha", only penalties are always compensated by bonuses, for example, a 50% shield booster penalty is compensated by a 50% bonus on remote pumping systems shield.
All this is related to the type of the sun in the system, because unlike the studied systems where the sun is in an active stable phase in unexplored systems, you can see all types ranging from newly born stars to black holes, pulsars, binary stars, etc.
System bonuses do not apply to "Sleeper", the table of bonuses can be viewed at the link
Considering all that has been said, life in unexplored systems is possible in two versions, life on a POS (star base) and life on spots (tabs) in a shred or logged carrier.
I think you already know that there is no "locale" in unexplored systems, if you have gone "invisible" then it is impossible to find out about your presence in any way, but you can unsubscribe to "locale", but of course it is better not to do this. Actually for this reason, you should not be surprised when you are caught by a "scrappy" ship. But you have a chance to notice a ship that has entered the system in the area of the scanner's action by heart-rendingly pressing the podskan button, there is a chance that you will notice it at the moment of transition from inst to cloku to cover to cloku.
I hope now it is clear what is the difference between unexplored space, how to get there and get out. Now is the time to answer the question "what to do there?"
Ore Mining (Gravimetric Signatures)
The life of an ordinary miner in zeros is similar to the life of his fellow miner in unexplored space, exactly the same mining of ore exclusively on gravels (gravimetric anomalies).

The types of gravels can be viewed at the link section Gravimetric.
Judging by the stories of those miners with whom I am familiar - in unexplored space, the main advantages are quite expensive ores and the fact that, unlike zeros, "beavers" will not constantly fly to you as if on duty, waiting in a "shred" when you climb into your gravel and substitute yourself under his torpedoes, in a word, safer.
To find a ship on a gravimetric signature, a stray hunter will have to scan you with samples, which you will immediately see on the scanner. Therefore, being careful, it will be very difficult to catch you. If you close all VX leading to your system and do not activate statics, then your security will increase significantly.
The composition of ores can be found in the description of gravimetric anomalies, the link is given above. After activation (the beginning of the warp), the anomaly will live for 3 days, or until it is all dug up.
It is better to mine ore in the home system, in neighboring unexplored systems it is also possible, but you should pay special attention to the residual mass of the VX through which you carry the ore so as not to be closed from greed in it.
The biggest disadvantage of mining ore in unexplored space is the problem of refining it into minerals. The fact is that in the refiner installed on the POS, the efficiency will be fixed - 75% (regardless of your skills).
There are several ways out of this situation. The easiest way is to move into systems with a static exit to highsec, and therefore export the ore directly to the empire.
The next option, which is suitable for the inhabitants of class 4-6 systems, is to wait for a random VX to zero space, through which you can "drag" the "roorka", and squeeze raw ore on it. Roarka can also be built on site. Compressed ore can also be taken out in different ways, or you can wait for a random VH in highsec and take out the ore with a "Freiter".
But for a start and acquaintance with unexplored space, it is still better to settle in class 1, 2 systems with a static exit to the empire, since there are enough of them.
Gas and Polymer Production (Ladar Signatures)

Gas production - with the birth of unexplored systems, the T3 branch of ships (Tengu, Loki, Proteus, Legion) was born, all these ships can be collected exclusively from resources extracted in unexplored space.
Ladar anomalies contain gas clouds. Polymers are brewed from the produced gas at the POS, after which hybrid components are assembled from polymers and salvag sleepers, from which T3 products are already made.
Blueprints (BPC) for the production of T3 modules are mined from magnetic and radar anomalies, the production process will be described in detail below.
There are 9 types of gas, ranked by profitability (at the moment) from top to bottom based on a production cycle of 40 seconds 5 "Gas Cold Harvester II":
С320 - 2,600,000 isk (Instrumental 6000-C320,500-C540)
С540 - 900,000 isk (Vital has 6000-C540,500-C320)
С50 - 850,000 isk (Barren 3000-C50, 1500-C60)
С32 - 400,000 isk (Vast has 5000-C32,1000-C28)
С72 - 350,000 isk (Ordinary 3000-C72,1500-C84)
С28 - 300,000 isk (Bountiful 5000-C28,1000-C32)
С60 - 90,000 isk (Token 3000-C60,1500-C70)
С84 - 34,000 isk (Sizeable 3000-C84,1500-C50)
С70 - 28,000 isk (Minor 3000-C70,1500-C72)
Current prices can be found at the link. To produce gas in the prefect, you need to spend about 10 days on skills for 5 T2 gas harvesters. Gas anomalies are available from the empire in systems 1, 2, 3 by static VH and 5.6 classes by random VH.
Newcomers living in the 1-3 class system in the evening, if they wish, can accumulate gas for 60-150 kk, in principle, players from the empire can do this. In general, in my opinion, digging gas is a better activity for a beginner EVE player than digging ore.
The peculiarity of the ladar and gravimetric anomalies is that after you scanned them and go to the warp you got a window, a 10-20 minute timer turns on, after which sleepers will arrive, which will interfere a little (C50 was often able to be pumped out completely before their arrival), canceling the warp "CTRL + SPACE" does not cancel the timer, so there is no need to warp to activate an anomaly.
To "Ordinary Perimeter Reservoir" it is not necessary to weld on a scannership, even at 100 km, because you will fall under the turrets and immediately burst, do not repeat my mistakes
Another top anomaly, "Instrumental Core Reservoir", is the most profitable, it contains C540, C320 and is guarded by a BSh with a scrum (won't let you get warped), it is digging from the spot. The peculiarity of digging from the spot is that the sleeper ships start attacking if you approach them at the minimum distance for each of them, while they do not care about the Zephyr-class ship, it is on it that you fly up to the place where gas is available and where the distance to BSh is more than 76 km (the far side of the S-320), but the distance to the gas cloud is no more than 1 km, press "People and places, bookmark", then you can safely warp to the bookmark and pump out gas on a normal ship. (To align the ship and steer it in any direction is two quick clicks in clear space).
With the "Vital Core Reservoir", which also contains these two top gases, but in the opposite proportion is a little more difficult, due to the fact that it is guarded by "Sleepless Keeper" who attack if you are closer than 300 km, then they do not have a scrum, so after they will appear, you can warp, or kill 4 BShs (DPS from each 245-EM, 245-TERM, 30-EXP, 30-KIN).
Usually, Ladars and Gravels are cleaned with normal BC, the main damage is EM + TERM.

How to pump gas? I personally chose BC "Hurricane" for myself, in fit 5 T2 gas harvesters, trial launcher, clocks, 10AB, 4 warp stubs, 3 rigs + cargo expanders, it also acts as a hole compressor. Why warp stubs? because how not cool life is more expensive, why hurik? because it looks worse than "Moa" on the podscan.
And so you became the owner of raw gases, what next? you have two ways, sell and process into polymers. If you decide to process into polymers, then you will need a POS installed in a system with a low level of safety or an unexplored system.
The gas is converted into polymers in the "Polymer Reactor Array" installed on the POS-e. Since the reactor can cook any polymers, the reaction program is loaded into it, according to which it will work, these programs can be bought at NPC stations, the price of one program is 10kk, 9 programs will cost you 90kk.

Each reaction has input elements, these are two types of gas and one type of mineral, at the outlet of the reactor there are polymers.
To assemble a chain on a POS-e, you need to complete all this:
1 - Polymer Reactor Array (varilka) = 12kk
2 - Biochemical Silo (one type of gas in each) = 30kk
1 - Coupling Array (mineral) = 2kk
1 - Hybrid Polymer Silo (warehouse of obtained polymers) = 6kk
One line will cost about 50 million ISK without a POS, then everything is set up, resources are thrown in, the program is put into the reactor, connections are set up, online and cooked.
Usually (except for S-50), 100 units of gas are spent per hour for the reaction, 20-100 units are produced in 40 seconds, 3000 - 5000 units are produced in a ladarka, which is for 50 hours of cooking. If you dug 2 ladars in the evening, then your reactor is provided with work for 30-50 hours (because the reaction requires a pair of gases).

I came to the following type of cooking - I put the minikis and all the resources on the POS in trucks (I have a habit of not putting anything in the corp hangar), then when they accumulate I take out a large "Caldari Control Tower" POS (otherwise the reactors will not fit) and hang on it 3 reactor. Nobody wants to kill such a POS from which nothing will fall, and the main POS remains under full protection, but the fuel consumption per 1 reactor is minimal.
When the reactions are cooked the PIC is removed. Do not forget the golden rule - if you can take something to the empire, take it away, and store everything expensive in the cargo of ships, if your POS is driven into the "reinforcements", then you will not pull anything out of the corp hangar, but the ships can be taken and that's all the valuable will remain in their cargo, which gives a head start for one and a half days (you can also keep the reserve pos in the cargo, and this is another 1.5 days on top). The rest of the T3 assembly process is best done at the imperial POS closer to the trade hub, there is also reverse engineering and assembly.
For those who decided to establish the production of T3 - it is very easy to acquire sleeper fat in the empire, it is not so difficult to invent the BOC yourself, especially since there is an imperial POS.
Since you have polymers, and you bought the sleeper fat in the empire, you can produce hybrid components, there are 11 types of them. BPO for hybrid components can be bought again from the NPC, the price is the same - 10kk per piece.
BPO of hybrid components is not so demanding on skills, T3 blueprints do not apply to production efficiency and skills of production workers, blueprints are waste-free as efficiency, although the production speed improves.
The hybrid components themselves are assembled on the "Component Assembly Array", then the finished T3 products "Subsystem Assembly Array" are assembled at the imperial POS, there is usually a reverse laboratory for obtaining the BPC on the T3 ships and the "Experimental Laboratory" subsystems.
Before starting to gas, when I scan the system, I make a spot next to the VX through which I entered at a distance of about 2-ay. Then I throw gas into space at this spot, periodically renewing the containers (it's unpleasant if everything disappears after 2 hours).
In the process of digging, I constantly observe the podskan, and as soon as I see ships or traffic jams, I turn off the fishing rods, warp to the spot and go to the "shred". For 10-20 minutes I watch what happens at the VX, if sabras, onyxes, etc. appear there. the ships inflating the bubble then I wait for them to leave, in any case it is better to leave this system or rest for an hour or two watching the podskan.
But you will never see the locals, who have all the ladarks in their tabs, and they warp on "clumpy" spikes, it is from such that you are saved by 4 warpstabs in a fit.
Ladarka has a small plus in that sometimes it removes a shred when the ship flies into a gas cloud, and you visually see your death even though it is far away.
How to make a spot (point) in flight, I think you know, before the start of the warp open "People and places, bookmarks, press: Bookmark" write its name but do not press "OK", then go to the warp and when you fly off a bit press "OK" so you have a bookmark in the middle of the path. It is great to have a bookmark above the VX 300 km away, then you will visually see it and those who are next to it, if there is a bubble, it will not be able to do anything and you will have time to leave for the empire. In order to learn how to run well, the best option is to learn to catch, as your mistakes will turn into your experience.
Magnetic and Radar Anomalies

Magnetic and Radar signatures, two types for each class.
Slightly more difficult than normal combat anomalies, they are not found on-board scanner without samples, they have the weakest signal level of the signatures. These are the most lucrative of all combat anomalies and can be performed either entirely or by blitz.
The main purpose is to provide the production of T3 ships with copies of blueprints (BPC), data banks, tools, elements of ancient technologies. When clearing an anomaly, the profit is fully adequate to the passage of 5-10 conventional combat anomalies.
Even in purified systems of the 2nd and 3rd class, one can find unsuccessful magnetic and radar signatures, apparently the players who are not able to master them are completely unaware of the possibility of making a profit without killing sleepers.
After warp to the anomaly, gray containers are visible, which must be opened using the appropriate modules. For radar signatures it is "Codebraker" for magnetic "Alalyzer" and "Salvager"), these containers are guarded by NPC sleepers.
A Talocan wreck of a ship that is guarded by a sleeper can accidentally appear on the prewarp, only from such wrecks you can get a sample of the T3 hull, only samples of subsystems drop out of ordinary containers, if a Talocan wreck appeared on the anomaly during the warp, your ship will be pulled into the center of the anomaly, it does how far did you warp to the plex.
The Talokan wreck respawns randomly when you warp the ship, so if you really need it, the best option will be warp from the spot with a shuttle until it spawns.
To gain access to the containers, it is not necessary to destroy all NPC ships, you can limit yourself to killing NPCs on which the trigger is not tied. After breaking the first container, the anomaly is considered passed, if all players warp off from it, then the anomaly will disappear completely.
On radar signatures using "Codebreaker" you can get datacores, hybrid announcers, hybrid technology tools. From one container you can get 1-10 Datacors, 1-4 Decryptors, 1-2 Tools. Radar signatures contain only technology data and tools.
Magnetometric signatures contain ancient components, from which copies of drawings are invented at reverse laboratories - BPC T3 modules (using, of course, datacores and decryptors previously obtained in radar signatures).
To access the containers there is no need to destroy all the NPC ships, besides, you will probably encounter the ship's "Talocan" wreck, by hacking it with the "Salvager" you can get a sample of the ship's T3 hull and other goodies.
The obtained ancient components can be of different quality, their price depends on this, and of course this is due to the complexity of the anomaly.
Just as in combat anomalies by warp, dorep capital appears in the form of 6 BShs on an anomaly of a carier or a dreadnought. After the down time, the capital dorep from magnetometric and radar anomalies disappears and can be recalled.
There are two types of radar and magnetic anomalies for each class, in one of them EM + TERM damage prevails, in the other EXP + KIN. What is actually seen by the types of NPC ships.
In principle, the number of magnetic and radar anomalies in class 1, 2 systems is large, and if such an anomaly was tucked under the arm, then he did not throw it.
Anomalies of these types can be blitzed, cutting down in the first wave all ships that prevent them from going to warp, or if tanking is impossible. Next, tanking the rest of the respawn, we break open the containers and fly away.
As an example of blitz, let's take the Forgotten Frontier Quarantine Outpost magnetic anomaly, in which the triggers are 3 sleeper cruisers, therefore 6 frigates with nets can be killed quite calmly and cracked containers. The Unsecured Frontier Database radar anomaly has frigates using scramble as triggers - so we kill only cruisers, and after breaking the anomaly, we kill the frigates and sail away. After a while, you can return and grease the wrecks hanging in empty space.
In principle, you already have all the tools in your hands, you just have to learn how to use them.
Blitting magnetic anomalies in class 4 systems brings 80-250kk Isk from the anomaly, it blits for about 10-20 minutes with a regular passive drake. It is very possible to make money on PLEX by blitzing magnets in VX 1-4 class in a day, Drake in a passive tank is very suitable for this. I will not describe the blitz of anomalies, let it be your homework. It's more fun to do it with a fun team
Tech III production

I decided to add this topic to the guide because I got acquainted with the production process of T3 and I can tell you about it in detail. And as it was written above, T3 ships appeared in EVE before I started playing it and for me they have always been, T3 are ships of the dark side of EVE, they are only partly similar to ordinary imperial developments, everyone knows about them that they are good and very expensive.
T3s are collected entirely from resources mined in unexplored systems, minerals, gases and salvag, the only thing that is needed from the investigated part of EVE is datacores of imperial scientific centers, because no matter how like T3 ships, this is a general technology adapted for people.
No matter how crazy it sounds - the cost of materials for the construction of any T3 with any set of subsystems is the same and is in the range of 350-400kk isk. In the ship's T3 hull, 70% are Melted Nanoribbons, 30% gas polymers, the lion's share of which is C320 and C540 gas.
You probably have a question, why is it so cheap? because on the market a ship with subsystems will cost 450-550kk. The answer lies in the fact that a significant part of the cost of a T3 ship is not materials, but copies of blueprints.
Let's start with copies of the blueprints (BPC) on T3 - the blueprints are the result of reverse engineering the remnants of sleepers on the reverse of the laboratory using hybrid tools, a racial decryptor, datacore sleepers and humans.

The reverse laboratory is loaded with a set of:
- A sample of the remains of sleepers of different quality;
- Hybrid instrument;
- Race pill;
- 3 datacores of hybrid components;
- 3 datacores of imperial technology.
Remains of ships and sleepers' subsystems are mined from magnetic anomalies, they can be of different states and quality, the quality of these remains itself determines the number of blueprint batches. Wrecked - 3 wounds, Malfunctioning - 10 wounds, Intact - 20 wounds. Only 5 subsystems and a case.
The race on the ships of which the drawing will be adapted depends on the Race hybrid decryptor "Tablets", there are 4 types of tablets, the most expensive are Caldary tablets in view of the demand for their subsystems and ships.
Pills are mined in the Sleeper Radar Signatures, along with a hybrid instrument and datacores for hybrid components. The missing 3 datacores will have to be purchased on the empire market or earned from RD agents.
As a result of the invention, you will receive a copy of the drawing for the rass selected by the decryptor and a certain type of subsystem determined by the remainder, but the subtype of the subsystem will be random one of four, then how lucky you are.
The better the quality of the original component, the greater the chance of getting a drawing, sometimes the invention process ends at the stage of disassembling the remains, in which case the remaining unnecessary datacores or a tablet will be returned to you.
Success rate formula: success rate = base rate x x
If all skills are 3, then the statistics will be as follows: Wrecked: 32.96% Malfunctioning: 49.44% Intact: 65.92%
If you learn datacore skills at 5 and leave the reverse at 3 will be: Wrecked: 41.2% Malfunctioning: 61.8% Intact: 82.4%
Due to the low probability of obtaining the desired subtype of a subsystem, drawings are a rather rare thing, their cost is also quite high, it is for this reason that some subsystems are 1.5-2 times more expensive than the materials required for their production, here is the link to the Calculator.

And so we have blueprints (BPC), the drawings need hybrid components from which we will assemble T3 ships or subsystems at the POS.
Blueprints for hybrid components can be bought on the market from NPCs, hybrid components are assembled at POS. The production of components does not require learning the skills of production efficiency, in fact, it is not a manufacturer who can produce components. Hybrid components are assembled from salvag sleepers and polymers (digested gases).
Polymers - Gas digested in the POS Reactor under the program purchased from NPC corporations, the cooking process was described above.
The production efficiency skill affects only when building T3 hull, subsystems can be built without it.
In principle, the whole process is quite simple, the main problem is obtaining a base of drawings of T3 components and the need to invest significant funds if the process is to be configured in pipeline mode.
Combat anomalies
The main place of ISK mining, they are also the most dangerous in terms of PvP death. All combat anomalies are scanned without probes, with an ordinary onboard scanner, in fact, this allows you to find a potential victim of a warp in a "cloak" by combat anomalies without throwing out probes, etc., as a result, you will be suddenly caught with a "clean podskan".
In systems of the 1st, 2nd, 3rd class, NPC ships do not have warp engine jamming modules, therefore, if it is tight, you can always retreat to the "spot" in disgrace, in higher classes you will not be given such an opportunity, in fact, you will not be able to escape from intruders you won't be able to do it for a while either.
Combat anomalies are divided by difficulty levels (prefix in the name):
Perimiter - lungs
Fronter - Medium
Core - heavy

On average, on combat anomalies, you will receive even damage of all types, in addition, sleepers are very active in using network stasis, neutriks, vampires, warp engine jammers on all types of ships from frigates to battleships. Actually for this reason it is worth abandoning the use of the "Ministry of Internal Affairs"
The main feature of sleepers is the ability to change goals on the fly, while the focus also changes and they pick up the goals at their optimum. If sleepers fail to push the target, they switch to the next one, including your drones. When there are living frigates of sleepers around and you release drones, then for them it is like a red rag for a bull, at the same time, if you suddenly want to distract the frigates, then throw them a victim, preferably as often as possible.
But the passage of anomalies by drones is possible, after several ships warp into the anomaly, sleepers attack the first target, after a while they switch to the next one, and it is at this moment of switching that they remember the composition of your fleet in the anomaly. After the sleepers have switched to the next ship, you can safely release your drones. But it is worth remembering that after warp or warp the ship to an anomaly, the composition of the fleet changes and your drones in space will be included in the attack list.
There is a very popular bug for class 4 combat anomalies called "Frontier Barracs ..." which hamsters love in two windows on PP Tengu.
Its essence is that if you warp on this anomaly, wait for a salvo of sleepers and warp off, then the anomaly disappears from the scanner and you can only find it by the battalion commander with samples when there are ships on it or by a bookmark made earlier. As a result, it is impossible to scan for anomalies, it is also impossible to catch a fat Tengu factional crab on the usual and most profitable combat anomaly without a commander of traffic jams, it turns out that you can steal combat anomalies purely for yourself without going through them. In general, the petition has already been written, we are waiting for it to be fixed
Yes, yes, I already know that the hamsters are already running around in a panic and crying, "Guys, let's live honestly!"
Let's go back to the anomalies, the actual "respawn" waves of sleepers are tied to the ships' triggers, if you don't shoot the triggers first, then it's not so scary.
I did not participate in capital (dreadlocks, punishments) murder of sleepers, so I will say what I heard.
There is no capital dorep in the ladar and gravimetric anomalies. In combat, magnetic and radar anomalies, after the first capital ship is warped, 6 BSh respawn, after the arrival of the second 8 BSh, the rest of the ships do not cause dorep. Capital reresp occurs only in systems of 5.6 classes and is tied to two types of ships - dreadnoughts and carriers.
In systems of class 5.6, anomalies do not completely disappear, but only the capital of the dorep after each "DT" is killed.
Actually, the extermination of sleepers is a very stupid task, we killed hundreds of thousands of them, but they still appear anew, this has already been verified
Any combat anomaly has the concept of center and range, sleepers will chase you only up to this limit, they will not fly beyond the permitted distance, but will fight against the wall of their maximum range, a sort of sleeper pantomime. This border is called the wall, it is fashionable and safe to hit the sleepers with the dreadlocks from the wall.
As it was written above, sleepers have a distance of aggression, it is clear that if you appear at a distance of 300 km from sleepers, behind their wall and attack range, they will not move towards you, for this you just need to throw a light victim into their zone, which will immediately warp off, after her quick warp, the sleepers re-aggro on the next one and no matter how far away he is.
From killed sleepers, data banks fall, which are bought by NPC corporations at fixed prices, the higher the BX class and the more complex the anomaly, the more data banks sleepers carry with them. The next thing we can get is salvag, but unfortunately it costs a penny except for one thing Melted Nanoribbons, this element is the other half of the profit.
The higher the BX class, the more databanks mean in profit, in BX 1.2 of the class, Melted Nanoribbons have a large part of the profit, in BX of the 3rd class 50/50.
It is necessary to talk about how sleepers actually protect themselves from hunters from the explored space.
Sleeper ships are armed with EM + TERM damage lasers and EPX + KIN double damage missiles. The tracking speed of sleeper guns is different, for snipers it is lower, for orbiting it is higher, for missiles they have a penalty for the explosion radius, which is compensated by the explosion speed bonus. The most important feature is the low signature size of their ships, for frigate 35m, cruiser 150m, BSh 400m.
Now let's recall the size of the signatures of the guns in service with the imperial invaders, the small turret - 40m, the medium - 125m, the large - 400m. It turns out that we can only inflict full damage with cannons at standing targets, while firing from large turrets is advisable only at immovable BSh sleepers, the size of the signature of the frigate of the sleepers is equal to the signature of the spoiler and its speed is also very high. Therefore, the main task in the extermination of sleepers is to inflate their signature and reduce their speed to the minimum. For this reason, a prerequisite for the successful destruction of sleepers is the presence of network stasis and a target paintter, the more their number in the fleet, the more damage the target receives. Two net stasis on the sleeper cruiser doubles the damage of regular heavy missiles.
Heavy drones poorly catch up with BSh sleepers; anything smaller than BShs, heavy drones are not able to catch up. Firing large turrets at very fast and fat signature sleeper is also not very effective.
In high-class anomalies, the main damage comes from the BSh sleepers, low-maneuverable ships and ships with a large signature receive all the damage inflicted by the sleepers. As an example, we can say that to pump out one Drake in a VX 3 class, 4 shield transfers are required, at the same time, to pump out a heavy assult cruiser, 1 shield transfer is enough, which is rarely used.
If you want to live, move and the faster you move and the smaller your signature the longer you will live. This is a general rule for EVE in general, but it is especially absorbed by crabs in VX.
There is another serious problem that you will have to face, these are energy neutralizers. In principle, they do not pose a danger in class 1, 2, 3 systems, but starting with class 3 magnetic and radar anomalies, this problem becomes more and more urgent.
Taking into account all the above-described features, the optimal ship is a rocket ship capable of attacking targets at a great distance without entering the zone of action of BSh sleepers, which has a low signature and high speed. Only one ship is suitable for these requirements, this is T3 Tengu.
In VX 3 classes, for pumping out all ships of the fleet, it is enough to have one Scimitar logistician, for his own repair, one large shield transfer is enough, if there is a logistician, the fleet can include 3rd generation BCs that are successfully pumped out by one logistician and have a target paintter in the fit. Two logisticians aboard Baselisk ships are capable of pumping out the fleet in Class 4 systems and compensating for the loss of energy depleted by sleepers to the entire fleet. In class 4 systems, anomalies can pass 2-3 Tengu in a remote shield transfer fit quite successfully.
Survival in unexplored solar systems
Respect and respect will help everyone who has helped, and will help!
Learning to scan in EVE or search for hidden signals
Scanning in EVE is easy. To begin with, we will find out what skills will help improve the scanning process, then we will consider such issues as: modules and implants for scanning. ships for the scan. The process of scanning itself in eve and what can be found - cosmic signatures.
Foreword
Scanning - in the game eve online there is a system for finding hidden signals ( Cosmic signature).
The same system is used to find ships of other players, but in this guide we will only talk about finding "complexes" of cosmic signatures - hidden signals with all sorts of goodies. How this all happens and what can be found will be written below, first about what is in the game that affects scanning by "traffic jams".
1.SKills - Skills.
Eve -Character Information -> Skills -> Scientific Knowledge.
2. Fit - equipment for scanning.
First, about the Probe Launcher "traffic jams" - modules that launch "traffic jams" into space.
Market -> ship equipment -> scanning equipment -. launchers of scanning probes.
Core Probe Launcher I is a launcher for Core Scanner Probes used to detect and scan space signatures in space.
Increases the power of scanning probes by 0%.
Note: Only one Probe Launcher can be placed on a ship.
T2 option.
Core Probe Launcher II - Increases the power of scanning probes by 5%.
Fractional option.
Sisters Core Probe Launcher - Increases the power of scanning probes by 10%.
Note: Can only release Core Scanner Probe
 Scanning probes. Scan Probes.
Market -> ammunition and charges -> probes -> scanning probes.
Core Scanner Probe I is a probe used in EVE to find (and obtain precise coordinates) for hidden signal sources. The basic power of the scanning probe (sensor) is 40 units.
Probes of this type are launched using Probe Launcher Scan Probe Launchers Fractional option.
Sisters Core Scanner Probe - + 10% to the strength of the scan of the cork compared to the usual one. The basic power of the scanning probe (sensor) is 44 units.
Note allowed scan radii: 0.25au-0.5au-1au-2au-4au ... 32au
Scanning enhancement modules in eve.
Market -> ship equipment -> scanning equipment -. upgrade packages for sist. scan.
| Scan Acquisition Array I | -10% - reduces scanning time when using scanning probes. |
| Scan Acquisition Array II | -20% - reduces scanning time when using scanning probes. |
| Scan Pinpointing Array I | -10% - Reduces deviation when scanning with scanning probes. |
| Scan Pinpointing Array II | -20% - Reduces deviation when scanning with scanning probes. |
| Scan Rangefinding Array I | + 5% - increases the scanning power using scanning probes. |
| Scan Rangefinding Array II | + 10% - increases the scanning power using scanning probes. |
Note: A maximum of one Scan Acquisition Array can be installed When using multiple Scan Pinpointing Array or Scan Rangefinding Array modules, the performance of each additional module is reduced. Modules are installed in the middle (med) slots of the ship.
Rigs - Riga.
Market -> modifications of ships -> tuning modules - tuning modules electronics.
| Medium Gravity Capacitor Upgrade I | + 10% - increases the power of scanning probes. |
| Medium Gravity Capacitor Upgrade II | + 15% - increases the power of scanning probes. |
Calibration T1 - 200, T2 - 300.
Implants that improve scanning performance.
Market -> implants and combat stimulants -> implants -> skill implants -> imilants scientific knowledge.
Connector 6.
Implants that reduce the maximum deflection during scanning.
- Poteque "Prospector" Astrometric Pinpointing AP-602 - maximum deviation during scanning -2%
- Poteque "Prospector" Astrometric Pinpointing AP-606 - Max Scan Deviation -6%
- Poteque "Prospector" Astrometric Pinpointing AP-610 - Maximum Scanning Deviation -10%
Connector 7.
Implants that reduce the operating time of scanning probes.
- Poteque "Prospector" Astrometric Acquisition AQ-702 - decrease in operating time of scanning probes by 2%.
- Poteque "Prospector" Astrometric Acquisition AQ-706 - reducing the operating time of scanning probes -6%.
- Poteque "Prospector" Astrometric Acquisition AQ-710 - reducing the operating time of scanning probes -10%.
Connector 8.
Implants that increase the power of scanning probes.
- Poteque "Prospector" Astrometric Rangefinding AR-802 - Increase the power of scanning probes + 2%.
- Poteque "Prospector" Astrometric Rangefinding AR-806 - Increase the power of scanning probes + 6%.
- Poteque "Prospector" Astrometric Rangefinding AR-810- Increase the power of scanning probes + 10%.
Set of implants for scanning.
Low-Grade Virtue Set (6 implants) - Full set gives + 33.83% to the strength of the traffic jam.
- Low-grade Virtue Alpha - slot 1
- Low-grade Virtue Beta - slot 2
- Low-grade Virtue Gamma - slot 3
- Low-grade Virtue Delta - slot 4
- Low-grade Virtue Epsilon - slot 5
- Low-grade Virtue Omega - slot 6
Ships with scan bonuses.
Market -> ships -> frigates -> Standard frigates (T1).
Note: For ships, the characteristics are given that are responsible for scanning and affecting the analyzer modules. For other data on the ships listed below, see directly in the game
Magnate
For each level of Amarr Frigate skill mastered:
Profile features of the project:
Heron
For each level of Caldari Frigate skill mastered:
Increase in scanning power of probes - by 7.5%
Reducing the duration of the working cycle of the dismantling module - by 5%
Imicus
For each level of Gallente Frigate skill mastered:
Increase in scanning power of probes - by 7.5%
Reducing the duration of the working cycle of the dismantling module - by 5%
Increased Virus Power for Relics and Data Analyzers - 10
Probe
For each level of the Minmatar Frigate skill mastered:
Increase in scanning power of probes - by 7.5%
Reducing the duration of the working cycle of the dismantling module - by 5%
Profile features of the project:
Increased Virus Power for Relics and Data Analyzers - 10
Market -> ships -> frigates -> advanced frigate -> special ships (T2).

Covert Ops Bonus:
Increase in the power of scanning probes - 10% for each mastered skill level
Reducing the flight time of probes - 10% for each mastered skill level
Strategic cruisers (T3).
They have the ability to install a subsystem with bonuses for scanning.
- Legion Electronics - Emergent Locus Analyzer
- Tengu Electronics - Emergent Locus Analyzer
- Proteus Electronics - Emergent Locus Analyzer
- Loki Electronics - Emergent Locus Analyzer
Subsystem Skill Bonus:
10% increase in probe scanning power per skill level.
Analyzer virus strength 10.
Special edition ships.
Frigate Sarum Magnate - For each level of Amarr Frigate skill mastered:
Increase in scanning power of probes - by 7.5%
BC Gnosis - role bonus: increased scanning power of probes by 37.5%
4. Learning to scan.
Well, let's say you fit a ship for yourself, put a cork thrower and stock up with a couple of dozen corks. Of course, it is desirable that it was rigged Covert Ops and a spell with skills at least "C", so you can probably scan almost any complex. Only 10/10 complexes are in doubt (about the types later) and other complex complexes on the scan in 0.0 systems. Deeper pumping and more stuffing of claims into the ship and fit makes scanning much easier, do not skimp, it's worth it.
Now about the process itself, I will show not the fastest, but the most accurate option of actions, with experience you yourself will learn how to scan faster, now the main thing is to understand the principle. I will go through all possible outcomes in order to weed out a lot of questions.
 We flew into the system at the same time the sensory overlay (introduced in the Odyssey) is triggered and we see in space all the signatures - locations. Green diamond indicates anomalies - 100% detection. With a red diamond, the locations that need to be scanned are signatures. If you open Probe scaner, then on its tab we will see a list of anomalies and space signatures.
So, at first, your built-in scanner gives you information about all the anomalies, as well as rough options for the location of the signatures, which can be seen in the scan results window immediately after jumping into the new system. This allows us to get a visual idea of the sites in the system, as well as see them in the form of scanning results with probes. When you open the system map at the same time as the scanner window is open, then even without the probes released, you will instantly see anomalies in the form of green results with the possibility of warp, and signatures in the form of red spheres showing their approximate location. In addition, the icons on the touch overlay will change according to your results. The better the signal, the more information there will be.
Press the scanner button (Alt-D), in the window that appears, select the Probe scaner tab and switch to the solar system map mode by pressing the button on the left or the button in the scanner window - map or simply by pressing F10. Switching between maps of the solar system and the galaxy is carried out by the Toggle Map button in the map control window of the World Map Control Panel.
We start the cork by clicking on the projectile and look at the appeared cube with arrows and a sphere ...
Control.
- All probes are launched from the launcher immediately, no matter how many are currently charged. The maximum number of probes in space for a player is eight. Any player can use eight probes, so the Astrometric skill no longer limits their number.
- Odyssey has two predefined probe positioning methods - spaced (probes cover a large area) and targeted (probes are focused on an object). These methods are not intended to be the only and best, but they are intended to provide a solid foundation for budding researchers.
- The probes will be next to your ship immediately after launch, but on the solar system map they will be displayed with the sun in the center and will not be shown at their current position until you press the scan button and the probes move to the position you specified.
- The default probe movement method affects all probes at once. By holding down the Shift key, you can work with a separate probe. By holding Alt, you can move the probes closer to each other.
- The probes also change the scanning radius at the same time; holding down Shift will change the scanning radius of one probe. Changing the scan radius will re-center the probes.
- To control the solar system map during scanning: hold LMB and drag - rotate the camera. Hold RMB and drag - move the camera. Scroll - zoom.
- Return and expiration of probes - return is instant and automatically occurs when docking or jumping into another system. The probes still have a life timer, but when it ends, instead of dying, the probes automatically return. The system now remembers the last used position of the probes upon automatic return, so it is very easy to return them to their original place by activating the launcher.
- Scanner window - buttons for setting positioning methods. These buttons will only work if you have eight probes launched, fewer are not supported.
In the solar system map: RMB - context menu.
Hold LMB and pull - camera rotation.
Hold RMB and pull - move the camera.
Scroll - zoom.
There are 7 buttons in the scanner window:

1.Analyze - start scanning with probes.
2.Recover Active Probes - return active probes to the ship,
after 1 second they will be in your hold and can be used again.
3.Recconect to Lost Probes - regain control of the probes
4.Destroy Active Probes - destroy active probes
5. Spaced positioning.
6. Positioning centered.
7.Map
Also in the scan window on the left under the buttons, there is a white square - RMB and you can create a special filter (the essence is similar to the settings of the overview filter) of signals, so that only those signal groups that are interesting to you are shown in the results. For core plugs, this is just an opportunity to filter out Cosmic Anomaly and Cosmic Signature. And for Combat, this is a vital option, because without a filter, they throw all the garbage into the results at ships, drones, structures, creating a gigantic list. So we create and customize filters to taste.
Let's move the plug so that all objects in the system fall within its radius of action. the plexes are not further than 4au from the planets or the sun. When an object enters the traffic jam zone, it is highlighted. The plug is pulled by the arrows or the edges of the cube. By pulling the arrows, we move all the plugs at the same time.
Click the Analyze button in the scanner window. In this case, we have silenced several signals. The traffic jam ALWAYS detects all signals. If your result is a void in the list of signals, then there is nothing in this system, you can fly further.
If you click on the signal in the scanner window (or select several with the key pressed), then now we will see a red sphere in the zone of which the signal is supposedly located.
The essence of scanning is in the symmetrical arrangement of the probes, in centering the middle of the figure formed by the spheres on the signature and in the subsequent decrease in the radius of the spheres - until 100% of the signal is received.
In the Odyssey, the following became possible. When scanning with 8 plugs, you can launch the probes and leave their position relative to each other unchanged, using the positioning buttons and changing only the radius.
An example of scanning for 4 plugs is given below (similarly for a different quantity.) This example is for informational purposes only for understanding the principles of scanning. Everyone should choose the scanning method for himself.
|
| 1. Take signal 714 |

| 2. We throw out the 4th plugs, arrange them symmetrically - we bring them to the red sphere to overlap the boundaries of the sphere |
 
| Instead of a sphere, there can be a circle or one, two points-actions are similar |
| Analysis | |

| 3. Press the analysis |
| 4. The sphere has turned into a point, move the plugs to the point and decrease the radius from 4a.u. up to 2a.e .: | |

| 5. For all movements, do not forget the "height" offset: |

| 6.Analysis: |
 
| 7. Decrease the radius and move. 8.Analysis, etc. with decreasing radius until we get 100% |
 100% green icon on the map - we can warp
Note: The screenshots were made before the Odyssey, so they are slightly different from what you will see in the game. But the basic principle of scanning is the same.
Depending on the power of the scanning plugs (skills, rigs, ship bonuses), you can start scanning both from 32a.u. and from a smaller diameter.
Sometimes, having scanned with one stopper, you can get a 100% signal, and many people at this moment start to stupor due to the fact that the signal is 100%, and warp is not possible. Answer: one sample is not enough.
Scanning with one plug and a small radius, you can stably get a high%, with a high% signal you can see what type of signal is here and even its name. It is not necessary to fully scan the signal to find out what is there.
Cosmic signatures eve.
Signal groups
Cosmic Singatura. These include:
Wormhole - wormholes (wormholes)
Peculiar "gates" leading to unknown solar systems not marked on the map. They have restrictions on the permeable mass and life time. Information about wormholes and the systems they lead to can be found here.
Combat - registered (area with increased danger)
All kinds of combat complexes with a bunch of NPCs and delicious clothes at the end of the expedition.
Expeditions are a chain of combat complexes in different systems, you only need to scan the starting plex, then all information about the next plexes will (or not, as luck would have it) displayed in your journal acc. tab. As a rule, in the first expeditionary complex, you need to blow up some structure to give the coordinates of the trail. complex.
This also includes "numbered" plexuses such as 1/10, 2/10, 3/10, 4/10, 6/10, 8/10, 9/10. These plexes are randomly generated in the systems and need to be scanned. The number indicates both the complexity and the size of the ship.
1/10 Frigates
2/10 Frigates, Destroyers
3/10 Cruisers, Frigates, Destroyers
4/10 Battlecruisers, Cruisers, Frigates, Destroyers
5 + / 10 Battleships, Battlecruisers, Cruisers, Strategic cruiser, Frigates, Destroyers
The general meaning of all Combat Plexes is to shoot at red crosses.
Gas sites (gas production area.)
Gas complexes. Having flown in, you find yourself in the middle of a heap of clouds that can be collected with a special "vacuum cleaner"
Gas Cloud Harvester I.
Boosters are made from clouds in the known space (see the market in the game). While collecting gas, they can damage the ship, not much, the cruiser can handle it.
In Wormhole systems, Ladar Plexes contain the gases needed to build T3 ships.
Relic sites (data mining district)
These are archaeological complexes in which there are special containers that are opened by the Relic Analyzer module. In containers, salvag, sometimes books (skills), sometimes bpts for t2 rigs and if memory does not change bpts for fractional structures for pos.
Relic Analyzer efficiency rigs will help you in these plexes: Emission Scope Sharpener IEmission Scope Sharpener II
and implants
- -5% Decrease the operating time of dismantling, hacking and archeology modules by 5%. (Connector 10)
- Poteque "Prospector" Archeology AC-905+ 5% Chance of Successful Relic Analyzer (Slot 9)
Data sites (rn data mining)
Hacking complexes with containers opened by the Data Analyzer module. In containers Decryptor "s, Datacore" s, bpts for various Data Interface "s, special materials for building date interfaces. In the known space, Data sites are a source of materials for Invention. ...
In the Wormhole-space Data sites, the source of materials for Reverse Engineering, i.e. production of t3 ships.
Rigi for hacking
Memetic Algorithm Bank I
Memetic Algorithm Bank II
Implants
- Poteque "Prospector" Environmental Analysis EY-1005-5% Reducing the time of dismantling, hacking and archeology modules. (Connector 10)
- Poteque "Prospector" Hacking HC-905+ 5% Data Analyze Success Rate (Slot 9)
- More information on how to open accounts with Relic Analyzer and Data Analyze modules can be found here.
- ore mining
- combat anomalies - the destruction of the NPC, something interesting may fall out.

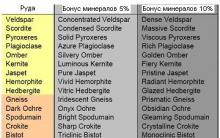
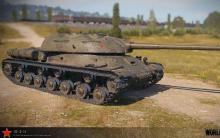

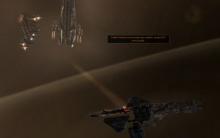


Mouse for pillbox 2. Guide for setting up a mouse. The best mice for MOBA games
ESET NOD32 Parental Control Application Test: How Parental Controls Works
Summary: Calendar of significant and memorable dates
Playing cards tattoo
Interesting logic When the network can draw water