In this article we will talk about the best armor in The witcher 3: Wild Hunt. Witch’s armor surpasses the rest that we encounter during the game in almost all respects, especially additional ones. As soon as we get the first set of the witcher, for example from the Griffin school, we stop paying attention to other armor, and very in vain. The two strongest sets for attack and defense, partly consists of the so-called "second-rate" armor.
Now let's look at the most interesting sets in appearance that you will meet at certain stages passing the Witcher 3: Wild Hunt.
The very first set that we meet in game world - Temer armor. You can find him at the merchant in the White Garden, whom we saved from the Griffin. The only limitation is price and level. The best property is that it light armor. In general, he does not give any additional bonuses, except resistance. Seth is worth attention, but only because of its appearance. If you come to the merchant at level 50, then the level of his goods will be already 29.
The second set of armor we meet immediately after " White Garden"in the castle in Vronitsy by the quartermaster, who stands near the entrance to the house of the Blood Baron. Nilfgaard Armor as bad as the Temer. This is a medium type of armor, and medium armor without reinforcing marks is useless. For me, it looks much worse than the first.

The third and final set, which we can buy from the merchants in the game, we meet on the Skelle Islands at the forge in Caer Troll. Undwick Heavy Armor just like the previous ones, they have no additional characteristics besides resistance. However, for heavy armor it is these parameters that are important and the fact that you can just buy them and not look for recipes deserve attention.

Addition " Stone hearts"gave us four types new armor. The Witcher Set of the Snake School, which is very similar to the base armor from Kaer Morhen. Traditional Ophir clothes: caftans, kuntushi. Robber Set and Burning Rose Set. None of these armors can be bought ready-made. For everyone, you need to find recipes, and then make them.
To receive you need to ophir armorneed to talk with the merchant. Visit a couple of places, kill a bunch of fanatics from the Order of the Burning Rose, and only then make copies. They look very unusual, especially after the heavy Skelligins.

Embroidered Kuntush - you can get it at a wedding or in the house of the wife of Olgerd, in terms of parameters it is slightly inferior to the Ophir armor, but it looks amazing.

Find a recipe armor of the Knights of the Burning Rose It’s not easy enough, for example, killing bandits and simultaneously checking all the chests. The armor, of course, is heavy and has nothing except resistance bonuses. Unfortunately, this is not a complete set: sword, cuirass and gloves.

All this fades compared to armor - New moon(relic). We are given it during the quest "Robbery". Medium-type armor has two rare bonuses: increased chance and critical damage power. If you make the witcher a fencer, then this set becomes the main goal. It is this armor that I consider the best in the game Witcher 3: Wild Hunt.

In addition, Blood and Wine CD Project Red did not do very well. They took one type of armor and simply began to improve its parameters, depending on the required level. For example, armor of the Bokler Guardsman(item master)

bokler Guard Armor - (magic item)

armor of the Bokler Guardsman - (relic)

Having slightly changed the previous option, increasing the required level and all parameters, we get boxer Guard Armor(magic item). As you progress through the Blood and Wine add-on, you can collect all the necessary details for this reservation.

armor of the Boxer Guard (master item)

boxer Guard Armor (Relic)

Again, increasing all the characteristics and the minimum required level, we already get armored Officer(relic)

armored Officer(magic item)

armored Officer(item master)

Again, boost parameters and small space changes give us (relic)

armor of the Bockler Guard Captain (item master)

armor of the Bockler Guard Captain (magic item)

It is extremely difficult to assemble, and in its characteristics it is comparable to grandmaster sets. All these armors must be made, and in order to collect all the recipes for this armor, you will have to check absolutely all the chests. On the other hand, it’s not necessary to look for all this, because we have four alternatives with appearancelike knightly armor.

tussent Knight Tournament Armor(magic item)

tussent Knight Tournament Armor(relic)

For example, armor of the knight Geralt of Riviathat we are given while participating in the tournament. It has rather weak characteristics, so this is not the best option.

Armor from Tesham Mutna, or as it is also called, the shell of Tesmach Mutna is an excellent armor with a unique ability to absorb HP. It's easy to find them, just be careful during the assignment with Regis in the castle of the same name.

With the following options, it’s already more difficult, because both of you will not be able to get both. If you go into the world of a thousand fairy tales, then you can find Tussent armor. But if you go to the cave to Srytoy, you can get armor from hyde hydt.


Personally, I don’t like this armor.
A gray-haired (or milky-haired) man in full bloom according to the plot of all computer and literary works does a lot of things: he kills monsters of different breeds, masters women, makes money and complains of persistent sclerosis (naturally: gray hair!).
In principle, lovers of fantasy creations and this is enough. The series of games “The Witcher” turned out to be just amazing. The first game was remembered thanks to the most non-linear at the time of the release of the world. The second project shocked the public with magnificent facial animation and system requirements. And the third part has become popular due to the vast open areas that an ordinary gamer, paying attention, especially to the plot, is almost impossible to grab.
In general, the last project had a lot of things in total. This applies to the armor and combat attributes of the protagonist. In an amazing spire The Witcher 3 weapons and armor scattered around the world (their indicators, of course, are different), and it’s quite difficult to find the best option.
And no one will fall between the cubes, and a good sword will kill any creature!
Having barely completed training and several initial missions, the player is free to poison himself to where his veins lead. Accordingly, at the very beginning of the journey you can find a relatively good gear. To begin with, if there is a desire to seriously engage in creating the best version of uniforms, you need to deal with what generally exists in the virtual world.The best equipment associated with several existing in the vast expanses witcher schools. There are five of them. But getting to suitable armor and weapons is initially not easy. The first version of the military clothing of Geralt is obtained directly in the fortress. The armor is very weak and is not suitable for a skirmish with serious enemies. You have to sweat before you get something really worthwhile.
To create and modify armor and weapons, you should get the right blueprints, find an experienced gunsmith, and then do the creation of the necessary things. For example, or can only be found after certain quests have been completed.
It is thanks to the tasks that it is easiest to find weapons and armor in The Witcher 3. Of course, due to chance and a thorough study of the area, you can also find the treasured equipment. But the territories are so enormous that combing the area in squares is a stupid idea.
It should be borne in mind that the drawings thereof can be of different levels. There are four in total:
- basic;
- improved;
- excellent;
- excellent.
The gunsmith virtuoso will create the desired armor according to the available drawings. Also, sometimes such masters need help finding some randomly lost item. Such quests are recommended to be performed without fail, otherwise it will not work to create something amazing.
There is one wonderful set of armor that does not belong to any of the schools. His name is Witch Hunter Armor Set. You can get the task with which you can take possession of it, from the master in Vronitsy. It will be called the “Master Gunsmith.” The quest will present as a reward new functions for the gunsmith, as well as the set of armor itself. The characteristics of the apparel are amazing. The clothes are perfect for high-level players. However, no matter what the character is wearing, first of all, it is advisable to rely on your own, and not on indicators of armor that mitigate damage.
It’s also wise to search for good swords right after the start. So, a Garval steel sword (108-132 damage) rests at the bottom of an unnamed river. If we speak not so generalized, then you need to comb the area at the bandit camp "Devil's Pit." In addition to the basic damage, he sets fire to enemies.
Also relevant among the players "Moon Blade". It is located in a flooded boat west of the bridge (which is north), if you look at the world map. In it you can put as many as three magic runes for enchantment.
And of the new contenders for the best sword - this is algerd von Evereck’s weapon from the supplement. If in last quest If you decide to stand up for Algerd and pass the tests of Mr. Mirror, then as a reward Olgerd will give you his sword, which builds strength during the battle and starts to glow beautifully.
Summary
Of course, every cool weapon in the game is impossible to describe. Moreover, for a certain type of enemy, some kind of sword is suitable, which, although it has good damage indicators, is absolutely not effective against other enemies.Armor and weapons in the game The Witcher 3 not even tens, but hundreds. Although, if you are able to dodge enemy attacks and select the ideal time to conduct your own strike, then all this does not play a special role.
Since the level of enemies in the supplement "Blood and Wine" turned out to be considerable, equipment is also needed, which will make it possible to effectively deal with them. However, you should not immediately rush into your chest and carefully sort through all your previously found things there, since in the Tussent region you will find completely new equipment - the equipment of the Grand Master, or the Grandmaster. In this guide you will find out not only where you can find all the Grandmaster equipment, but also find out where the Grandmaster Smith is located!
Where to find the blacksmith-grandmaster?
The blacksmith can be found in the shop of the city "Bokler", near the sign that points towards the Nilfgaard embassy. You just need to go a little east, after which soon you will certainly notice the badge of armor and sword on it. As soon as you find, you can safely talk to the shopkeeper who will tell the witcher that he dreams of becoming a grandmaster. So you will receive the task: "Master, master, master, master!".
If during the dialogue with the blacksmith we started talking about the missing witchers, then he will tell Geralt about the treasure hunt, during which it will be possible to obtain the armor of the grandmaster. The same goes for the new equipment of the Manticore School.
After that, you will have to complete the task of finding treasures and return back to the blacksmith. This will create the ability to create grandmaster equipment, which includes armor and weapons. The price will not be too high and in general five types of grandmaster equipment will be presented. All are described below.
Where and how to find all parts of the Bear School’s Grandmaster Armor
Grandmaster Silver Sword School Bears, Grandmaster Schools Bib Bears, Grandmaster Schools Bracers Bears
Above is a screenshot, and here will be a description. Focusing on the screenshot and description, you will certainly find parts of the Bear School equipment. So, in the marked place are the ruins of a red building - search this building from the back side. There will be a large pile of stones near the canopy - use the Aard Sign on these stones. After the stones are knocked down, a passage to the cave will open. The cave will be small, so when you find it, you can find all three drawings of this set of armor.

Grandmaster Steel Sword School Bears, Grandmaster Bear School Pants, Grandmaster Bear School Boots
In the screenshot above, you need to find the cave. Inside the cave, it turns out that the cave has more than one tunnel. Nobody bothers you to explore the cave along and across, or immediately move to the above place. In any case, the last three drawings will be found.
Where and how to find all parts of the Wolf School Grandmaster Armor

Grandmaster Wolf School Chestpiece, Grandmaster Wolf School Boots, Grandmaster Wolf School Pants
This is the last possible improvement of the Wolf School armor set, which is easy to find, and with a guide - even easier. The fact is that absolutely the entire set of armor is in the same ruins, but which will have to be searched completely and thoroughly. Before starting the search for six parts of the new armor, near the entrance to the ruins (which are indicated in the screenshot above), look for a purple ruby. What for? This ruby \u200b\u200bwill be needed in order to remove the barrier of the same color. To find the ruby, activate the witcher's flair. Use your witcher instinct to find a cracked wall and break it with the Aard Sign. As soon as the witcher enters the ruins through the cave, turn left. In the first room there will be a chest on the floor, where you will find the above-mentioned first three parts of the kit Grandmaster Armor "School of the Wolf."
Grandmaster Bracers of the Wolf School, Grandmaster Steel Sword of the Wolf School, Grandmaster Pants of the Wolf School
After you have taken the first three parts of the mentioned new Wolf School armor set, turn around and return to the room from where you came here. It is necessary from that place to move forward up to a slightly damaged collapse. In the same place the corpse will also lie, having searched which it will be possible to find the last three parts of the Grandmaster's armor of the Wolf School.
Where and how to find all parts of the Cat School Grandmaster Armor

Grandmaster Cat School Chestpiece
Actually, searching for the Cat School’s Grandmaster equipment is a bit more difficult, because parts of this armor are scattered across the map. Anyway. You can find the first part of the kit in the screenshot above. This place will not be the usual ruins, or caves - this is a manor. You can get inside from the right side, after having previously climbed the boards through the wall. Inside, most likely there will be a couple of enemies, but nothing complicated. Go inside the house, whose front door will be painted white. Inside, activate the witch's flair and examine the picture, which depicts a bearded man in an elegant hat. Behind the picture there will be a cache, and in the cache the long-awaited drawing. We go further.

Grandmaster Cat School Pants, Grandmaster Boots Cat School
These drawings are in ruins in a swamp, which are located near the estate (see screenshot above). Upon arrival, climb the stairs and look around - you need to find a blazing bonfire from logs. Near these flaming logs (which resemble a signal fire) there is a chest inside which lies the two aforementioned drawings.

Cat School Grandmaster Bracers, Cat School Grandmaster Silver Sword, Cat School Grandmaster Steel Sword
The screenshot above again shows where these three drawings of the new Cat School armor are located. As you already understood, these three drawings are located near the estate, where a bib drawing was previously found. Upon arrival, find the cave at the indicated location. The cave will not be so big. Inside, activate the wolf’s instinct, because you need to find something like a bag in one of the cave’s small blinds (mushrooms will still grow nearby). Inside the bag will be the last three drawings.
Where and how to find all parts of the Griffin School’s Grandmaster Armor

Griffin School Grandmaster Steel Sword, Griffin School Grandmaster Boots, Griffin School Grandmaster Bracers
The first three drawings can be found in the eastern part of Tussent, in the fort, which was destroyed almost to the very base. It’s better to go to the fort via the central road, because if you go, for example, to the fort from the west, you have to face the Boss. All three schemes are in the chest, which in turn is under the stairs. The staircase and, of course, will not look like a staircase, so be guided by the stone steps that lead up - if you feel more comfortable. In any case, there is a witch's flair, so be careful.

Griffin School Grandmaster Silver Sword, Griffin School Grandmaster Bib, Griffin School Grandmaster Pants
The last three drawings can be found in the castle next door (north-western part from the previous place). Now be careful: it’s better to enter the castle from the main entrance. Having entered inside, you have to turn left in any case - at this moment you need to clearly go forward, up to the wall. The wall is actually an illusion, dispelling which you can find a secret corridor leading down. Below you will need to find a mini-room with a table and a variety of jars, because there will be a crystal that needs to be taken. Immediately after this, go to the center, where on the map there is a passage forward, but the door is not open. There is a lever on the side, so you can find it by activating the witch's flair. When the secret door (wall) opens, go ahead. Search the chest, activate the portal using the Aard Sign and the previously found crystal. Thanks to the portal, you will find yourself on the other side, where you have to defeat the Golem. And right after this monster it will be possible to go further, where all kinds of furniture will be located. Now carefully examine everything here, because the last three drawings are in this place!
Where and how to find all parts of the Grandmaster Armor of the Manticore School

Grandmaster Steel Manticore School Sword
On the skin above the ruins are marked where you can find the first item from the Manticore School set. The first thing in this quest is the steel sword. In these ruins there is one dilapidated tower, from which wooden beams will protrude and on which you can see an iron mesh reminiscent of broken doors in the old days. So, you can get to the top of this ruined tower exclusively through the walls. Climb a wall and just go inside. When you are in the tower, activate the witcher's flair and look at the walls, because one of the stones of this wall is a cache. Inside the cache, you can find a drawing of the sword.

Grandmaster Manticore School Armor
The next place is the ruins, which in appearance can seem like a cave. In any case, look at the screenshot above and go to this place. Upon arrival, you need to find a way inside a small hill. Inside, just move to the very end, up to a dead end. When you find yourself in a round hall, inspect the walls - on one of the walls hang various kinds of pieces of paper. One of these pieces of paper will be the armor drawing of the School of Manticore.

Manticore School Grandmaster Pants, Manticore School Grandmaster Boots
The next place noted above is the ruins resembling an ancient library. There will be guards at the entrance, but they will not bother you. The path inside will be completely linear, the only thing worth knowing: you need to break the wall with a crack using the Aard Sign, and inside you have to fight with the shadow. Otherwise, everything is simple: at the very end of this place, carefully inspect each box. Soon, therefore, you will find two more drawings.

Grandmaster Manticore School Silver Sword
This drawing is a little more difficult to find. To begin with, you should know that you will have to conduct searches in the next cave. You can get inside the cave only from the side of the river. Inside the cave will be huge. In any case, first go forward along the linear path, but when you are at the fork, go left. Now you need to move forward to the extent that you do not come across a blockage, which can be destroyed only with the help of the Aard Sign. Immediately after this, go inside to the very end and near the stranger you can find the drawing of the silver sword of the School of Manticore.

Grandmaster Bracers of the Manticore School
The most easily mined item from a full set of armor. Go to the place indicated in the screenshot above and jump from the pier into the water. Swim to the very center of this small lake and dive. At the very bottom, activate the witcher's instinct and, in this way, you can find the last drawing.
The game has only three set schools of witches. School of Griffin, Cat and Bear. There is also a Snake school, but this school has no armor, only swords. You can activate the task of finding armor and weapons of a particular school by accident or on purpose. If you want on purpose, then gunsmiths sell notes about these schools. Read them and go to the place. But if you want to save valuable money and still find sets, then read this guide.
The spoilers will contain maps of those places where the drawings of a particular set are located.
The Witcher 3. Guide to finding equipment witch schools and blacksmith craftsmen
 The Witcher 3. Guide to finding equipment witch schools and blacksmith craftsmen
In Velen will be the grave of the witcher from the school of the griffin. Jump to his grave. There will be many ghosts and poisonous areas. Blast them with the help of Igni and quickly run to the end of the hall without paying attention to ghosts. Remove the blockage with the help of Aard and fight with Ekimma.
Search all the chests. As a result, you will get drawings of armor, pants, boots and gloves of the Griffin school. Read the diary and get the following tips. If you have the eye of Nechlema (get the story), then you can dispel the illusion of a boulder and get out of here.
Now you need to search the baronet castle and the ruins of the fortress at a lonely rock.
The Witcher 3. Guide to finding equipment witch schools and blacksmith craftsmen
 The Witcher 3. Guide to finding equipment witch schools and blacksmith craftsmen
Near the fortress there will be a raised bridge. So we go to the cliff and slowly go down to the water. There will immediately be a place of power. Use it and again go into the water, dive and you will find a cave in which you can swim to the castle. There will be many drowners in the water, so use a crossbow to deal with them. Climb the stairs and climb the fortress. There will be many chests with drawings and other utilities inside, so examine everything very carefully. The chest with the drawing of the silver sword we need will be next to the bridge. Climb the stairs and take everything from there. Lower the bridge and get out of here.
The Witcher 3. Guide to finding equipment witch schools and blacksmith craftsmen
 The Witcher 3. Guide to finding equipment witch schools and blacksmith craftsmen
The Witcher 3. Guide to finding equipment witch schools and blacksmith craftsmen
 The Witcher 3. Guide to finding equipment witch schools and blacksmith craftsmen
We go to the castle of the baronet. The castle will have endriages and harpies. There will also be a harpy nest here. Strip the castle and destroy the nest. After that, inspect every nook and cranny so as not to lose anything of value. Go through the door and there you will find the skeleton of George and the last drawing of the Griffin school, namely the drawing of a steel sword.
The Witcher 3. Guide to finding equipment witch schools and blacksmith craftsmen
 The Witcher 3. Guide to finding equipment witch schools and blacksmith craftsmen
The Witcher 3. Guide to finding equipment witch schools and blacksmith craftsmen
 The Witcher 3. Guide to finding equipment witch schools and blacksmith craftsmen
You can buy part of the tip from the blacksmith in Vronnitsy and go explore the Temple Island (see on the map). To do this, download to Novigrad. Jump to the end of the mark and you will understand that you need to look for the cave. Get down from the horse and go down the stairs, and then jump off the cliff and along the path you will reach the cave. In the cave, use the Eye of Nechlema to dispel the illusion. There will be a golem inside. Kill him and move on. The central door will be closed.
Go to the left aisle and you will find yourself in a room with a riddle. You need to arrange the statues so that they look at each other (in the center). If you do everything right, a passage with water will open. Now go to the right passage, destroy the screen with the help of Aard and go on. At the end of the aisle, kill the ghost and take the Golem Score from there.
Now go to the left passage and jump into the water. There will be three drowned, kill them with a crossbow. Go to the very bottom where you will find the skeleton with the key to the laboratory. Return to the door, open it and fight with the distraught witcher. From his corpse, you take the drawings of the armor, pants, boots and gloves of the Cat School. Read his diary for further tips.
The Witcher 3. Guide to finding equipment witch schools and blacksmith craftsmen
 The Witcher 3. Guide to finding equipment witch schools and blacksmith craftsmen
Now we need to search the skeleton of the destroyed Flying Deer ship. Get on the nearest tiller and sail to the ship. Get on the ship and go into the hold. There will be a chest with a crossbow drawing and sorcerer's notes. Read them.
The Witcher 3. Guide to finding equipment witch schools and blacksmith craftsmen
 The Witcher 3. Guide to finding equipment witch schools and blacksmith craftsmen
Now we need to visit the ruins of Est Tayyara. Your road to the ruins will pass through Oksenfurt. There will be no enemies in the ruins. Aard smash the screen and take the drawing of the silver sword and the next notes from the skeleton. Read them.
The Witcher 3. Guide to finding equipment witch schools and blacksmith craftsmen
 The Witcher 3. Guide to finding equipment witch schools and blacksmith craftsmen
The last point will be Drahim Castle. Break the door in place with the help of or Aard and go inside. Use the stairs to get to the lowest level of the castle. There will be a chest with drawings of a steel sword and regular notes.
The Witcher 3. Guide to finding equipment witch schools and blacksmith craftsmen
 The Witcher 3. Guide to finding equipment witch schools and blacksmith craftsmen
The Witcher 3. Guide to finding equipment witch schools and blacksmith craftsmen
 The Witcher 3. Guide to finding equipment witch schools and blacksmith craftsmen
A tip on this quest can be bought from a gunsmith in Ochsenfurt. You will have to look for this set on Skellig. First of all, we need to search the ruins of the castle of the Tirschach clan. The passage to the fort will be blocked, but it does not matter. Climb the rocks nearby and jump from the other side. You will be near the entrance to the fort. In the fort you will find yourself in front of the bars. Go left and go down to the prisons. There kill the ghost and pull the lever, and then kill the ghosts that appeared. The return route will no longer return. Search the cameras. One of them will be empty. Jump there, kill the ghosts and go upstairs. As a result, you will find yourself in the throne room. Take notes and drawings of the armor, trousers, boots and gloves of the Bear School from there. Remember to read the poem. Kill ghosts, pull the lever and get out of here. From the work, we immediately get two tips: the cave of sirens and the fortress of Etnir.
The Witcher 3. Guide to finding equipment witch schools and blacksmith craftsmen
 The Witcher 3. Guide to finding equipment witch schools and blacksmith craftsmen
We are moving to the ruins of the fortress of Etnir. Near the fortress there will be gargoyles and an elemental of ice. The sign of Igni acts well on the elemental, and you should already know the tactics with the gargoyles by this time. After the reprisals against the monsters, go into the open passage and take the drawings of the silver sword along with letters. From the letter we learn about another location of the drawing: the ruins of the inn.
The Witcher 3. Guide to finding equipment witch schools and blacksmith craftsmen
 The Witcher 3. Guide to finding equipment witch schools and blacksmith craftsmen
There will be sirens and ghosts on the spot of the burnt inn. Kill them and go to the entrance to the inn. Break the chips with the help of Aard and go inside, examine the tavern. Inside will be notes and a drawing of a steel sword.
The Witcher 3. Guide to finding equipment witch schools and blacksmith craftsmen
 The Witcher 3. Guide to finding equipment witch schools and blacksmith craftsmen
The last point will be a cave of sirens (the far left end of the map). It is very far to go there. It is better to board a boat, and then, using a quick transition, moor to the village near the cave, and get there by horse. There will be a lot of drowned people in the cave. Go almost to the end of the cave and go into the left tunnel. Climb the ledges and you will come across a skeleton which will have a note and a drawing of a crossbow.
The Witcher 3. Guide to finding equipment witch schools and blacksmith craftsmen
 The Witcher 3. Guide to finding equipment witch schools and blacksmith craftsmen
In order for you to make all these set armor and their improved versions, which you collected on this guide or yourself, you need a master - armor. Go to the castle of Vronitsa in Velen (the castle of the baron) and talk with the blacksmith about the masterful manufacture. He and his partner will tell you that he needs tools of excellent quality. We need to sail on Skelig, or rather on a separate island called Undvik (on the left side of the map, in the center). Again, it’s a long time to sail, so take a boat and, using a quick trip, land at the pier, and use the horse to get to the goal. Once in place, go into the house, and then go to the right cave. Because the left cave leads on a different task. Inside there will be a level 26 rock troll. Hit him with hard blows on the back and do not forget to use the sign of Igney. Pick up tools from the chest and right from this place you can make a quick trip to Velen.
The Witcher 3. Guide to finding equipment witch schools and blacksmith craftsmen
 The Witcher 3. Guide to finding equipment witch schools and blacksmith craftsmen
Jonna will tell the whole truth. In fact, she is the master blacksmith, not Fergus. She will decide to prove that she is the best blacksmith and will forge the best armor for you. But for this you need acid, and just then an archigryphon appeared nearby. Once in place, follow the trail with a flair. You will find yourself on a hill, where you will fight with a monster. Hit him with quick punches and dodge. Sometimes you can give in to the heat with the Igni sign and don't forget to protect yourself with the Quen sign. Remove the acid gland from his corpse and jump to John. As a result, the general will come and arrange a check of this armor. Agree to help John and dress him. Stand and wait. They will shoot at you from a crossbow, but the bolt will simply fly off, but the second test subject was not so lucky as you. Witcher 3. A guide to finding equipment for witch schools and blacksmith craftsmen
For you to make all these swords and crossbows that you collected on this guide or yourself, you will need a master swordsman. Go to Novigrad and speak with a blacksmith near the port. He will give a tip to the master - swordsman, who has already retired and sculpts dumplings. Visit his workshop and talk to him. The elf will talk about his problems and ask to go to a meeting with the Pauper King to discuss supplies. He alone is afraid, and with the witcher it is somehow easier on the soul. As a reward, he promises to forge a good sword and further assist in the creation of objects.
Come to the pier at midnight and speak with Hattori. After that follow him. He will bring to the man of the king nicknamed Tin. He will offer 50% of the income, say that it is a lot. Then he will offer 35%. Say it a lot anyway. Then he will turn around and leave and you will have time for a decision. Say "No, no, no." He will turn around and agree.
It’s time to celebrate, but no. The people of Tesak will attack you. Fight off them and run after the bandit. He will open the door. Break the barrels and move on. You will find yourself in the port and everything will be quiet. Talk to the bandit and confirm the terms of the deal. As you spoke, Hattori got scared and ran away. Run after him to his shop. Knock on the door and talk to him. He refuses to do anything without security and asks to go talk to Sucrus, his former bodyguard, to whom he did not pay the bonus. We go to the square and see how he beats the merchant, after which he will throw himself at us. Crumple his sides. After the fight, he will call you a tavern for conversation. Offer him a job, and he will ask for a service. You can either take the money from his son-in-law, the merchant, or you can smuggle all the goods. Go to the port and convince the merchant to give money to Sucrus with the help of the Aksy sign. Now you can return to him and tell the good news, and after that return to Hattori and make him happy.
To start making swords, he will ask to steal the raw materials from Ernest van Hoorn. Approach Sucrus and tell about this task. He will say that we come at midnight to the Golden Sturgeon tavern. He will tell us what to do. Go to the guard and meet there a merchant (if you have enchanted him), who will complain about you. You can also enchant a guard or send greetings from Yarpen Zigrin and give him 200 coins. After that, go inside and use your instincts to find the necessary boxes and mark them with chalk so that the guys of Sucrus can carry them away.
The Witcher 3. Guide to finding equipment witch schools and blacksmith craftsmen
 The Witcher 3. Guide to finding equipment witch schools and blacksmith craftsmen
Go out into the air and you will see Ernest there together with the merchant who has already tapped you. But before the fight, he will recover and you will be able to defeat Ernest’s detachment with him, Sucrus and his guys, and then completely forget about him. Go to Hattori and talk about the reward. He will say that we go after the sword in a couple of days. The blacksmith will give you the “Sword of the Scraps” and thank you for your help. Now he can make master weapons and everything else.
The Witcher 3. Guide to finding equipment witch schools and blacksmith craftsmen
 The Witcher 3. Guide to finding equipment witch schools and blacksmith craftsmen
Detailed guide with pictures about where to find and collect all the available equipment items of different schools in The Witcher 3: wild Hunt. Good luck
Where to find the Cat School gear in The Witcher 3?
Cat School Outfit:
- Feline Steel Sword
- Feline Silver Sword
- Feline crossbow
- Cat Armor
- Cat Bracers
- Cat Pants
- Feline Boots
You can start this quest right after the main quest: Nilfgaard Links, which is in the First Act. However, it is recommended to start after completing the quest Wandering in the Dark, as it will open access to the cave, without which you will not go far. In addition, when completing the quest of Baron, he could give you a letter guaranteeing full access to Novigrad. Where and how to start collecting Cat School gear:
In the East - Silver Sword

Move east from Novigrad. Having reached the ruins, go to the center of the temple and follow down the stairs leading underground. Use Aard to make your way through the passage to the right, and here you will find the first element of the Cat School Equipment - a piece of silver sword.
Reward: Notes of the Professor, through the silver sword
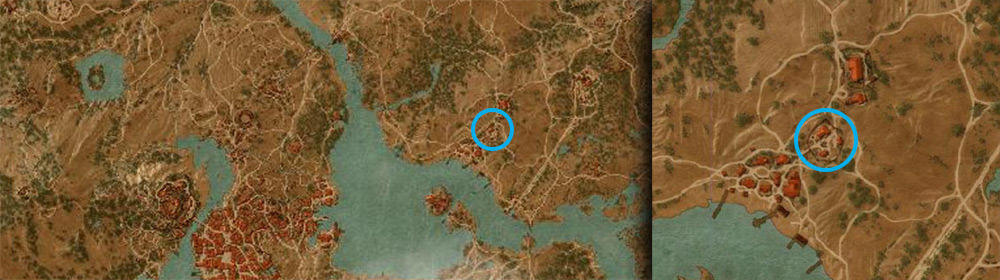
Castle - Steel Sword

After reading Professor’s notes, you will learn a new goal - Drahim Castle. The castle is located west of your current location and south of Novigrad. Look at the map.
Once in place, use the Aard to smash the door and use the stairs down.
In the corner of the basement you will find the second element of the Cat School - through the steel sword.
Award: Magazine, drawing of the Steel Sword
Shipwreck - Crossbow

Get off the horse on the west coast of Velen and swim to the signpost. Climb aboard the ship and get to the part immersed in water, where you will find another drawing - the Cat's Crossbow. There are also one more notes that will show the way to the last part.
Rewards: Notes, Cat Crossbow
Novigrad - Armor (+ improvement of the entire set of all levels)

Inside you will find a Golem guarding the zone. This is an opponent of level 16, be prepared for a serious battle, especially if you play at a high level of difficulty. If your level is not high enough to defeat a golem, try to kill it using the kven sign, as it protects you from taking damage from a single blow.
We return along the aisle and go left. We follow the passage until we reach several statues in the shape of a circle. Using the switches, we turn all the statues to the center. We jump into the water. Sail to the bottom to pick up the key to the laboratory. Go back to the cave with the Golem. Use the key and open the last part.
Reward: drawings of all elements of the armor.
Griffin School Equipment:
- Griffin Steel Sword
- Griffin Silver Sword
- Griffin Armor
- Griffin Pants
- Gryphon's Boots
- Gryphon's Bracers

How to start the quest to collect the Griffin school set:
Hindhold - small ruins in the northern part of Velen.

The easiest way to get from the tree is with the hanged. Further north through the wooded area.
Upon reaching the place, explore the ruins. Go through the ruins to the upper level, where there will be harpies. This will launch the Treasure Hunt for the Griffin School set.
Reward: Letter, Recognition, Thursday Sword and Crossbow.
Lornruck

Jump into the water, near the place of power there will be a grotto swim there, then climb up
Here you get a drawing of the Griffin for the Silver Sword.
Award: Craft Notes, Silver Sword Drawing, and Magazine
Dragon Hunter's Grotto (+ upgrade to the entire set of all levels)

The final installment of Treasure Hunt is the Dragon Hunter's Grotto. Here you will receive a lot of rewards and collect the entire set of Griffin armor.
We go into the cave. Dealing with perfume. Move to the end of the first tunnel and after to the left. Then you will see a crack in the wall - break it with the Aard sign. Go inside.
Climb to the upper level of the cave zone and use your instinct to open the loot.
All levels of armor lie in the chest
Bear School Outfit:
- Bear Steel Sword
- Bear Silver Sword
- Bear Crossbow
- Bear Armor
- Bear Boot
- Bear Bracers
- Bear Pants

Beginning of Bear Equipment Hunt
Ruin

To start the search you need to go to the southern part of the main Skellige island and explore the ruins. Hidden among the ruins, is the first drawing - the Bear Steel Sword.
Reward: Arrest warrant, Notes, Drawing of the sword.
Fort

Fort Etnir is located on the same island as the ruins, but to the north.
Go through the door on the right side of the building and take the drawing of the Bear Silver Sword.
Reward: Arrest warrant, Letter, sword drawing.
Northwest island

Get to the island, and then move to its southern part. Here you will find a cave by the sea, right in the middle of the southern coastline. Find a small tunnel in the cave. we jump through the crevice. We find on the floor, among the remains, another drawing for crafting.
Reward: Letter, Drawing of the Bear Crossbow
Harbor (+ improvement of the entire set of all levels)

Get to the village on the northeast island of Skellig. Climb the path to the Fort.
Inside the fort, turn left and down the stairs to the very end. Turn the lever on the wall to open the doors and gain access to the passage.
Among the prison cells, find the entrance to the narrow passage, it is not difficult to notice. Move along it to the end, where it is divided. The left passage leads to a dead end. Right into the loot room.
In the room you are waiting for drawings of a full set of armor of the Bear School.
Reward: drawings of the entire set
The equipment of the snake school is only swords. Without armor and without improvements. There are only basic ones.
But this does not mean that these swords are bad. They are great for levels 1-10. But then they will not be useful to you, because then more tenacious monsters will come, and people too.
Silver sword

The first drawing, along with the letter, you will find inside the crypt on the body of Kolgrim. Before that, you need to kill the ghost (level 7), but this is not a problem, just lure it into a magic trap using the sign of Irden and inflict damage on the target. Where to find the second item will be indicated in the note.


Steel sword

The drawing of the second sword is in the ruined castle in the White Garden. This castle is a deserter camp, so get better (if your level is less than 5). Then go into the ruins and take drawings from the chest. By the way, do not forget to take an interrogation. It sheds light on the history of the witcher from the school of the Snake.


Brain mill for kids questions
Who made the ancient maps?
Five endings of "hide and seek"
The Copper Riot: The Causes of the Copper Riot
Copper riot 1662 reasons results consequences move